The second option for storage accounting has also been developed, which involves the use of office store rooms. The main difference is that automatic material disposal can only occur in the office where patients are admitted. This storage method is suitable for larger clinics with multiple offices, each assigned a separate inventory custodian.
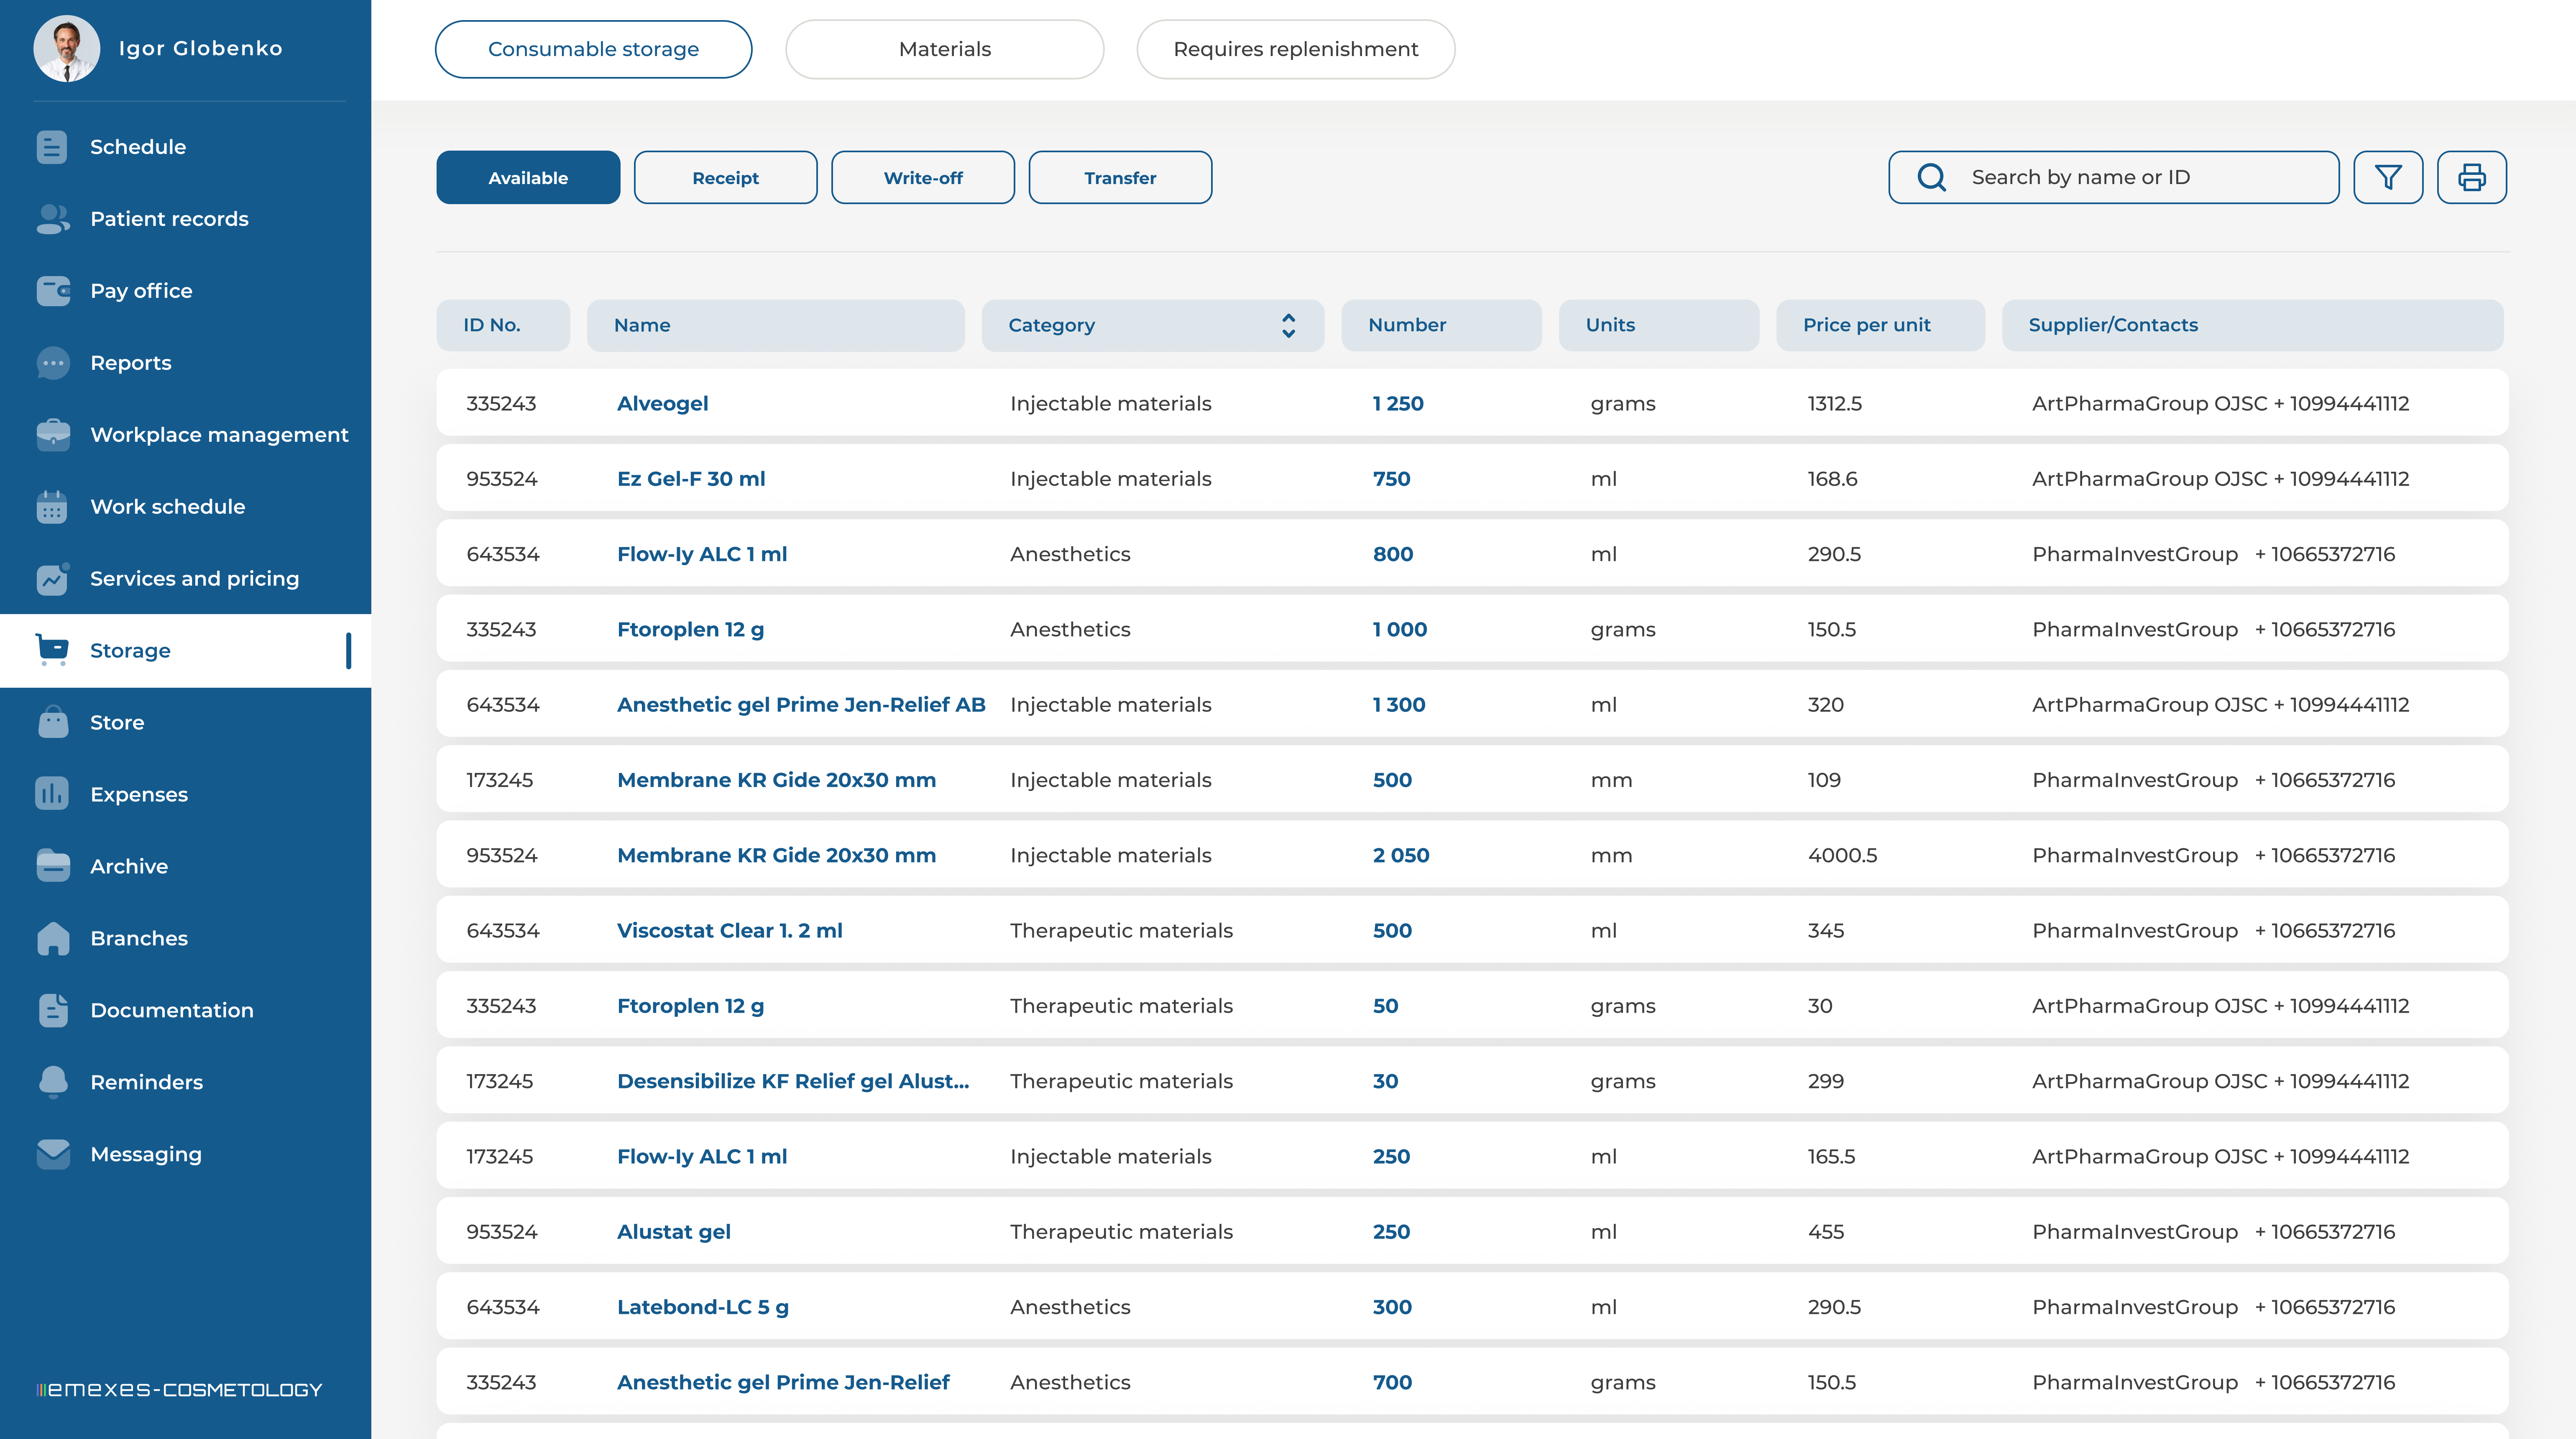
The store rooms are organized as follows: initially, all medicines and materials used by the clinic should be added to the "Materials" section, categorized by name and ID number. When adding each new material to a category, you must also specify the measurement units and the minimum quantity. The minimum quantity indicates how much of an item should remain in stock for it to appear in the "Running Out" section, making it easier to quickly reorder products from the supplier.
The system provides two types of storage: "Main Storage" and secondary "Office Store Rooms."
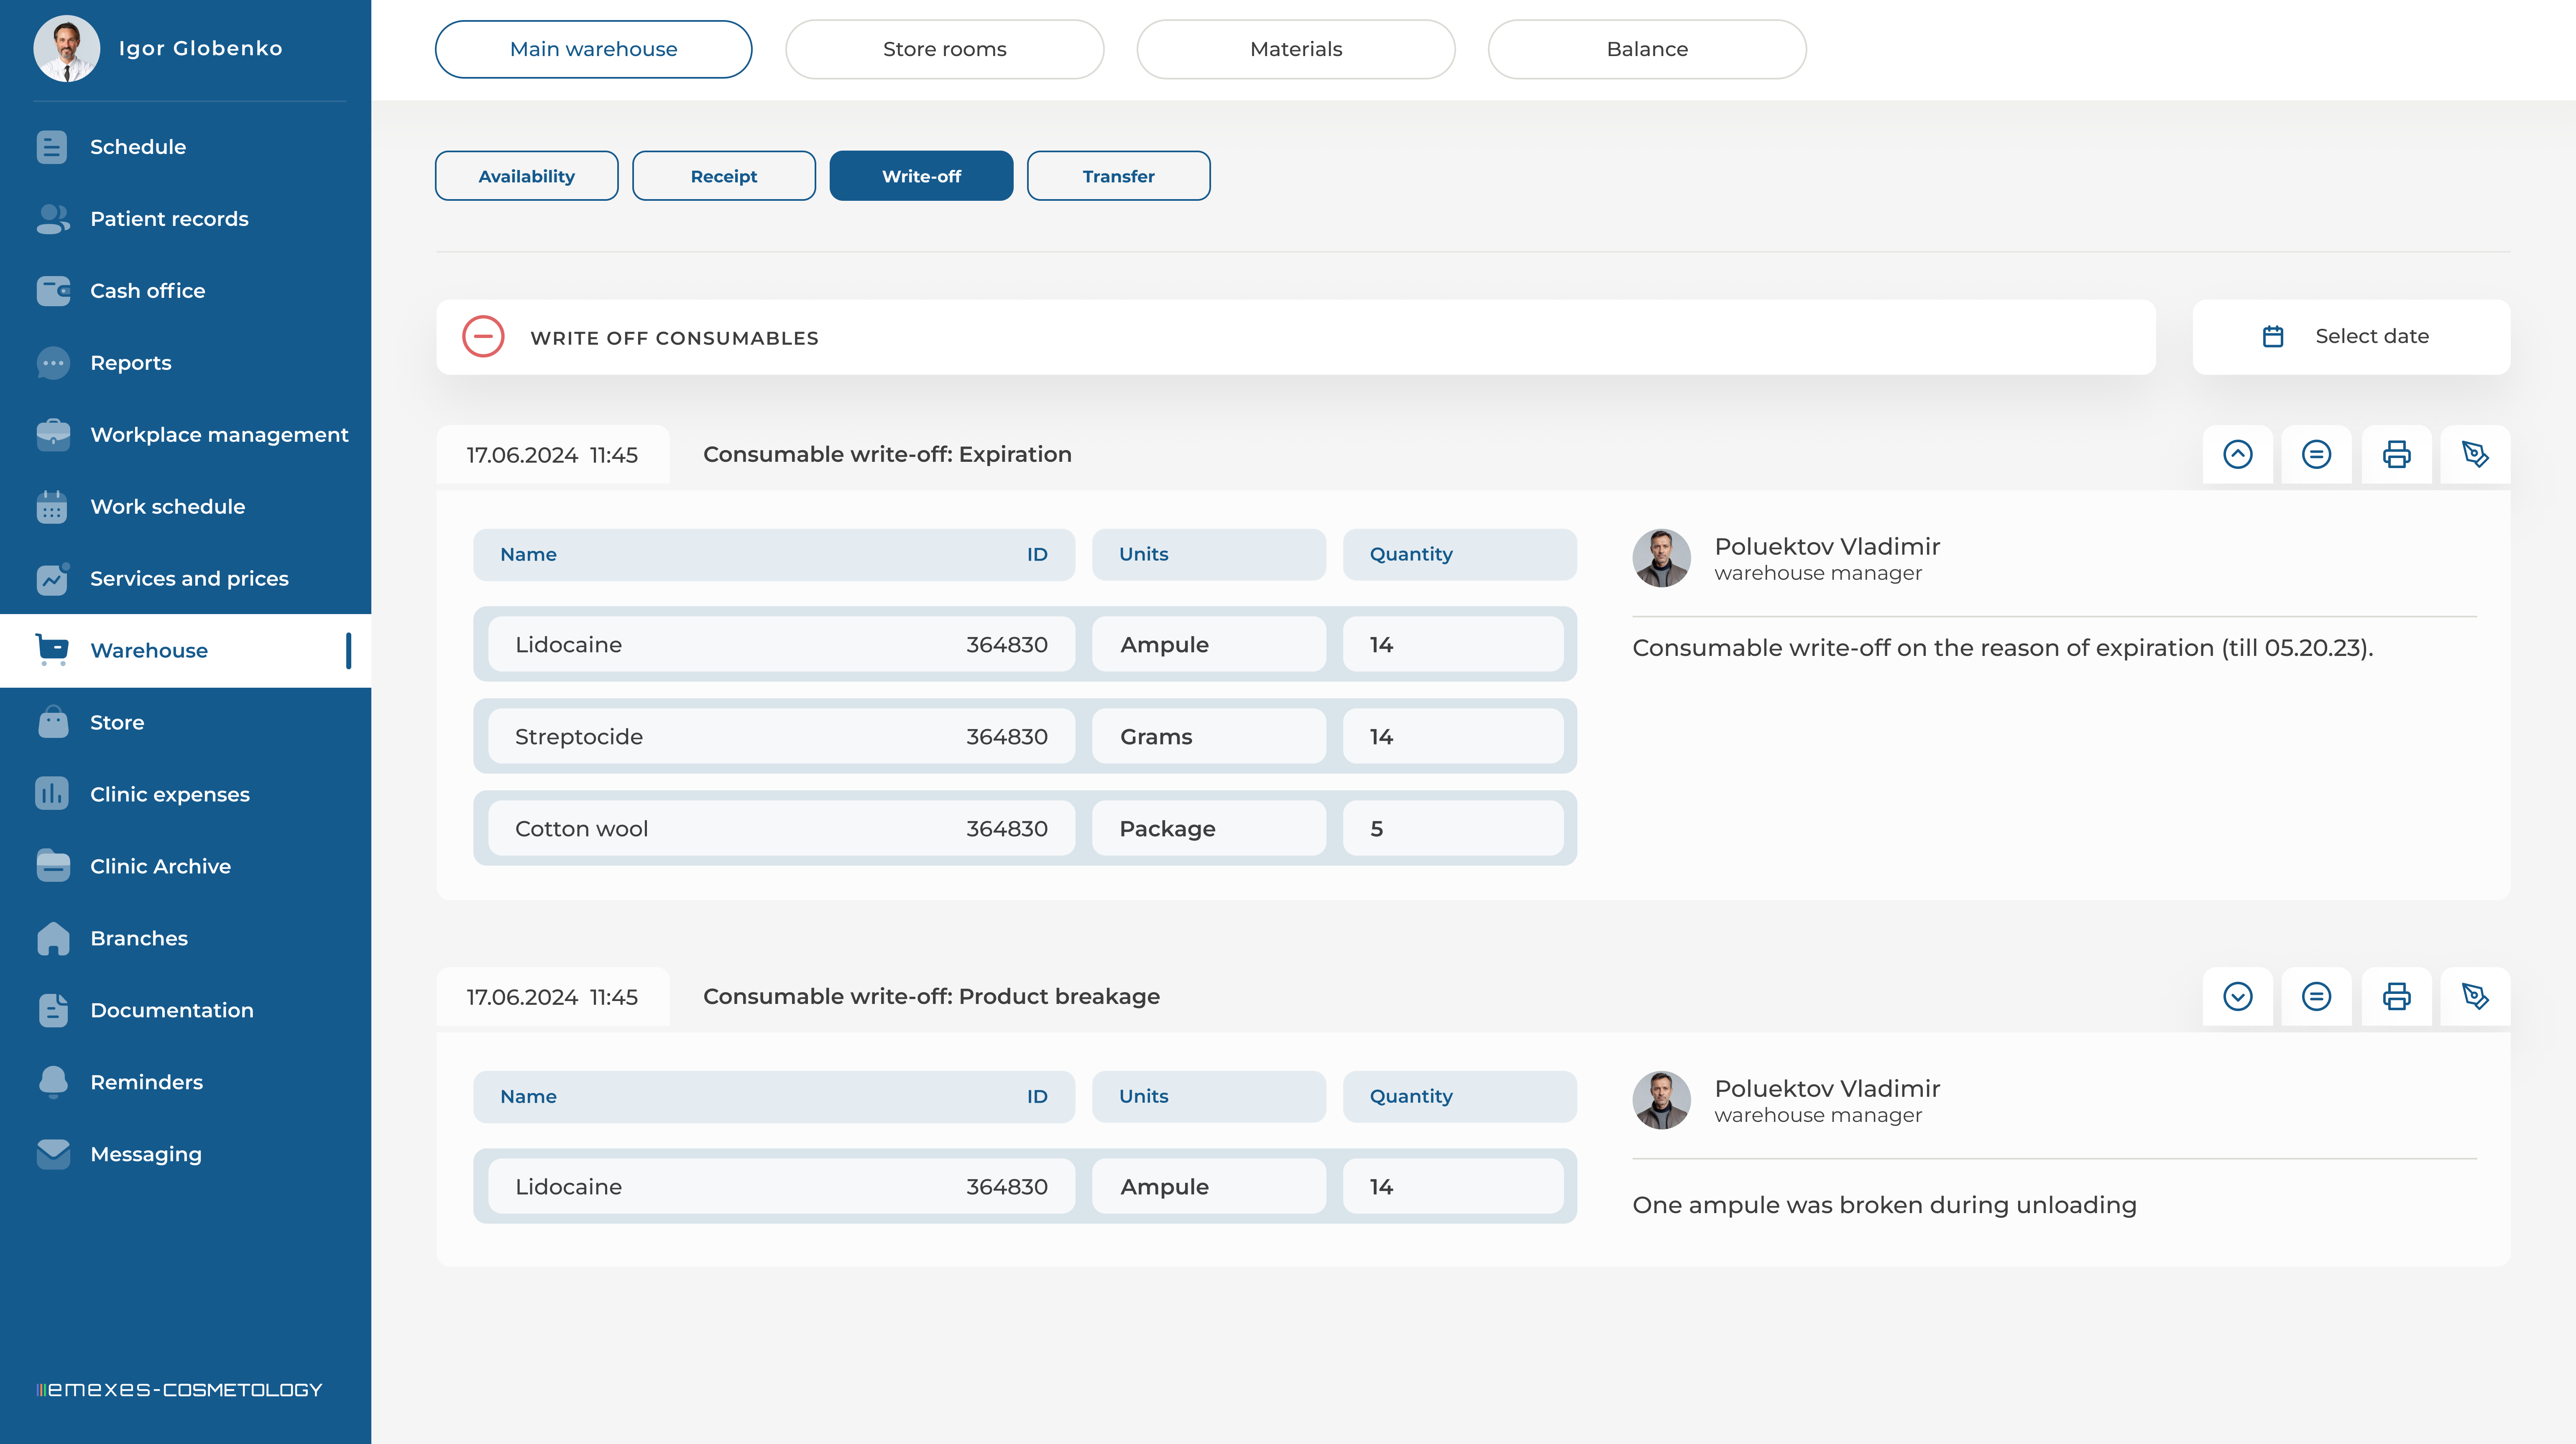
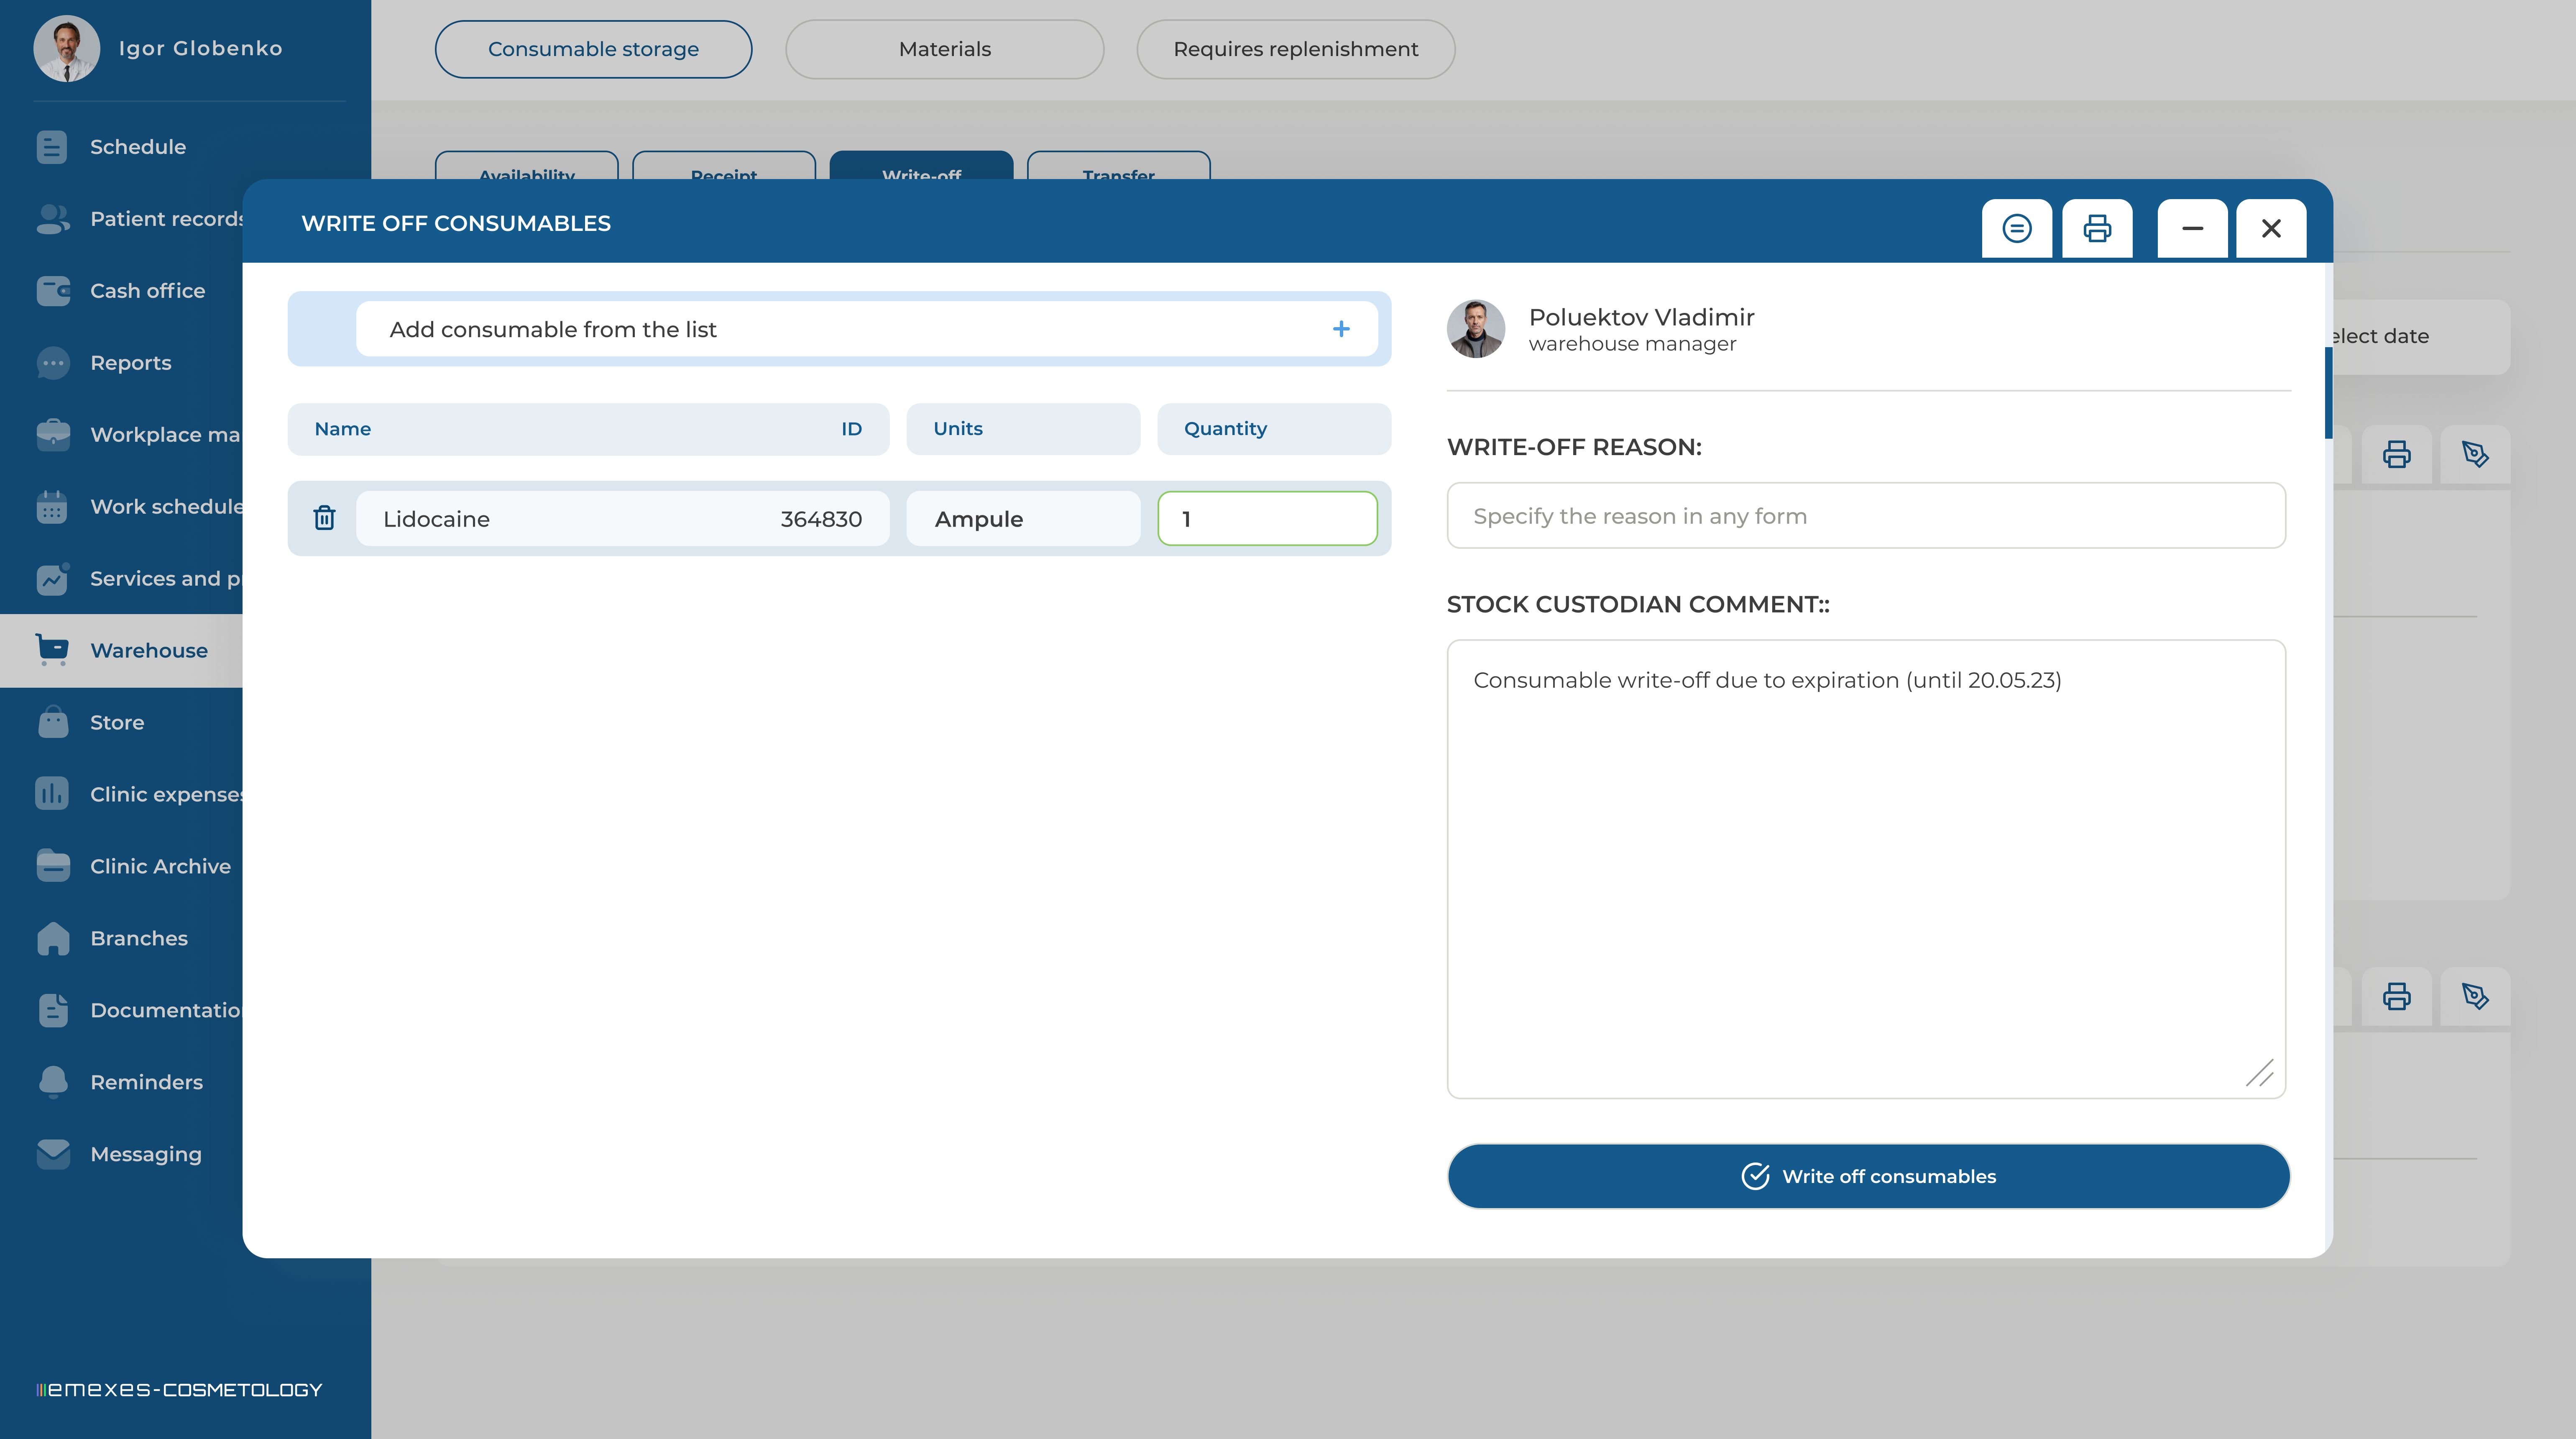
THE MAIN STORAGE accepts materials from external suppliers. The storekeeper receives the materials and then moves them to store rooms as needed. Materials can also be written off from the main storage by specifying a reason, such as "Product damaged" or "Product expired."
OFFICE STORE ROOMS are automatically created when you create offices in the Workplace Management section, with a number corresponding to the office. These store rooms are used to account for materials in the offices where they are directly applied. With this type of storage, you can:
- Receive materials from the main storage or other offices.
- Write off materials manually (automatic material disposal occurs directly from the patient's record and then appears in the statistics of the office store room).
- Move materials to other office store rooms.
If you think that a newly created office does not need a store room, you can delete the corresponding store room, but only if it has no material movement history. You also cannot remove a clinic office if its store room has a material movement history. It is possible to create an additional secondary warehouse, for example, a “Warehouse Hall,” which will contain the clinic’s inventory that requires accounting. To create a new storage, you need to press "+" next to the drop-down list of office store rooms. The storage created in this way will have all the features of secondary storage, except for the automatic material disposal feature.
1. MATERIAL RECEIPT AT THE MAIN STORAGE
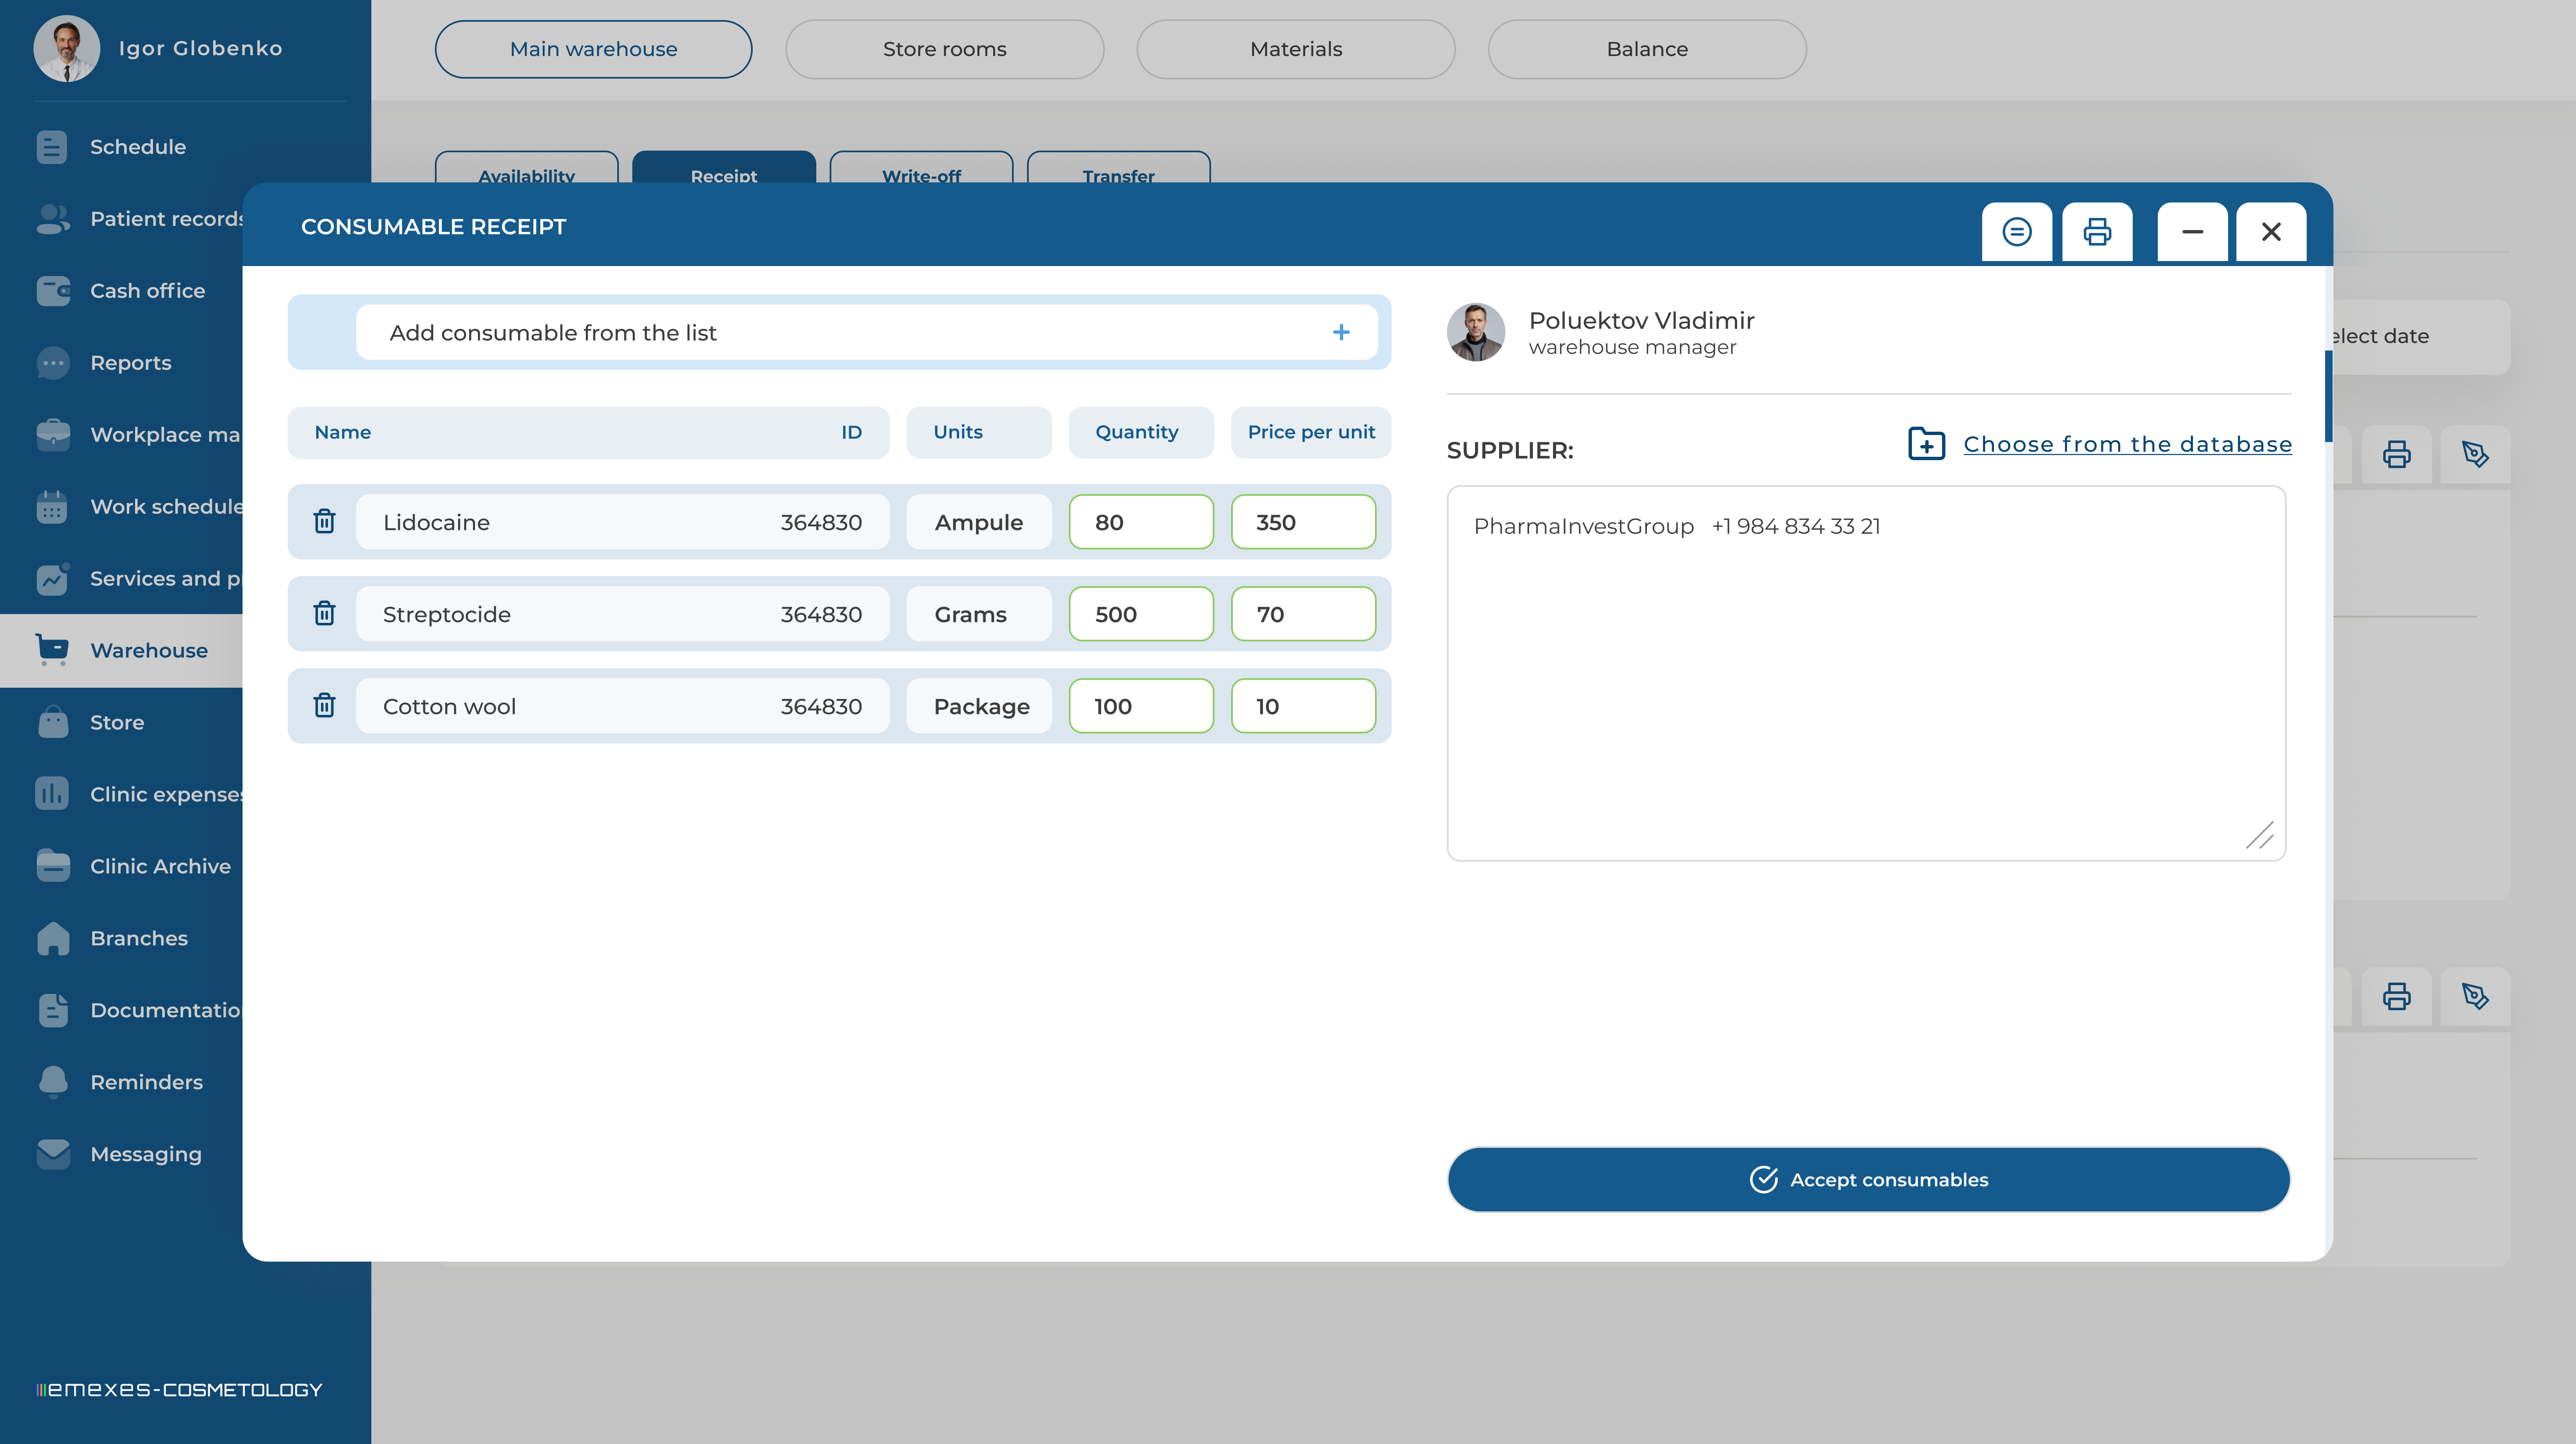
After adding all the materials used by the clinic to the database, you will be able to receive them into storage. To accept materials, click on "Receipt" in the MAIN STORAGE section and select "Accept materials into main storage."
A pop-up window will appear where you can select materials from the list of materials used by the clinic (if the materials are not in the list, they should be added beforehand). After selecting the materials that arrived at the clinic, the storekeeper will indicate the quantity according to the specified units of measurement, as well as the price per unit.
Next, the storekeeper specifies the supplier and their contacts, then clicks "APPLY MATERIALS TO STOCK." The accepted materials will then be displayed in the Available section of the main storage. Additionally, the "Receipt" section will show the archive of all previous material receipts.
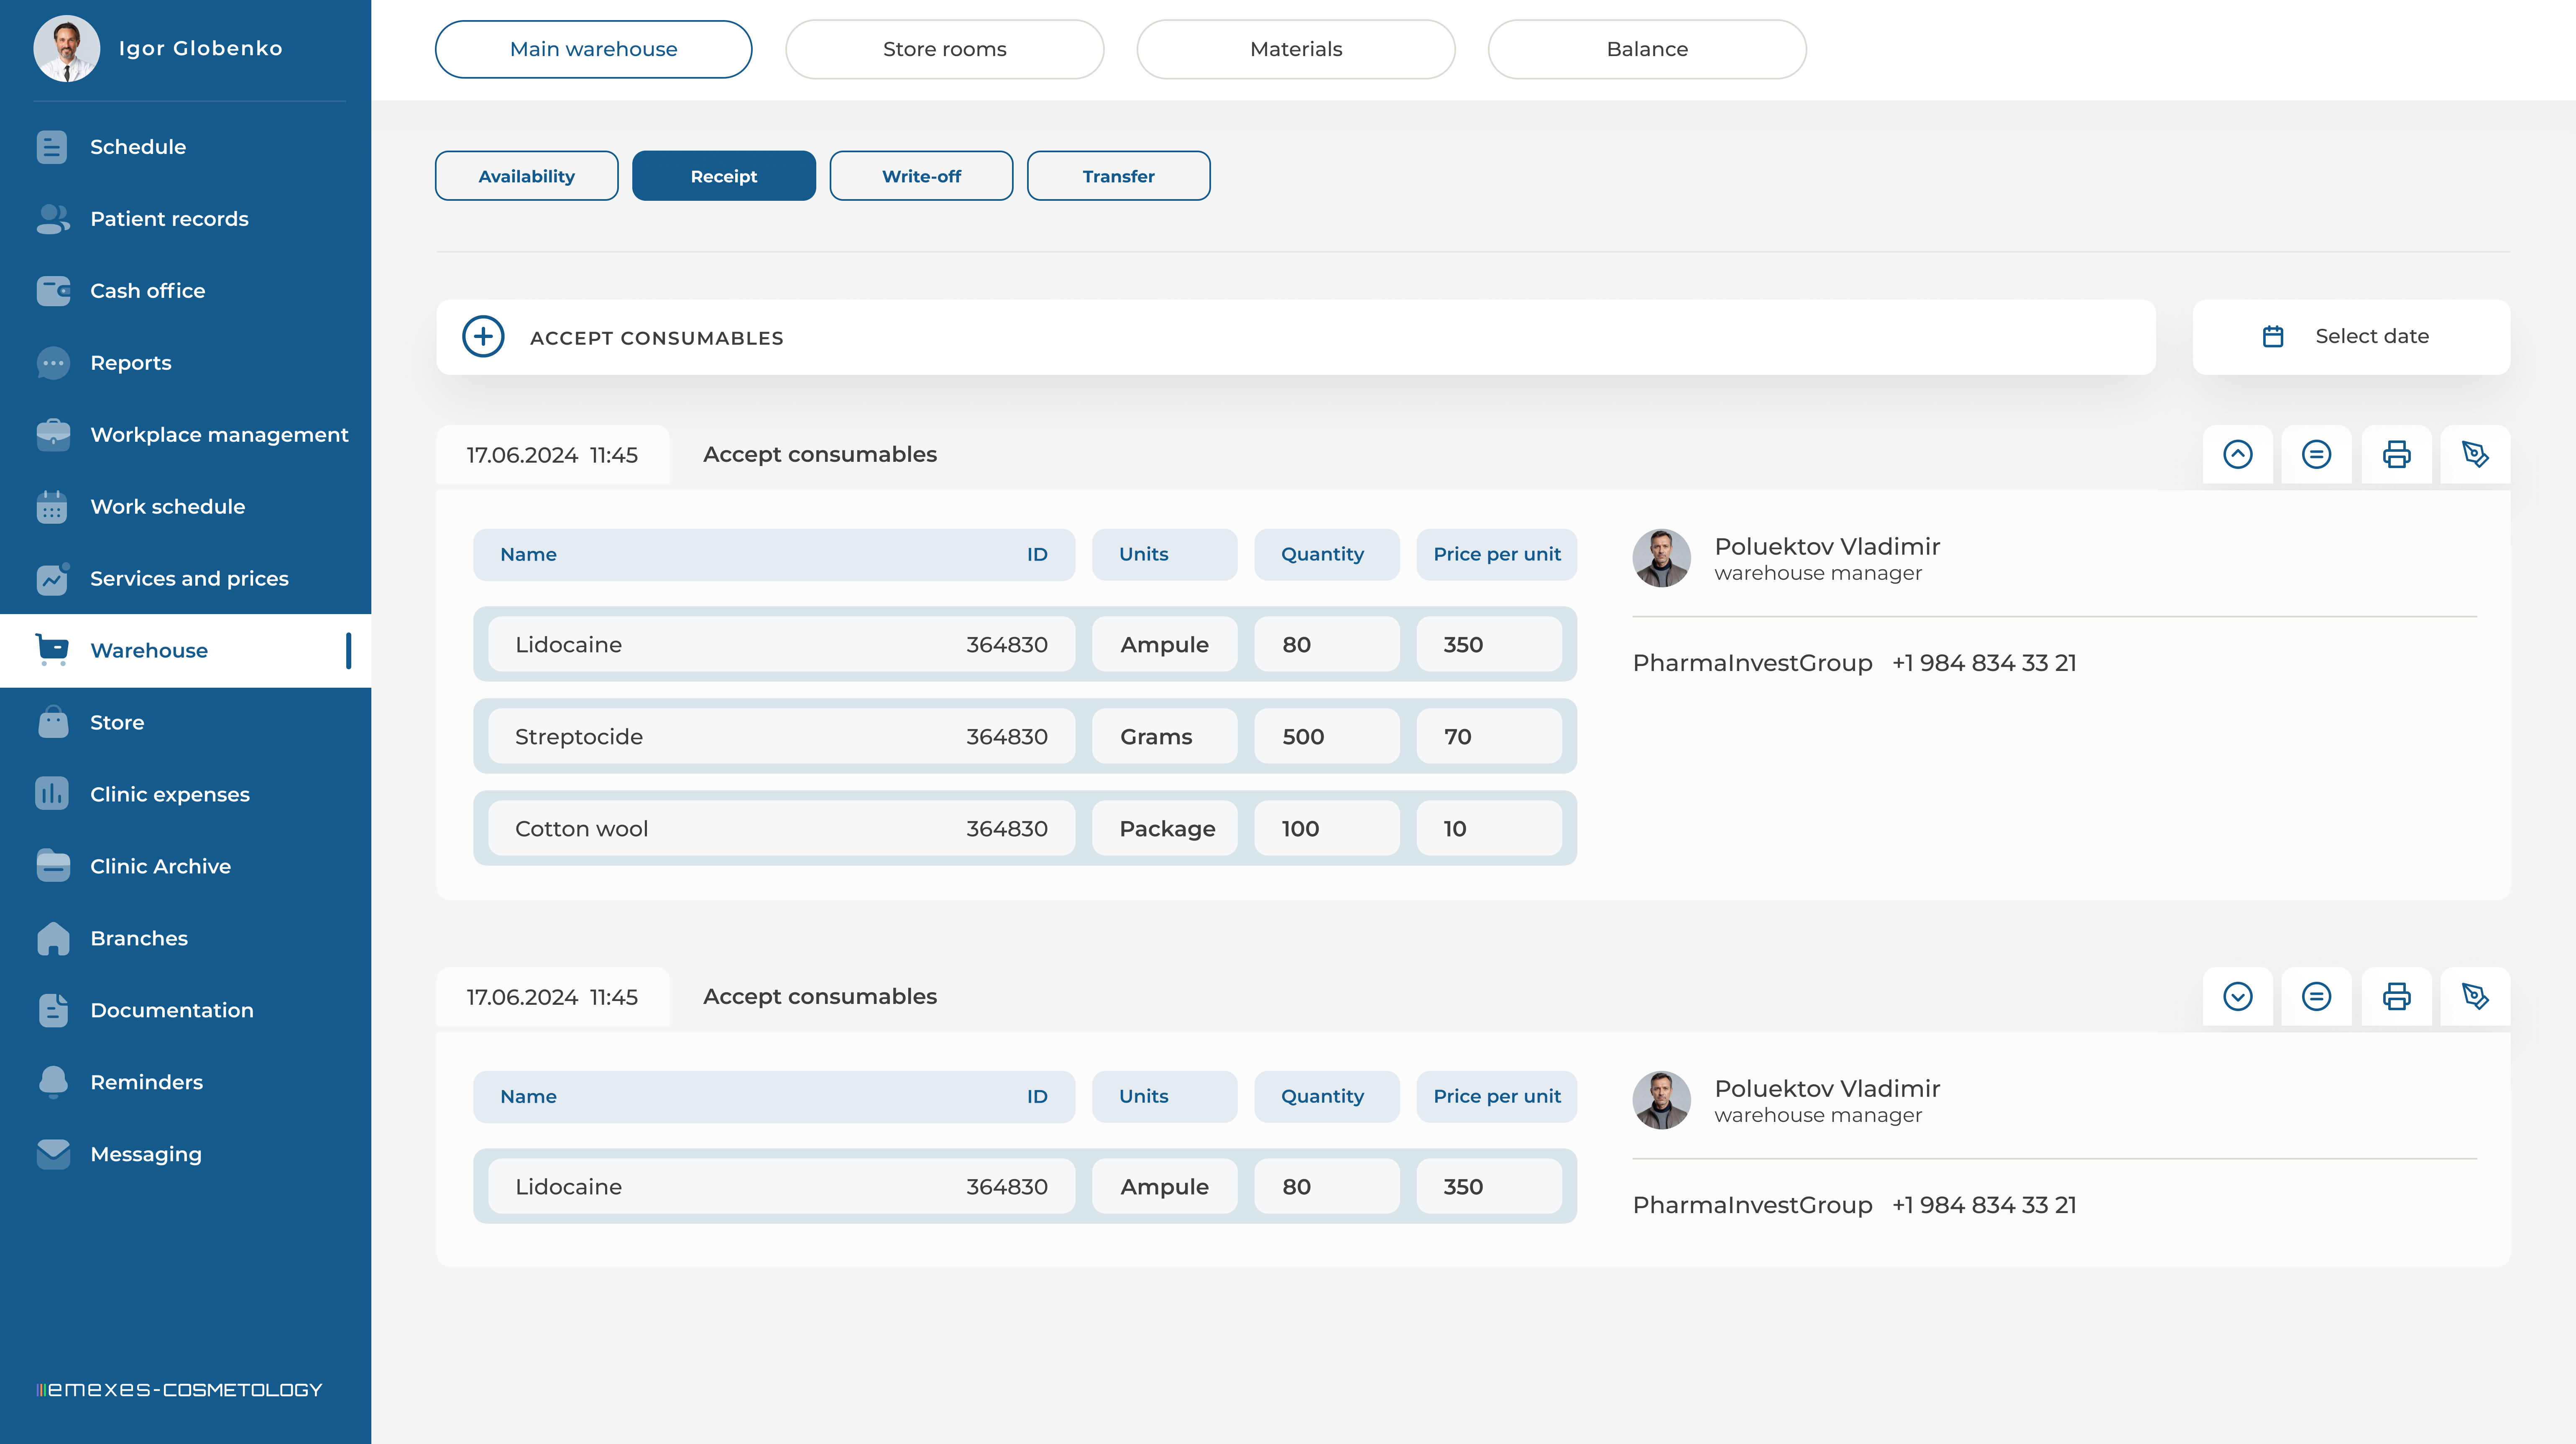
2. MATERIAL AVAILABILITY IN THE MAIN STORAGE
The material availability table in the main storage includes a list of all materials currently in stock. The table displays the material name, its ID number, the category it belongs to, the quantity on hand, units of measurement, the last supplier of the product, and the current price per unit (as specified in the most recent material receipt documentation). By clicking on any item, you can view detailed reports on the movement of that material within the main storage.
3. MATERIAL DISPOSAL
The storekeeper can write off materials from the main storage. To do so, navigate to the "Disposal" section and click the corresponding button. Then, select the material to be written off, specify the quantity, and choose the reason for disposal (e.g., "Product damaged"). If necessary, leave a comment and click "Dispose" to complete the process.
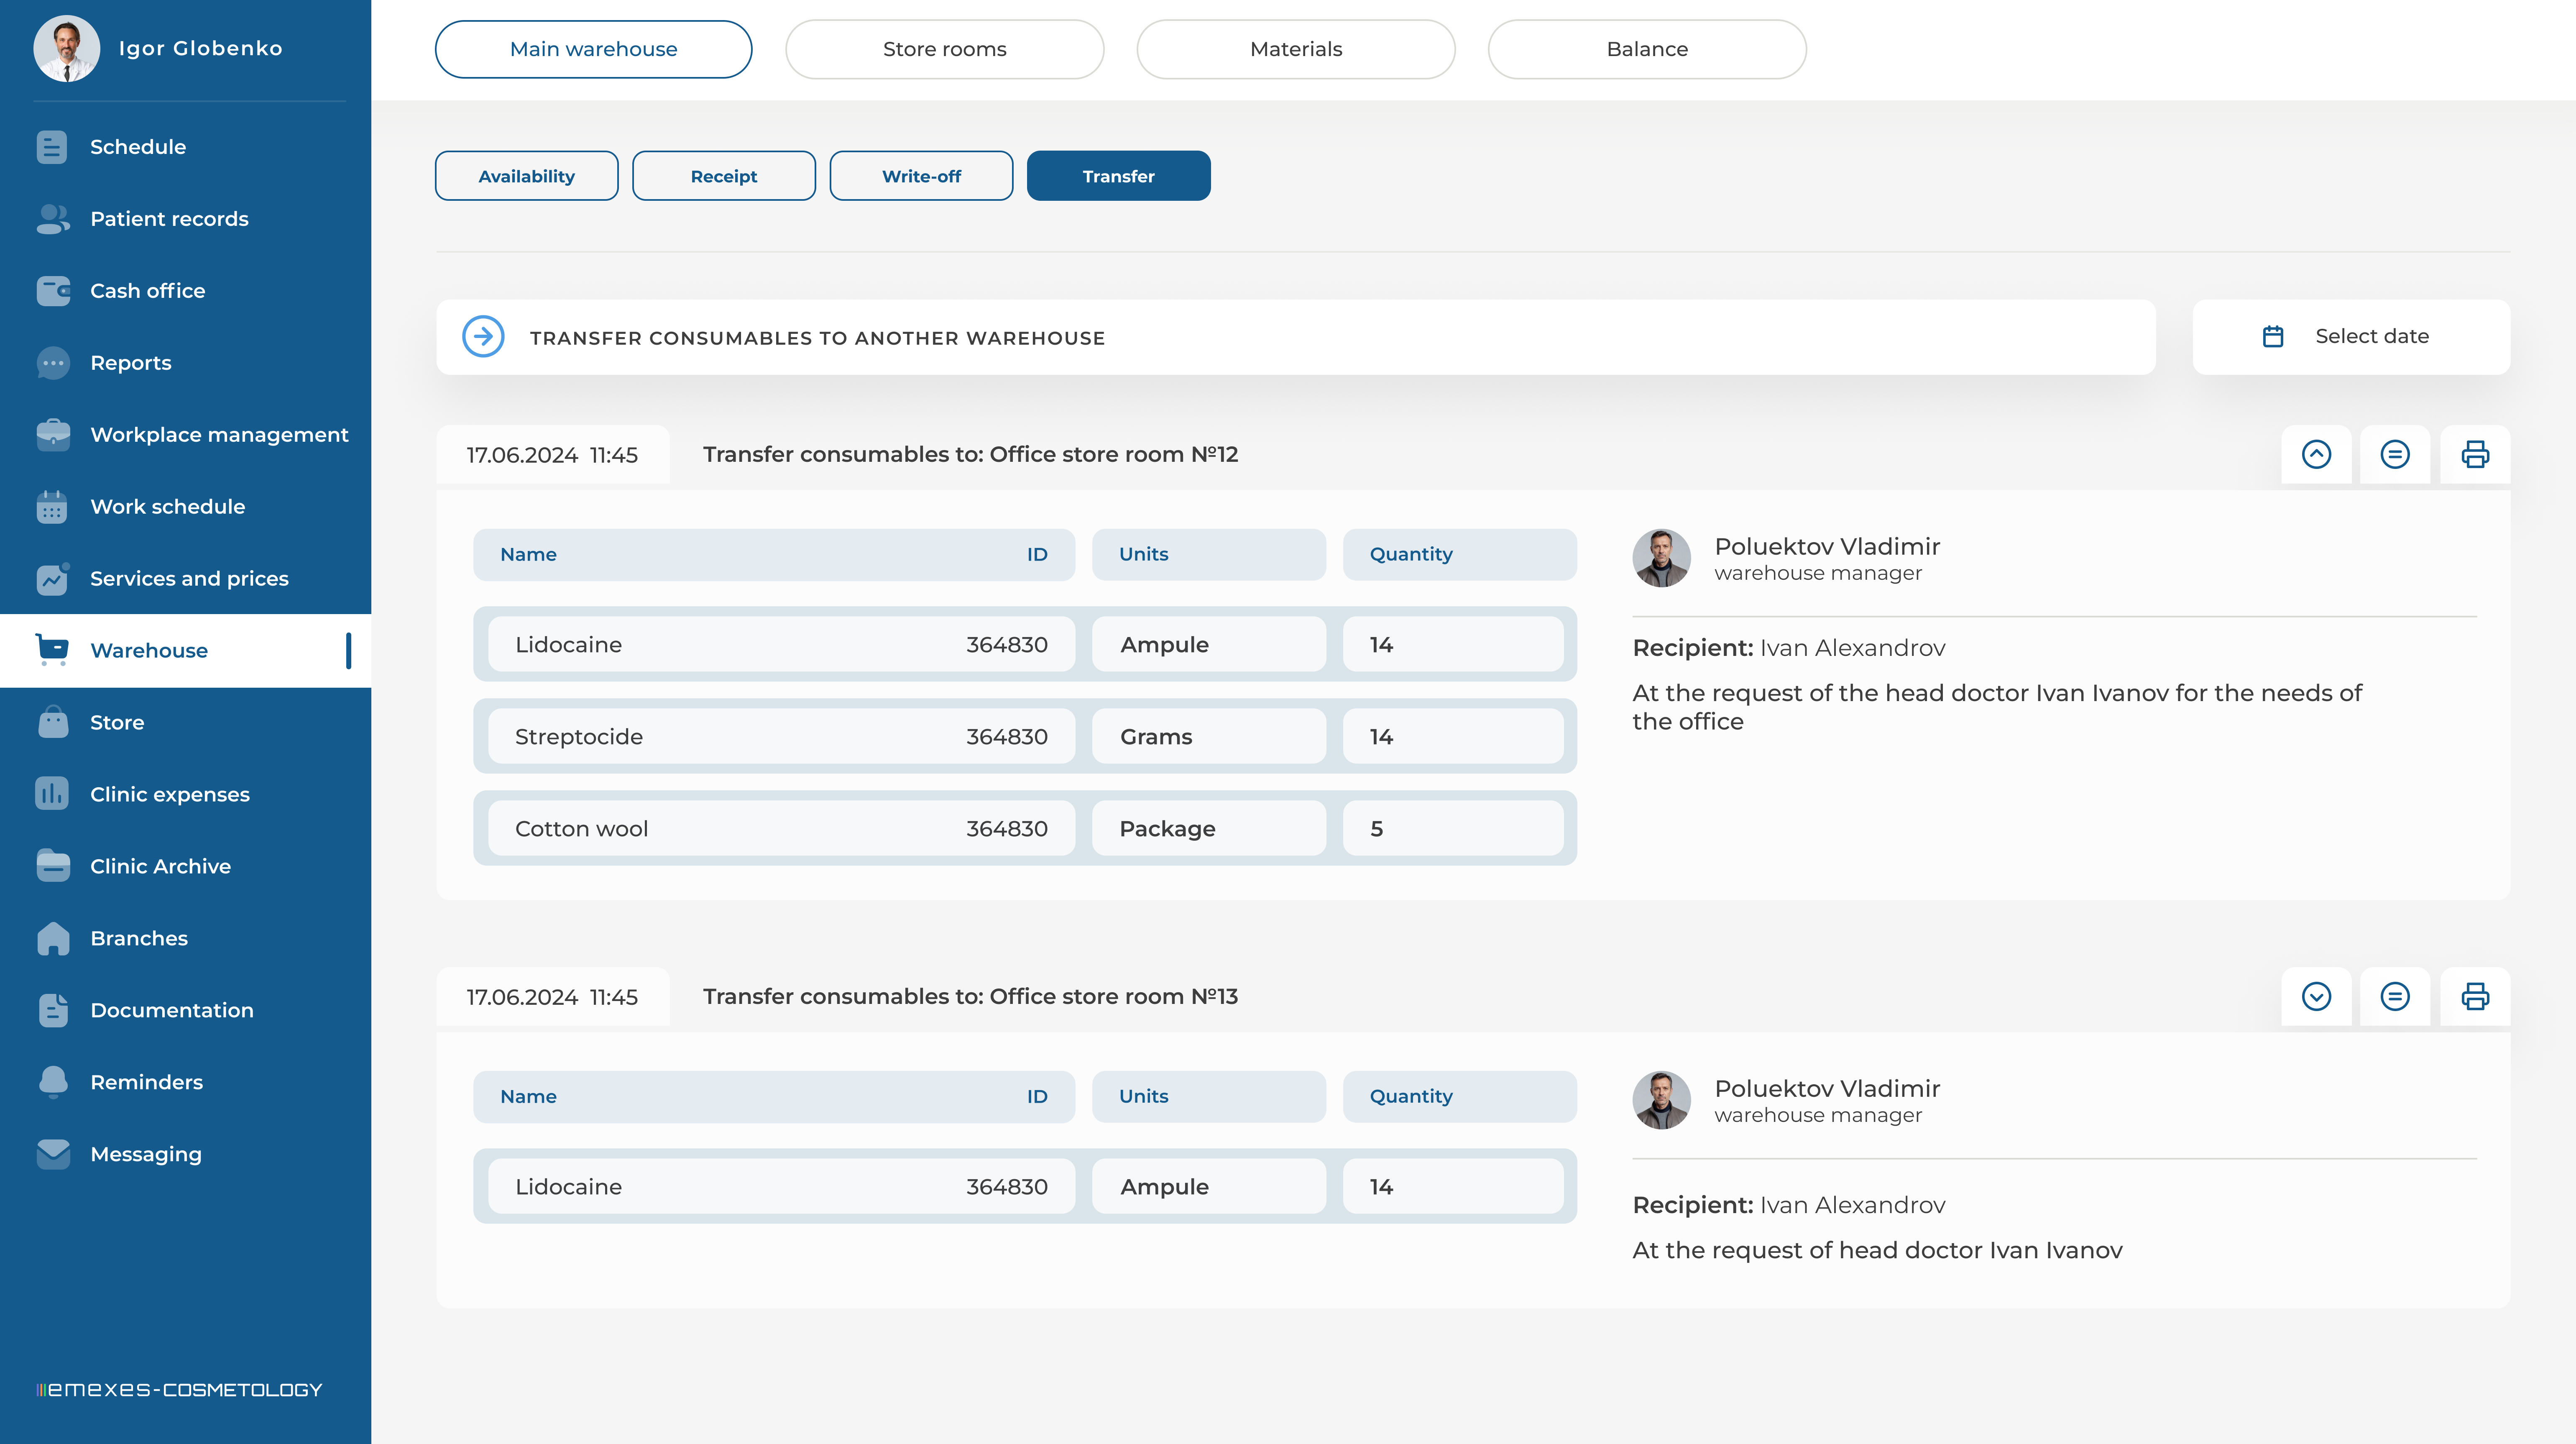
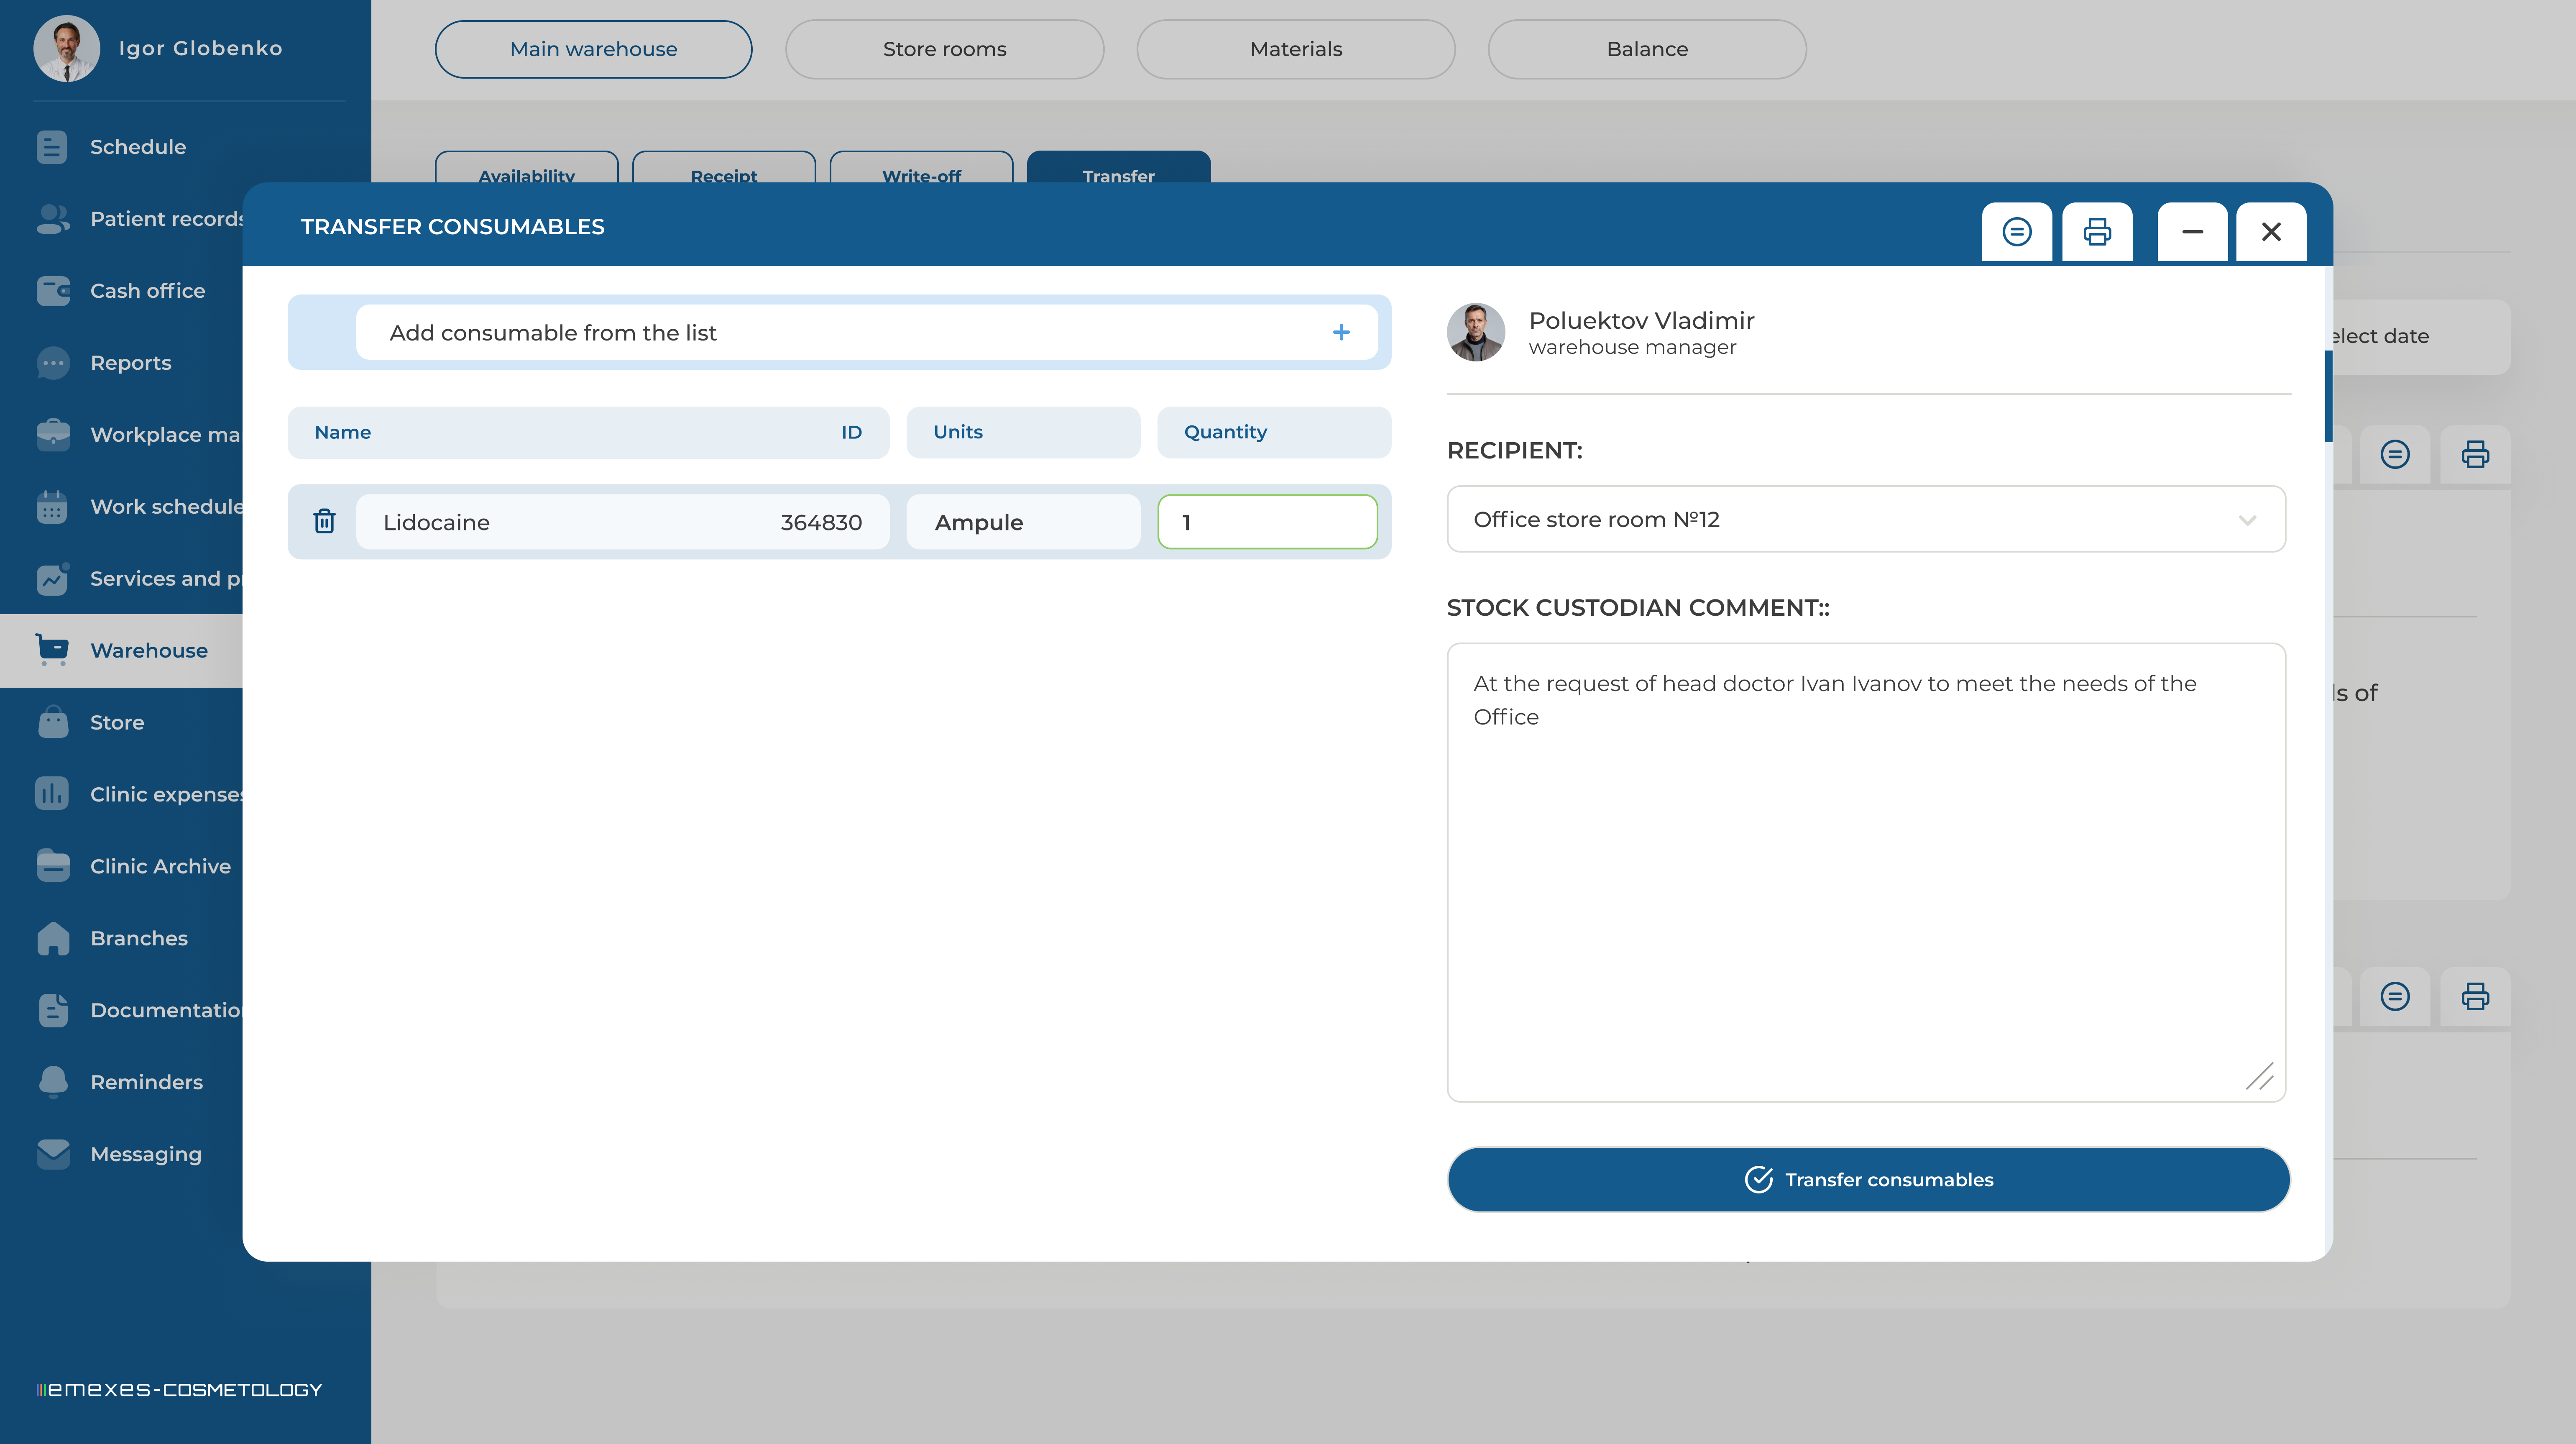
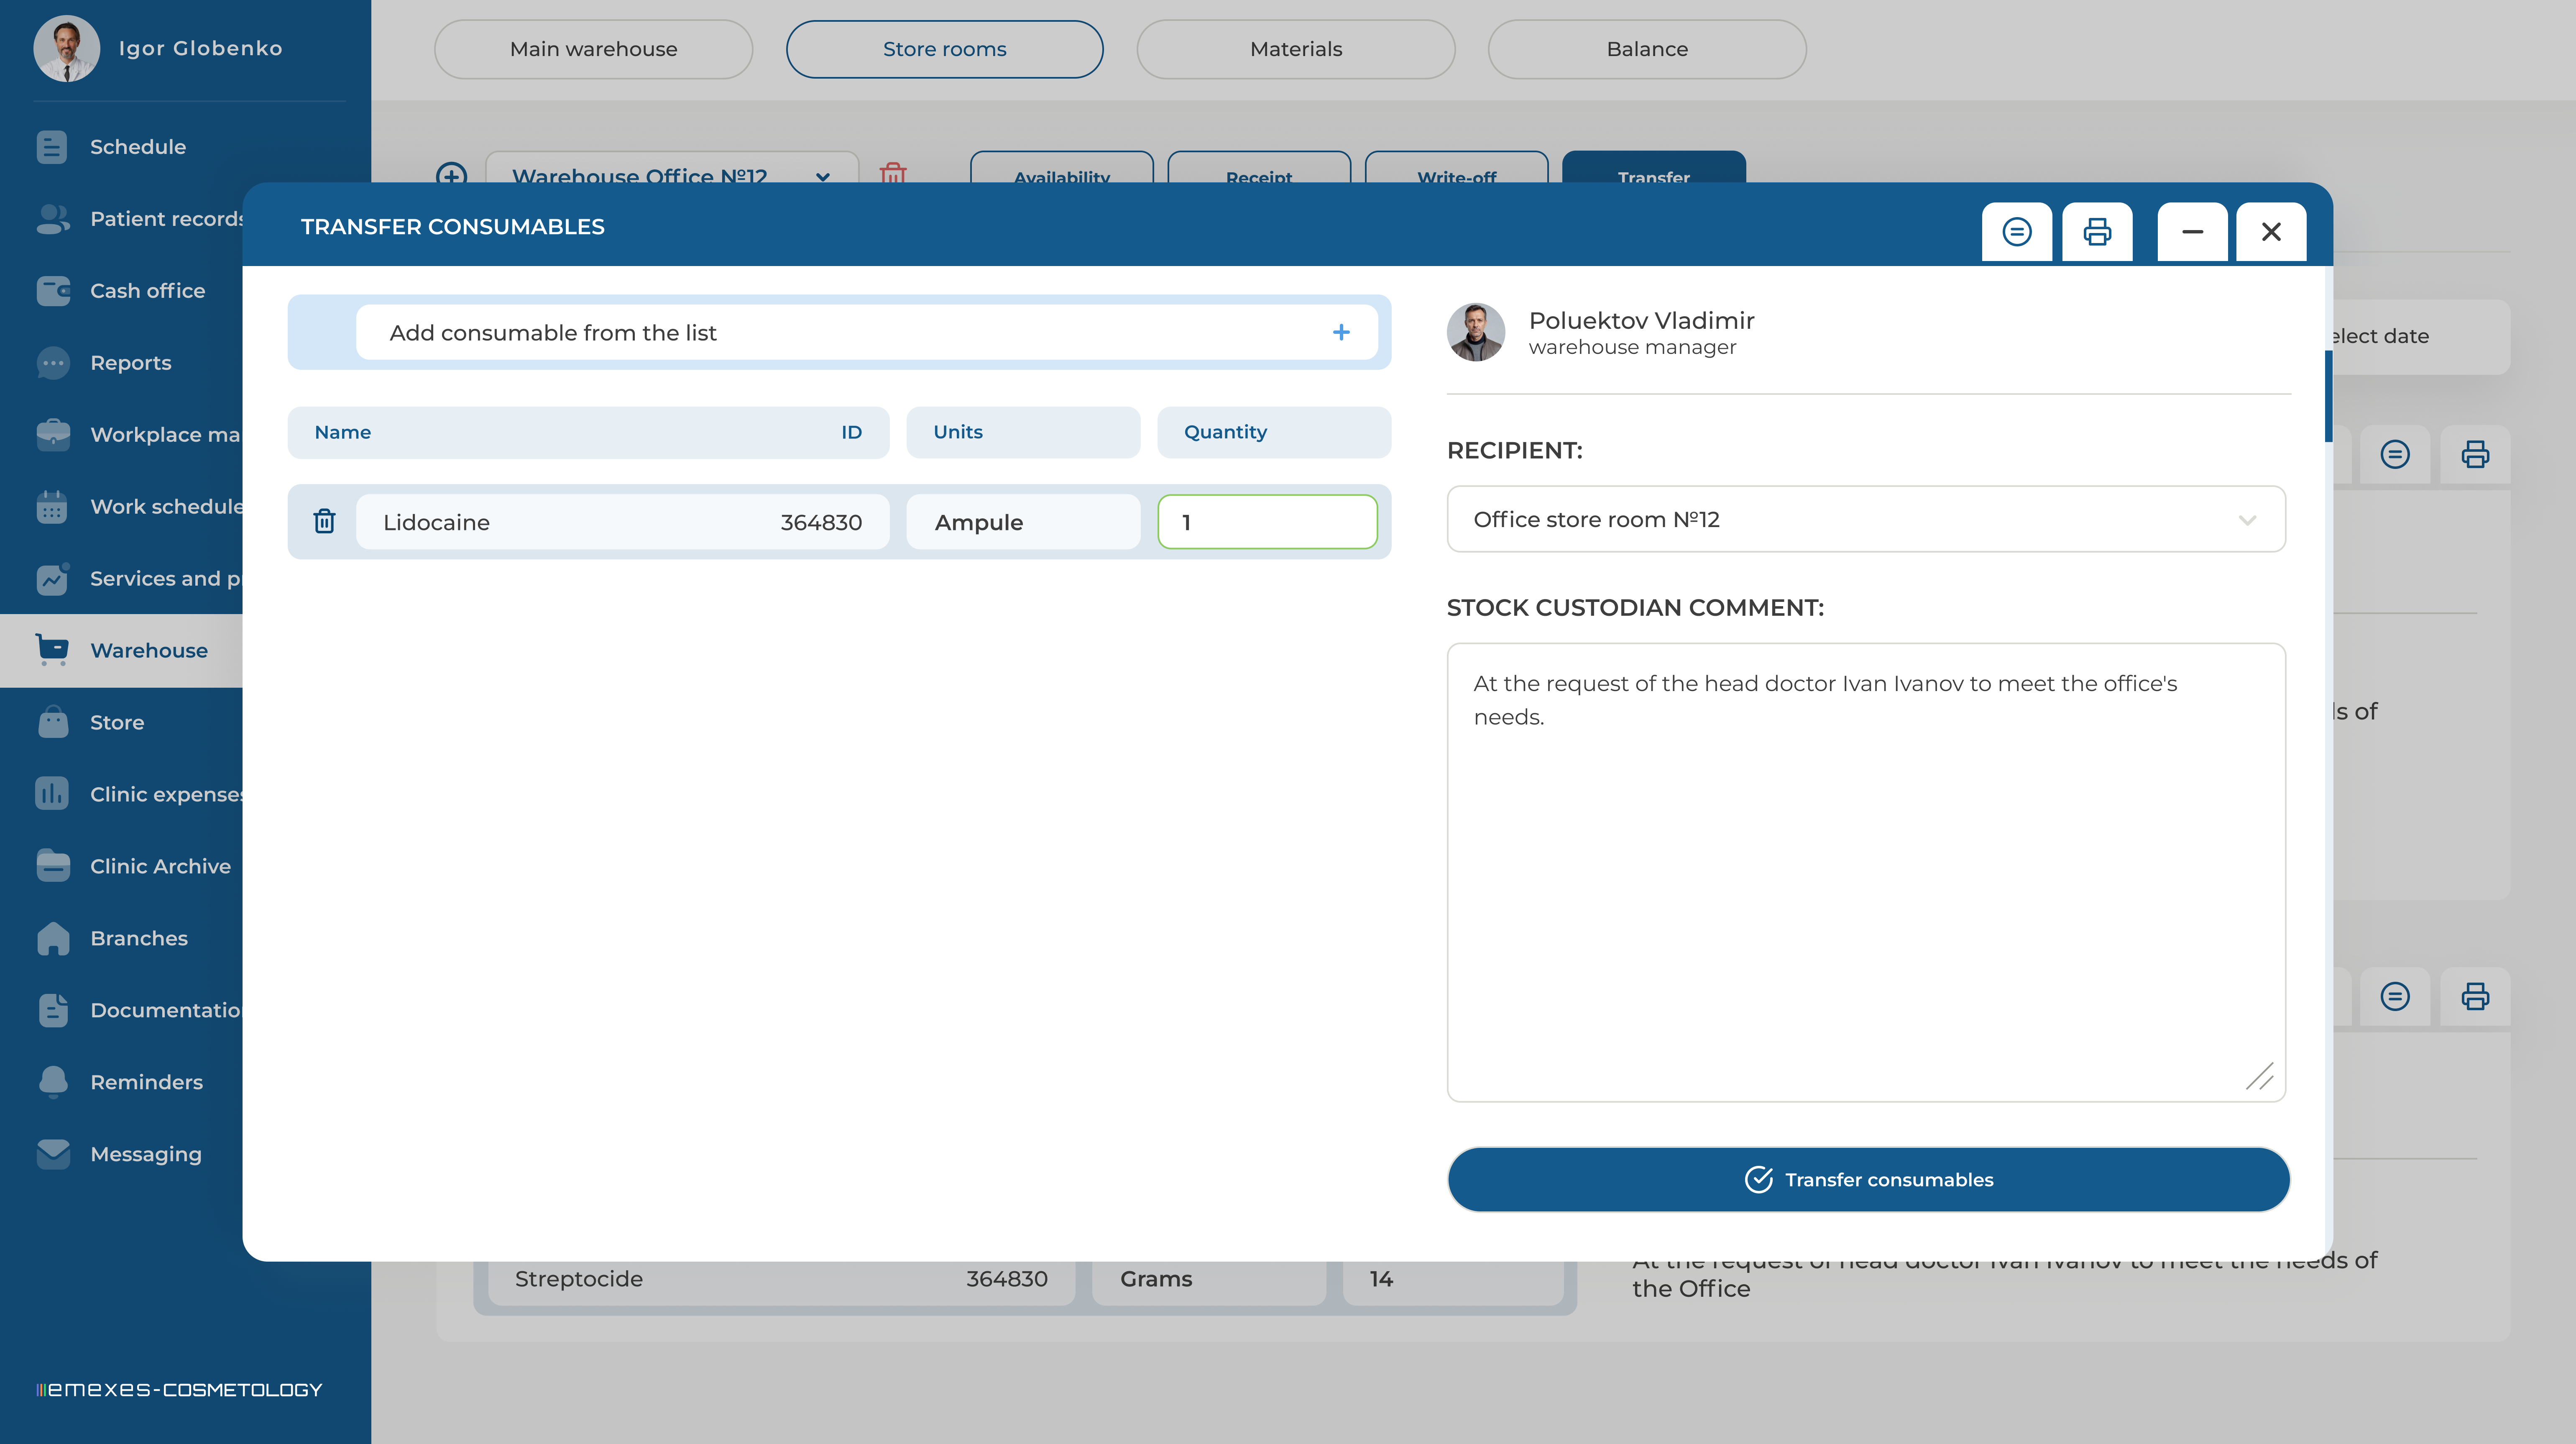
4. TRANSFER OF MATERIALS FROM THE MAIN STORAGE
To move materials from the main storage, go to the "Transfer" section and click "Transfer materials." Select the desired material and specify the quantity to be transferred. Next, choose the office where the materials will be transferred and add a comment (for example, explaining the transfer is being done at someone’s request). Clicking "Transfer materials" will create a transfer request, which must be confirmed by the recipient in the corresponding office store room. Once confirmed, you will see this request in the archive of main storage transfers.
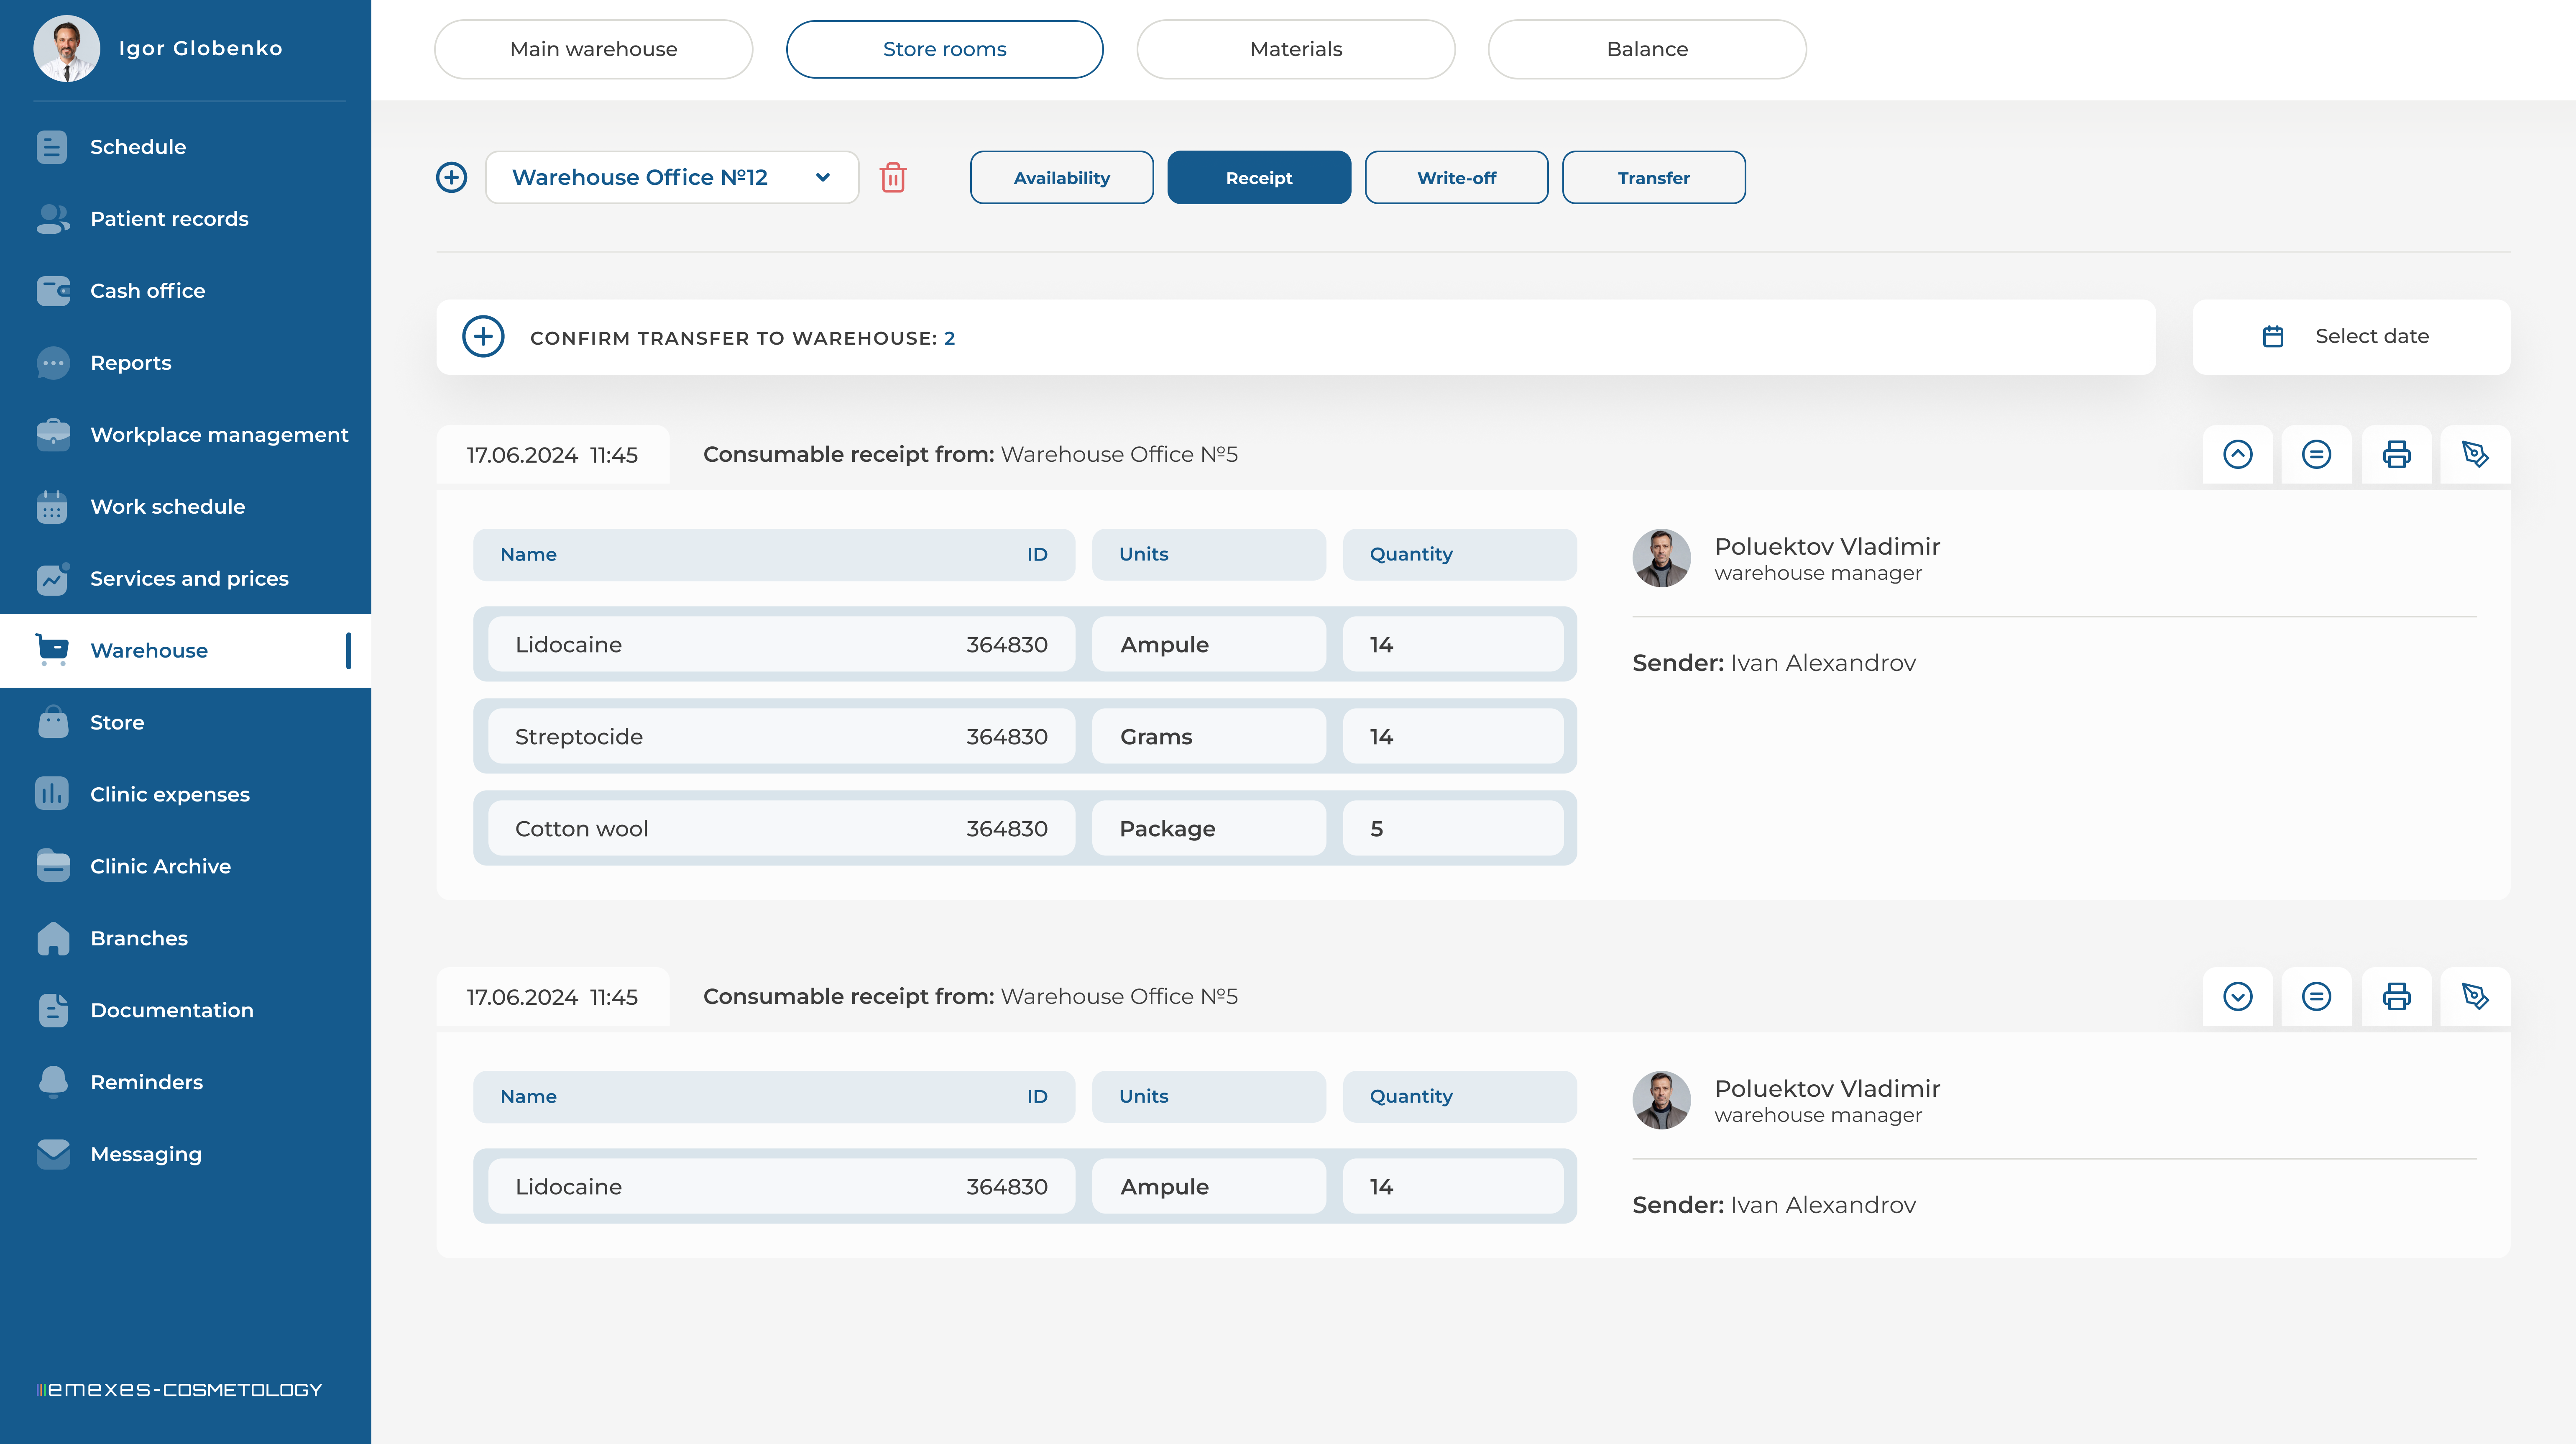
5. MATERIAL RECEIPT AT STORE ROOMS
Materials can be transferred from the main storage or between store rooms. For example, if you need Lidocaine transferred from the main storage to your office, the storekeeper must create a transfer request from the main storage to your office, which you will need to confirm.
To confirm the transfer, go to the "Receipt" section in your office store room and click "Confirm." You will see the list of items to be moved and can choose to accept or reject the transfer. Once you accept the materials, they will be displayed in the Available section of your office store room and added to the receipt archive. By clicking on one of the items, you can also view a detailed report on the material transfer to your store room.

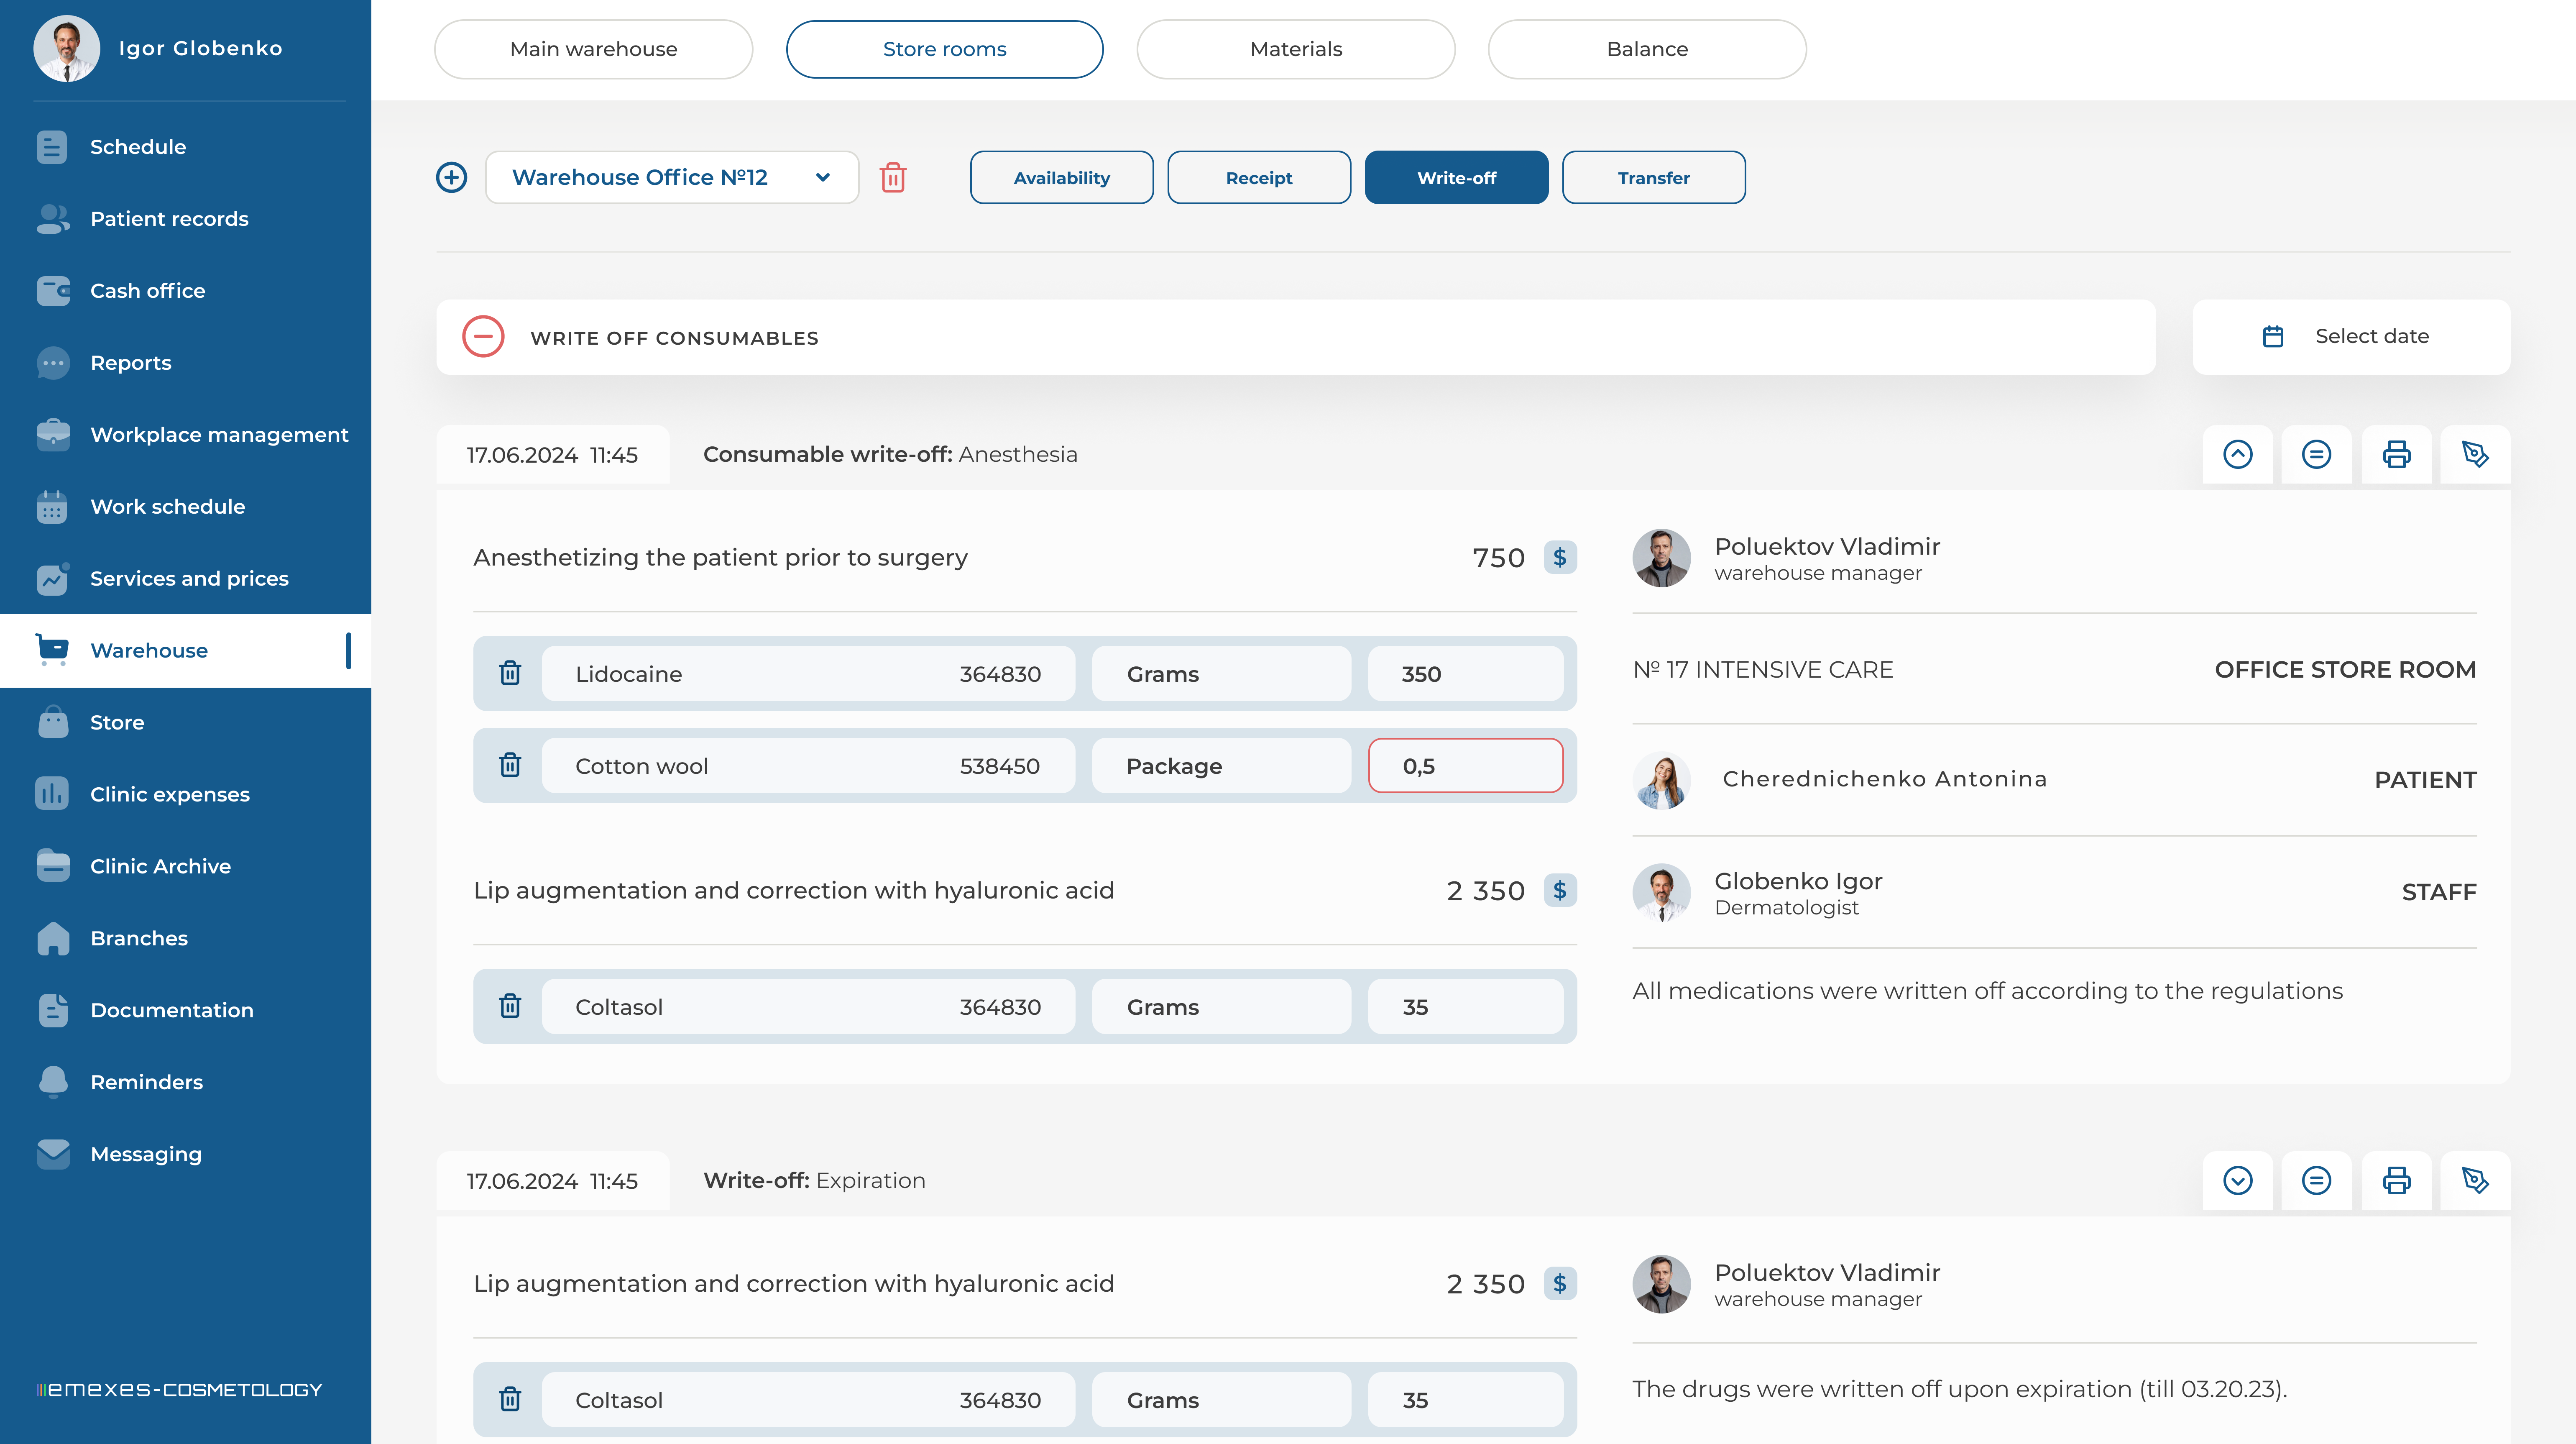
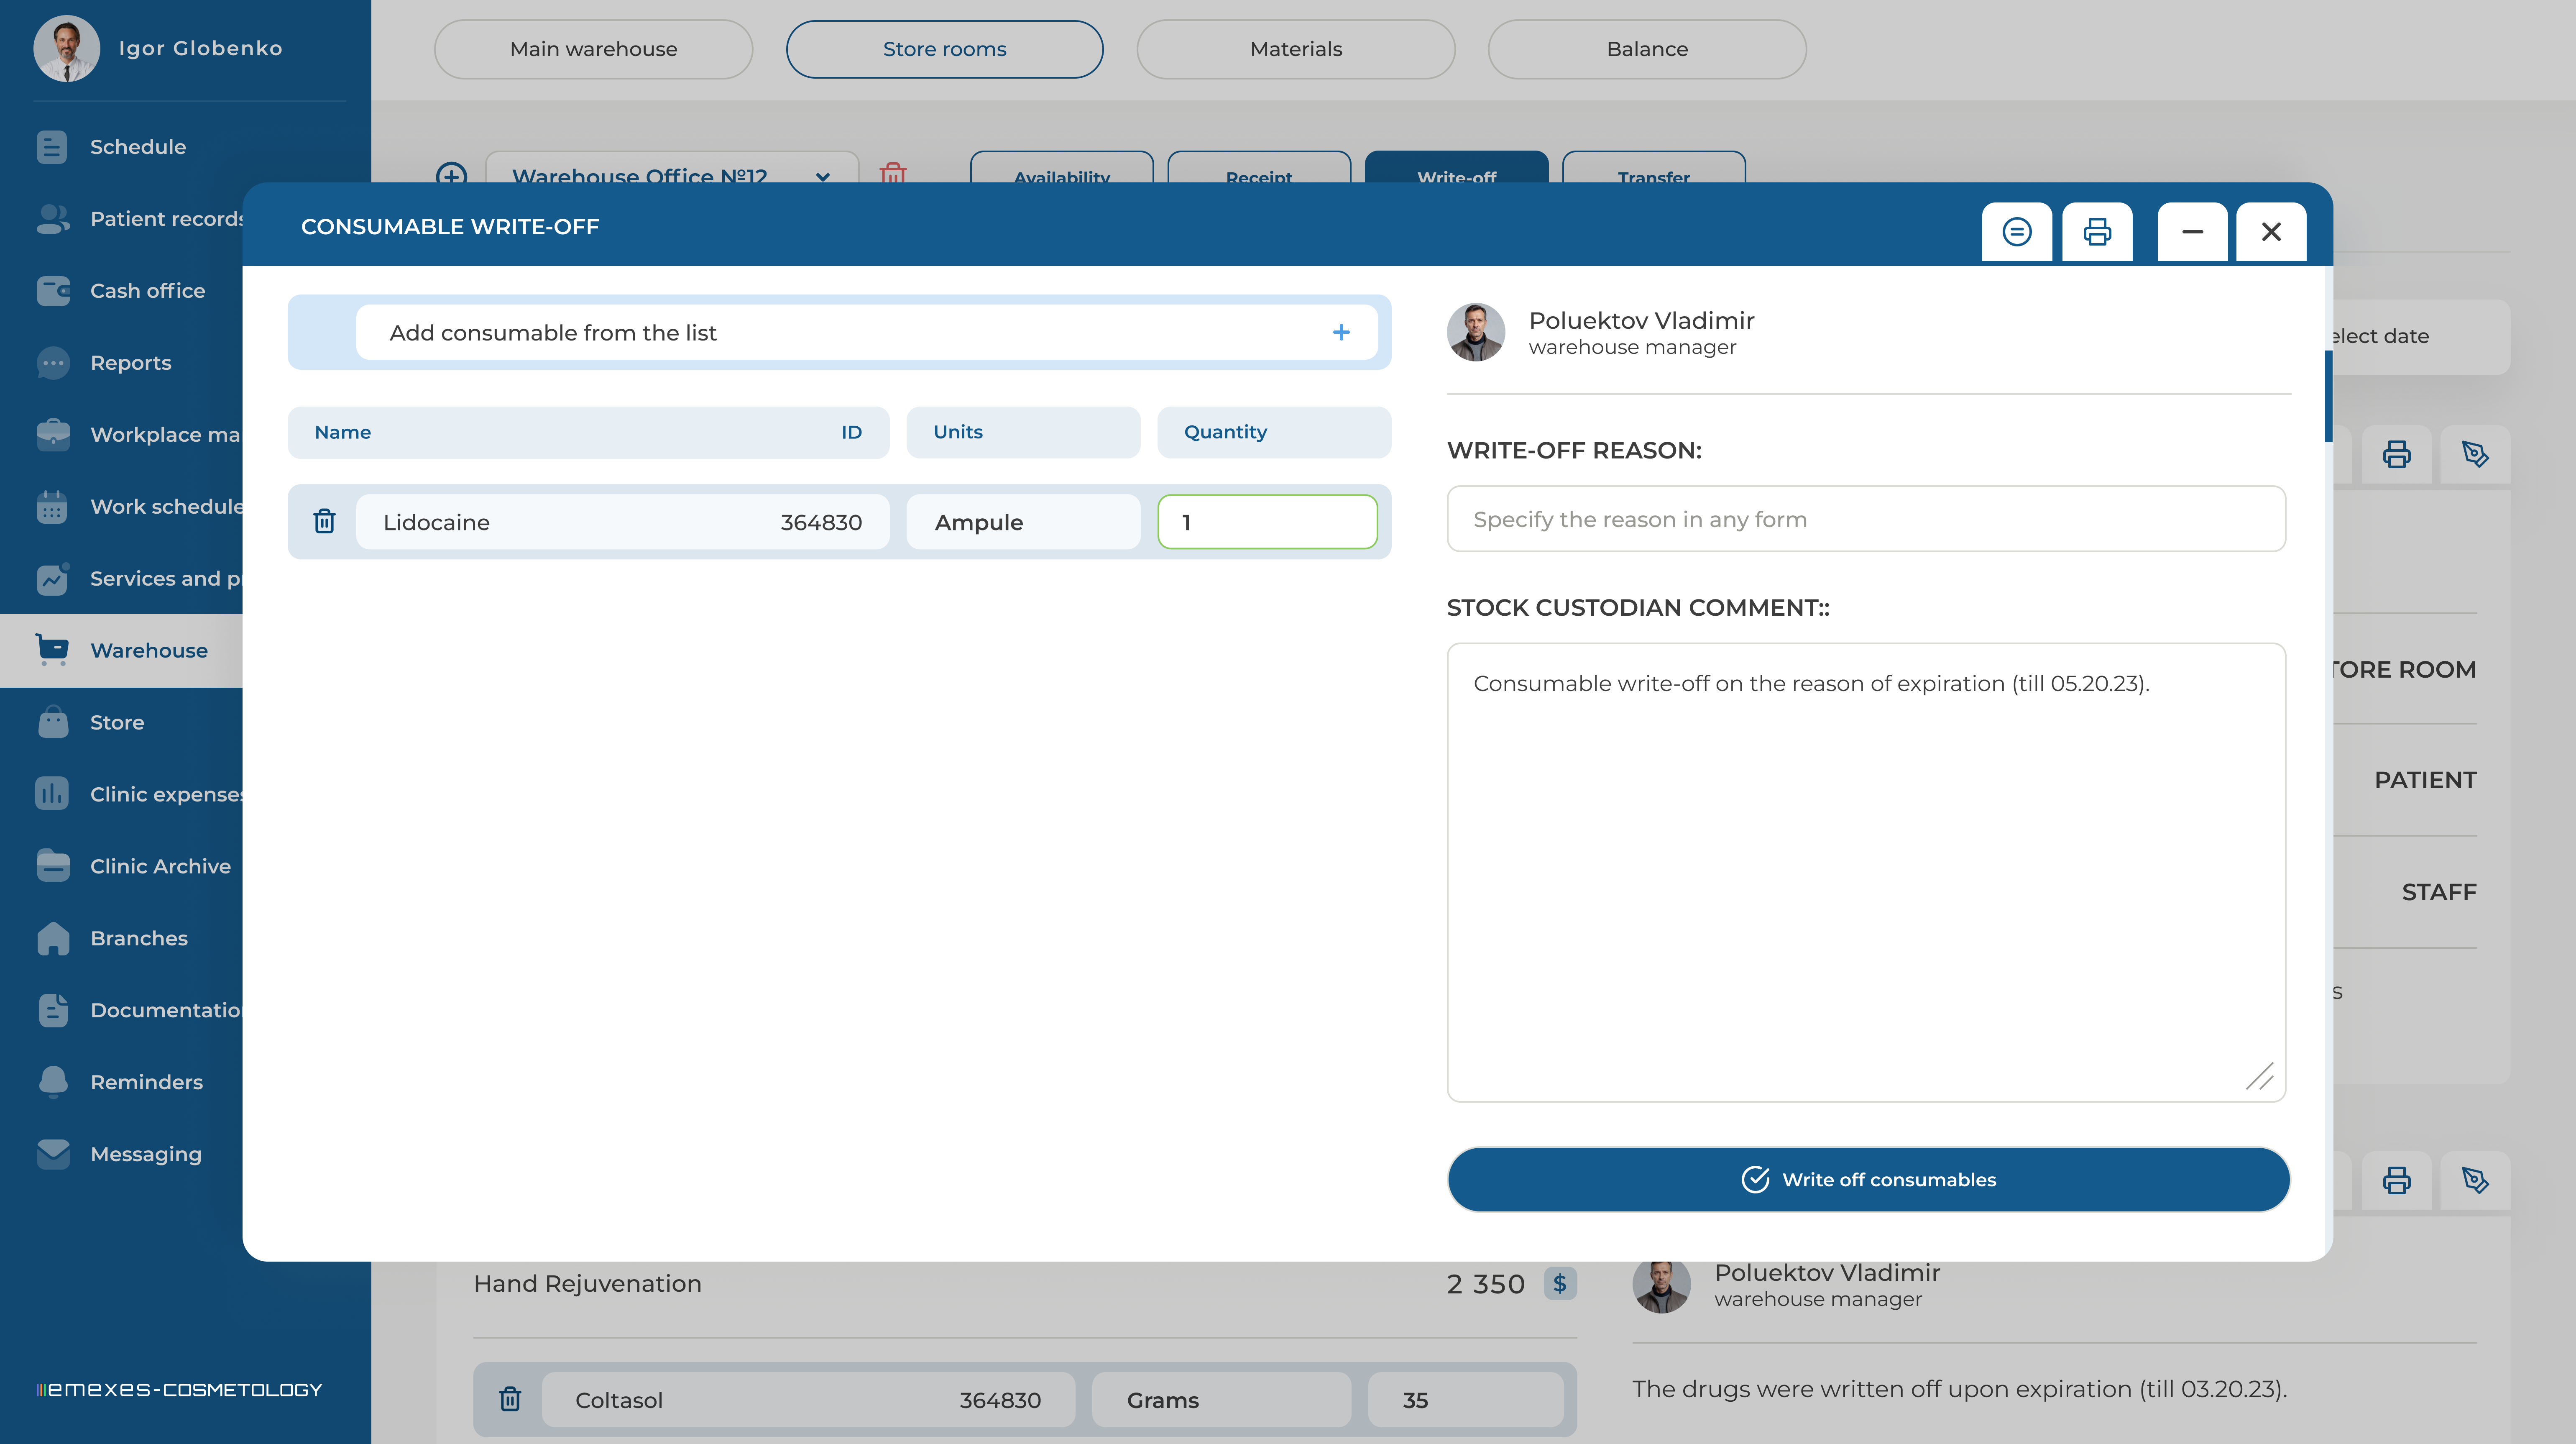
6. MATERIAL DISPOSAL AT THE OFFICE STORE ROOM
Material disposal from store rooms can be done both manually and automatically.
If you account for material consumption in the "Services and Prices" tab, after an appointment is over, you will see a "MATERIAL CONSUMPTION" button related to this appointment. By clicking it, you will see the materials used and their cost. If necessary, you can edit the quantities or add additional materials used. After leaving a comment, click "Dispose" to complete the material disposal.
Only those involved in the appointment (doctors and assistants) can write off the materials. Additionally, you can write off materials from the store room due to expiration or other reasons.
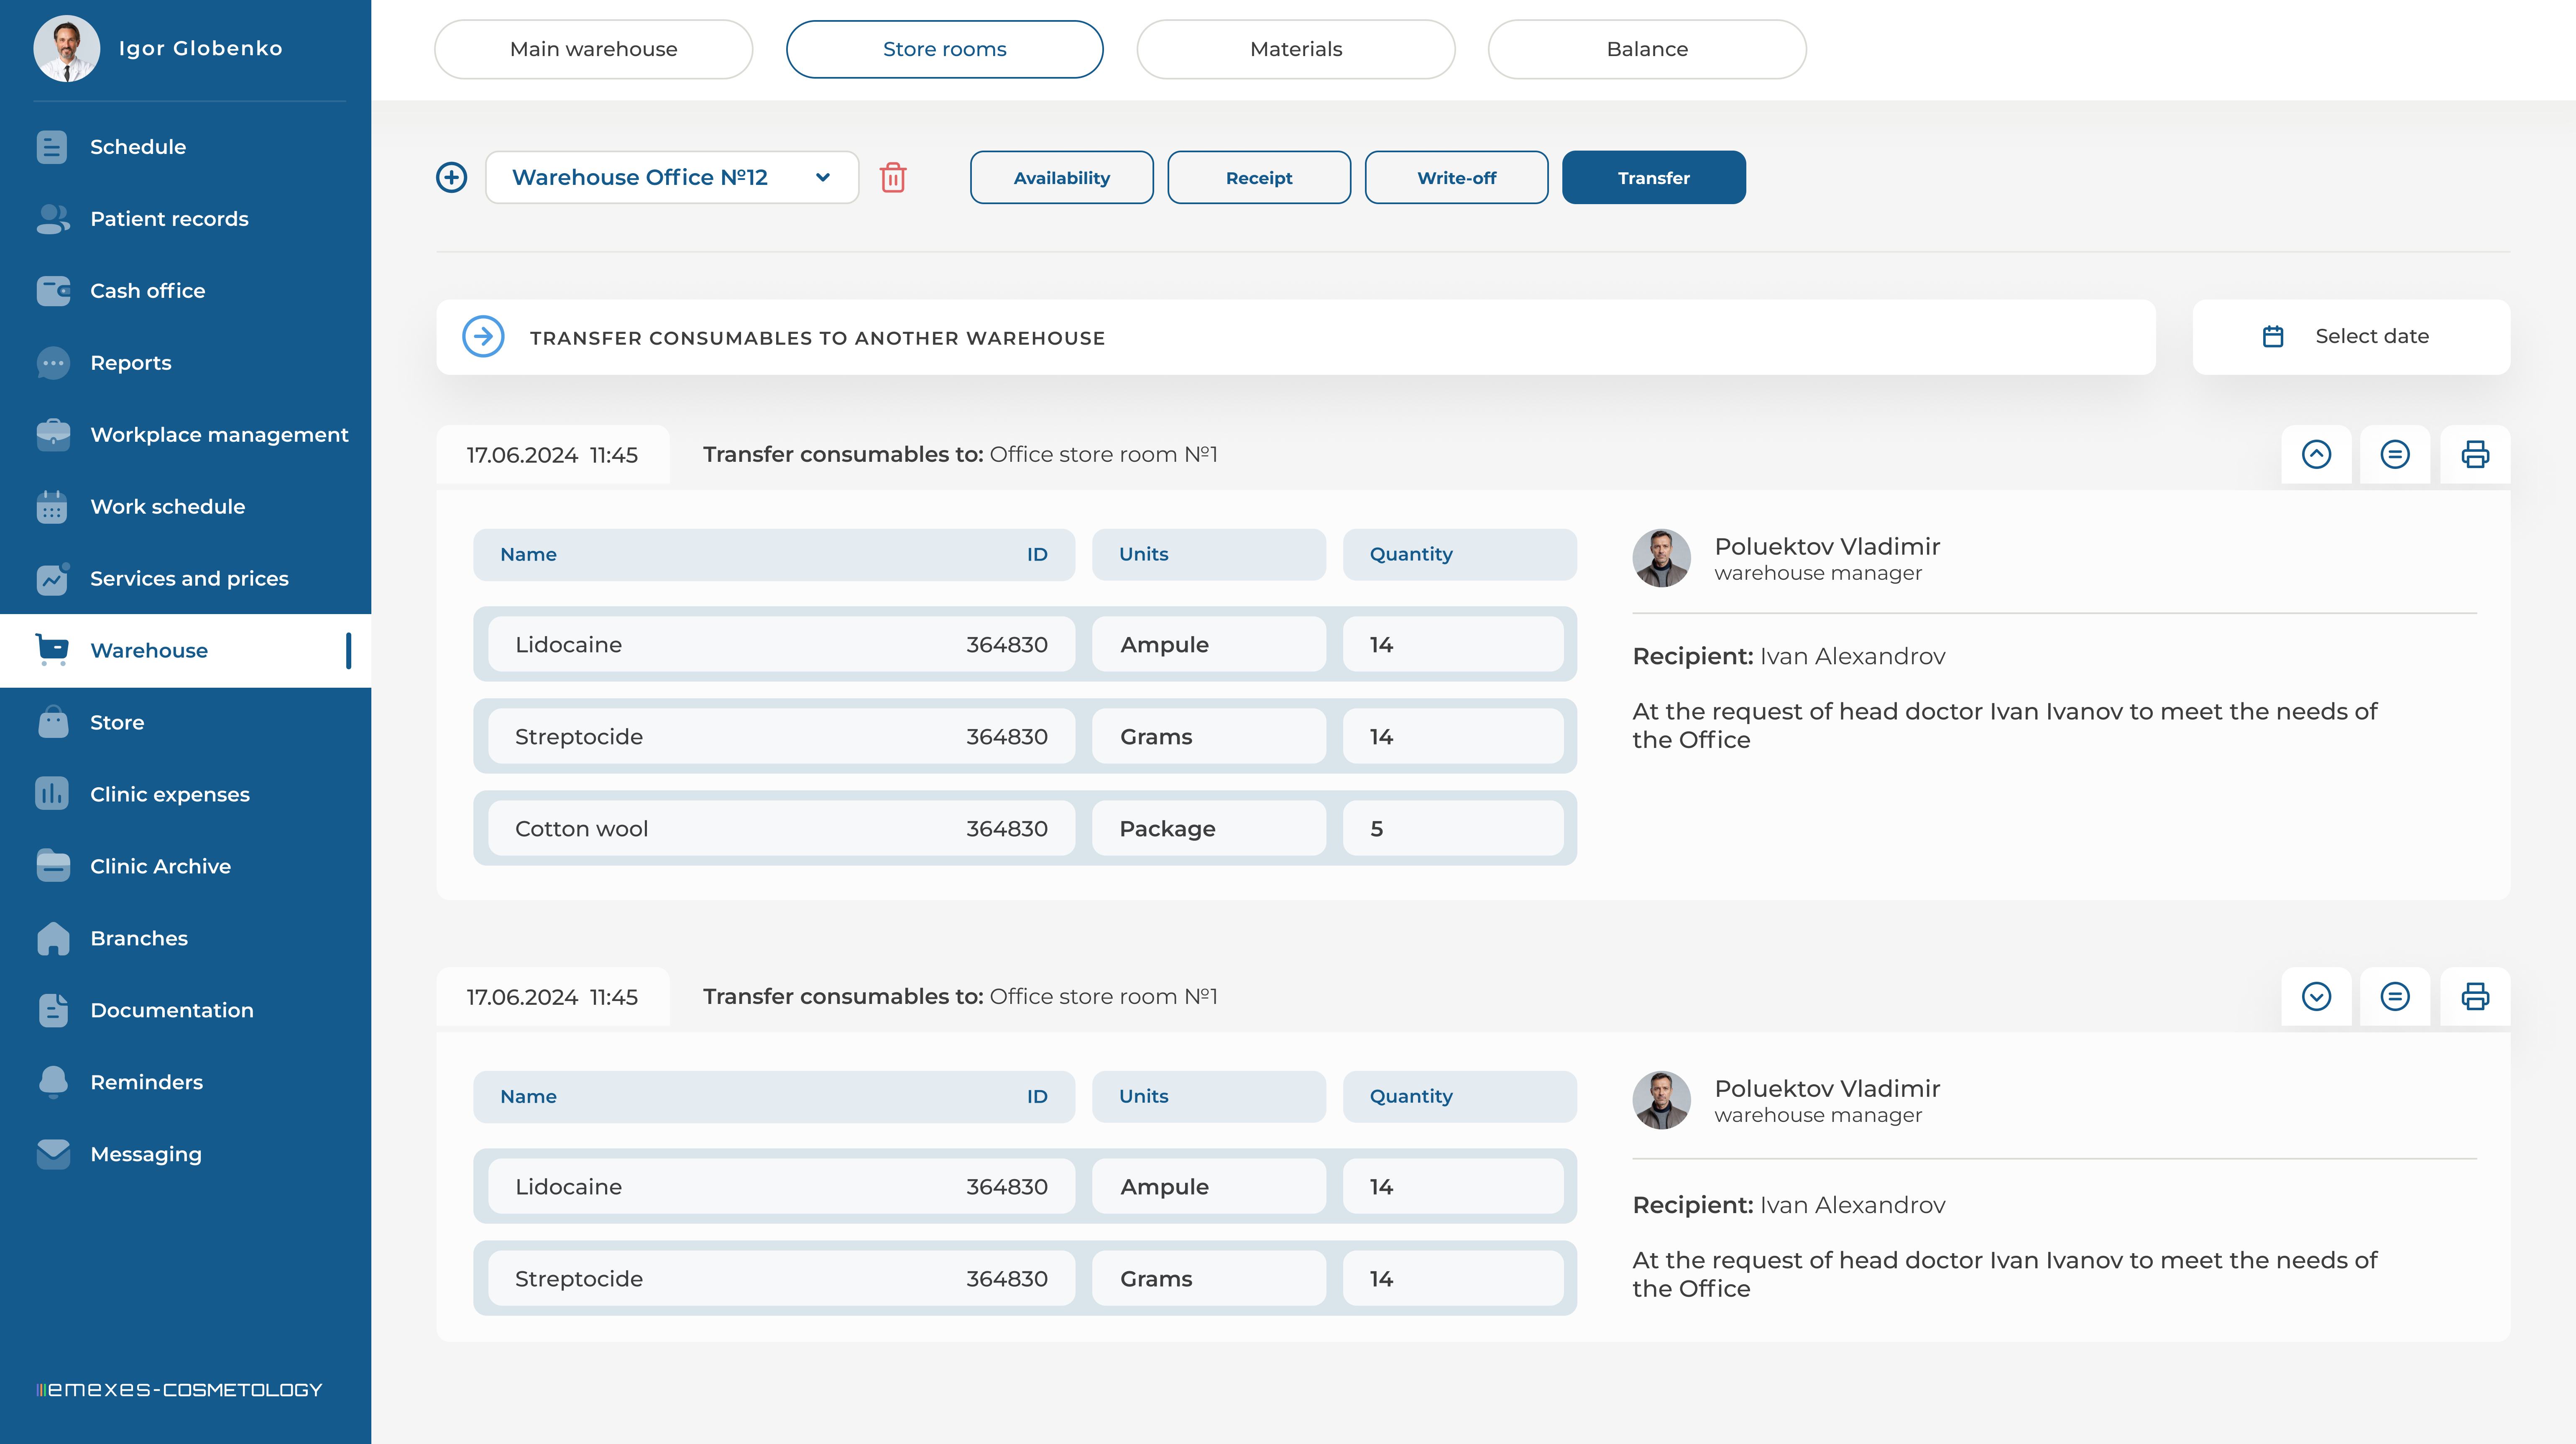
7. MATERIAL TRANSFER FROM THE OFFICE STORE ROOM
The transfer of materials in this section fully corresponds to transfers from the main storage. However, it's important to understand that you cannot return materials to the main storage, as materials at the main storage can only be received from suppliers. In other words, materials can only be transferred from one secondary storage to another secondary storage.
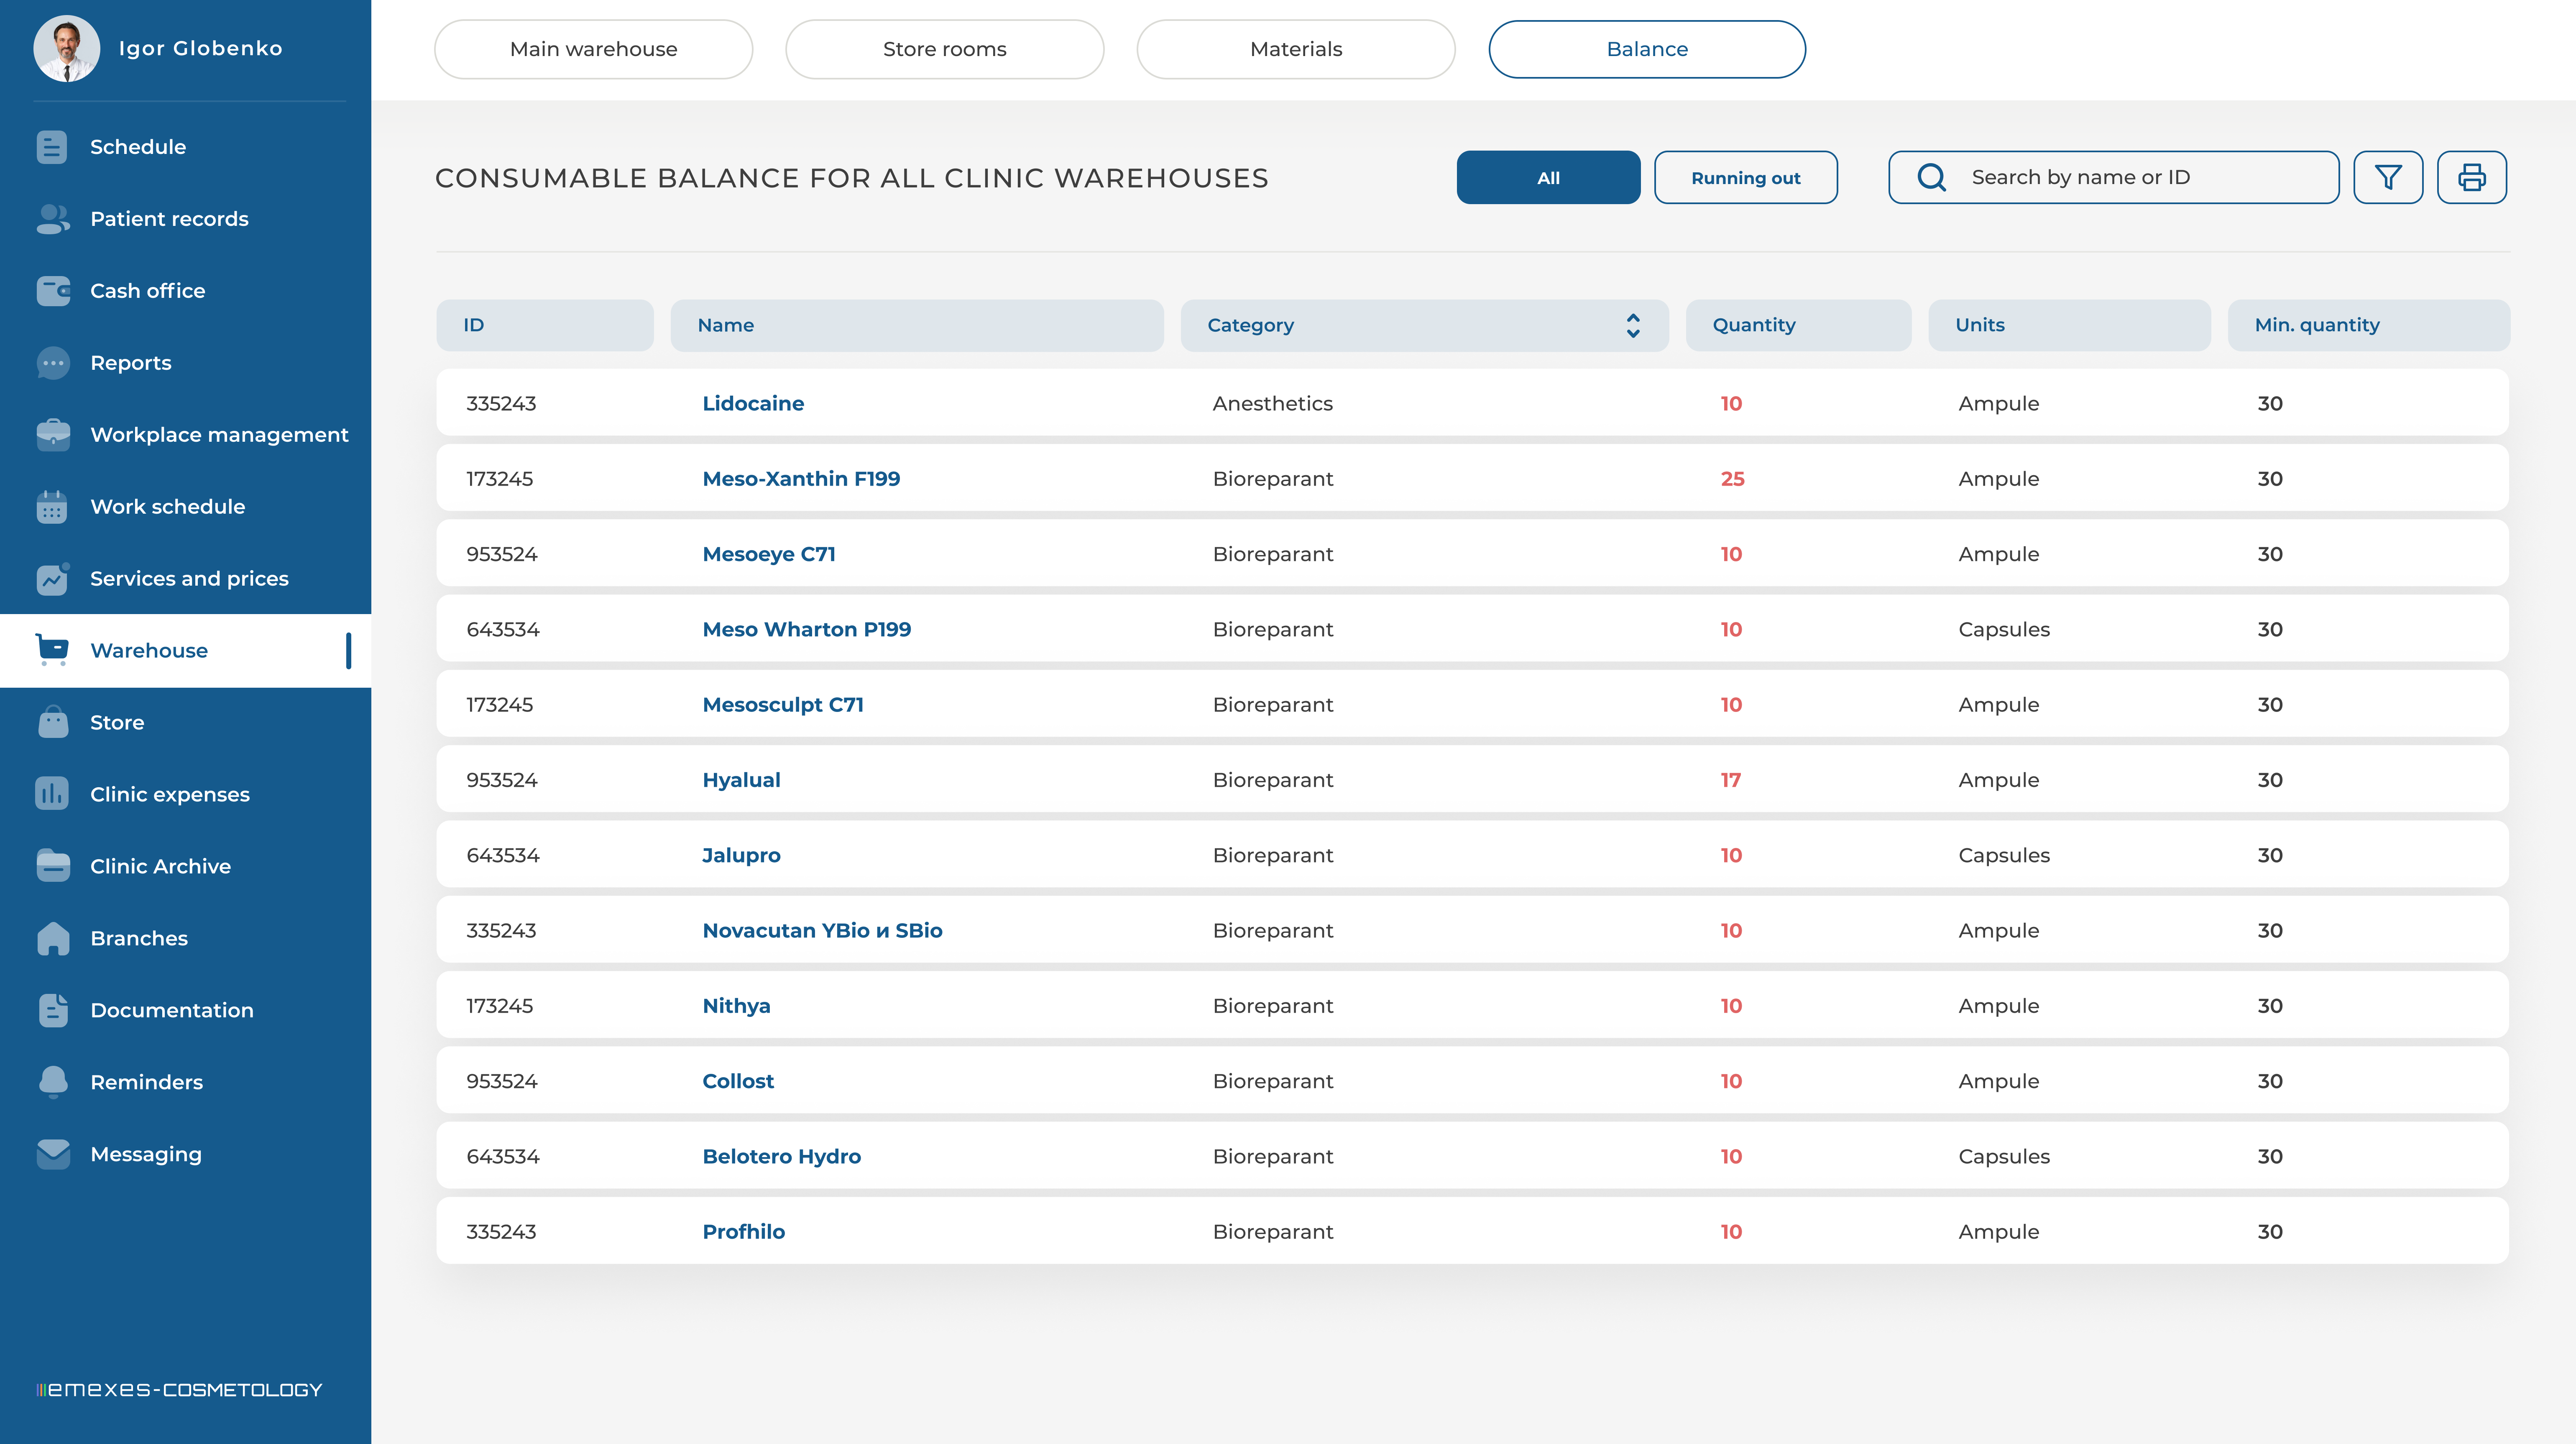
8. MATERIAL BALANCE
In this table, you can see the materials and their total quantity across all of the clinic's storage facilities. To see where these materials are stored and in what quantity, click on the desired item.
To view materials that are running low, click the "RUNNING OUT" button. After that, only materials with quantities below the minimum threshold (as specified earlier in the MATERIALS section under the Storage tab) will be displayed in the list.