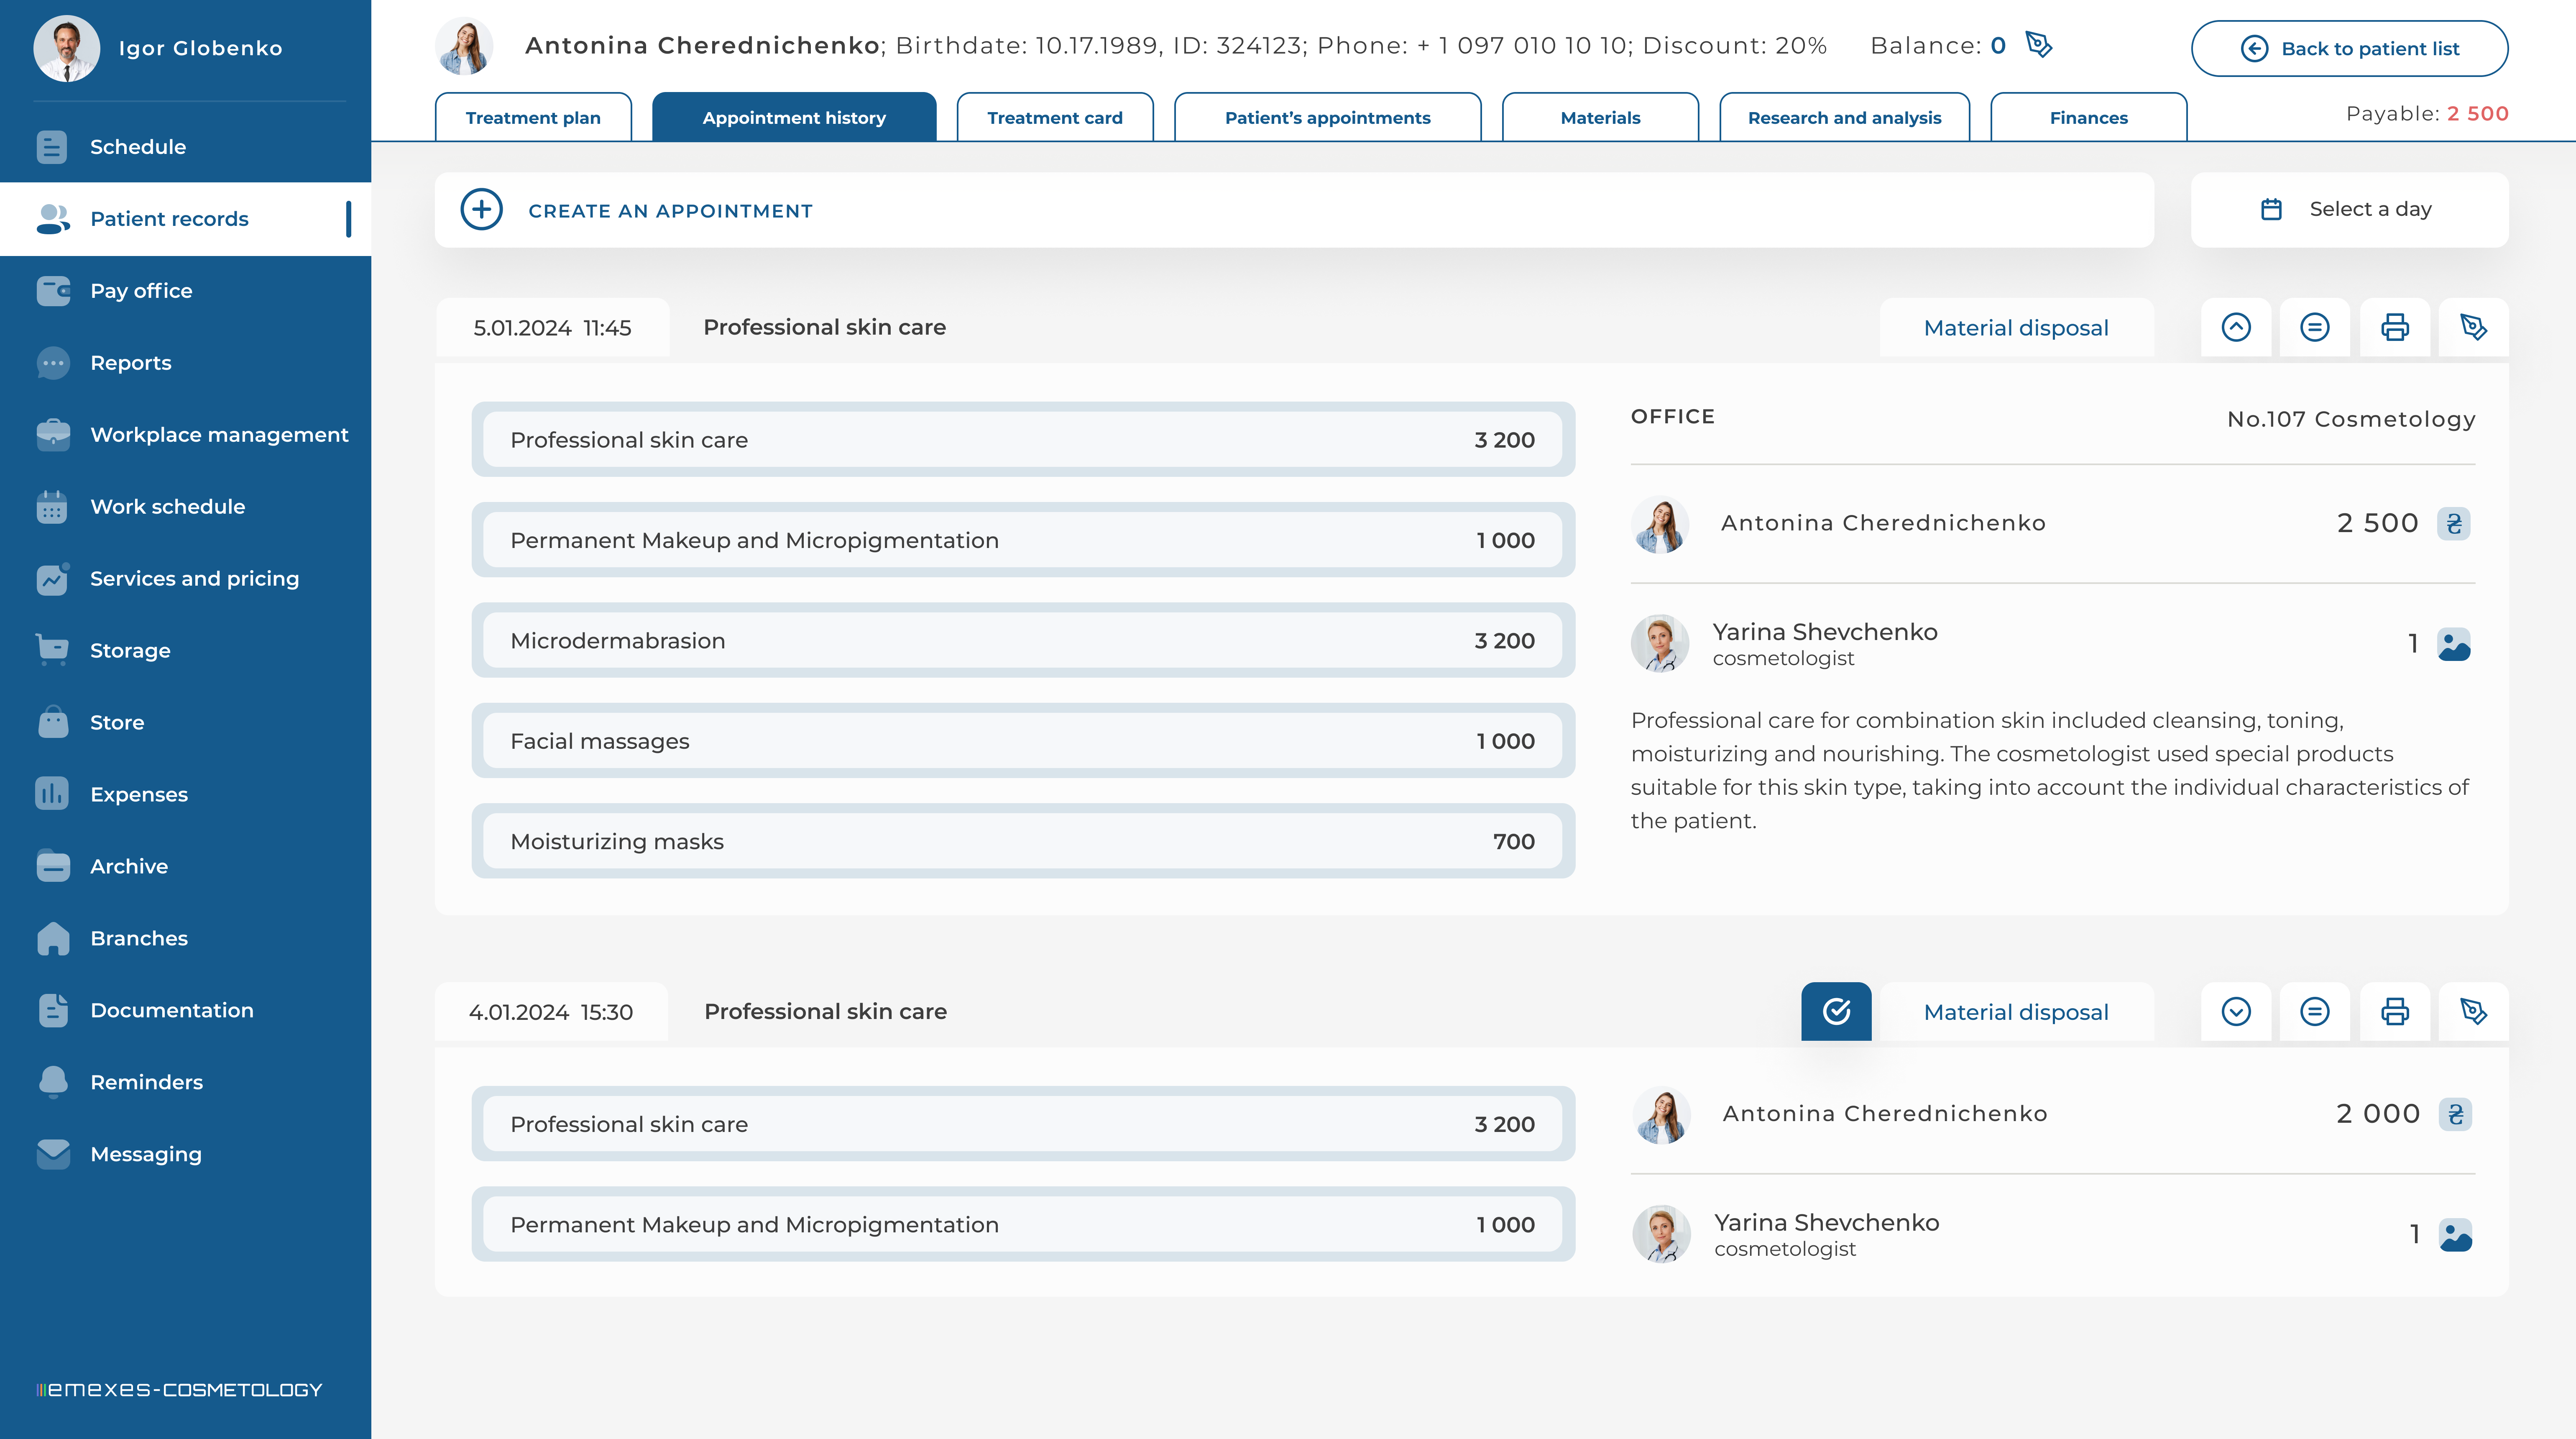
Completed patient appointments are displayed in the "History of Appointments" section. To search for a completed appointment within a specific time period, you can use the "Select Date" button.
Completed appointments are displayed minimized by default, but you can open them for detailed viewing, hide the cost of procedures, and print the appointment.
Completed appointments are included in the statistics of all employees who participated in them. If two or more employees worked on a percentage basis, the value of the procedures performed in the appointment is credited to each employee's salary according to their set percentage of earnings.
"Set Up a Patient Appointment" is a button located above the list of completed appointments. After clicking on it, you will need to provide the following information in the modal window:
- The Doctor admitting the patient, or multiple doctors if necessary.
- An Assistant, if required by the doctor. There may be multiple assistants.
- The Office Number where the appointment will take place.
- A Brief Description of the appointment, which will serve as its title.
Doctors and assistants listed in the modal window have access to edit or remove the appointment.
After you have filled in the above-mentioned data, a modal window for the new patient appointment will open, and a payment for this appointment will be automatically created in the pay office, based on the services rendered to the patient.
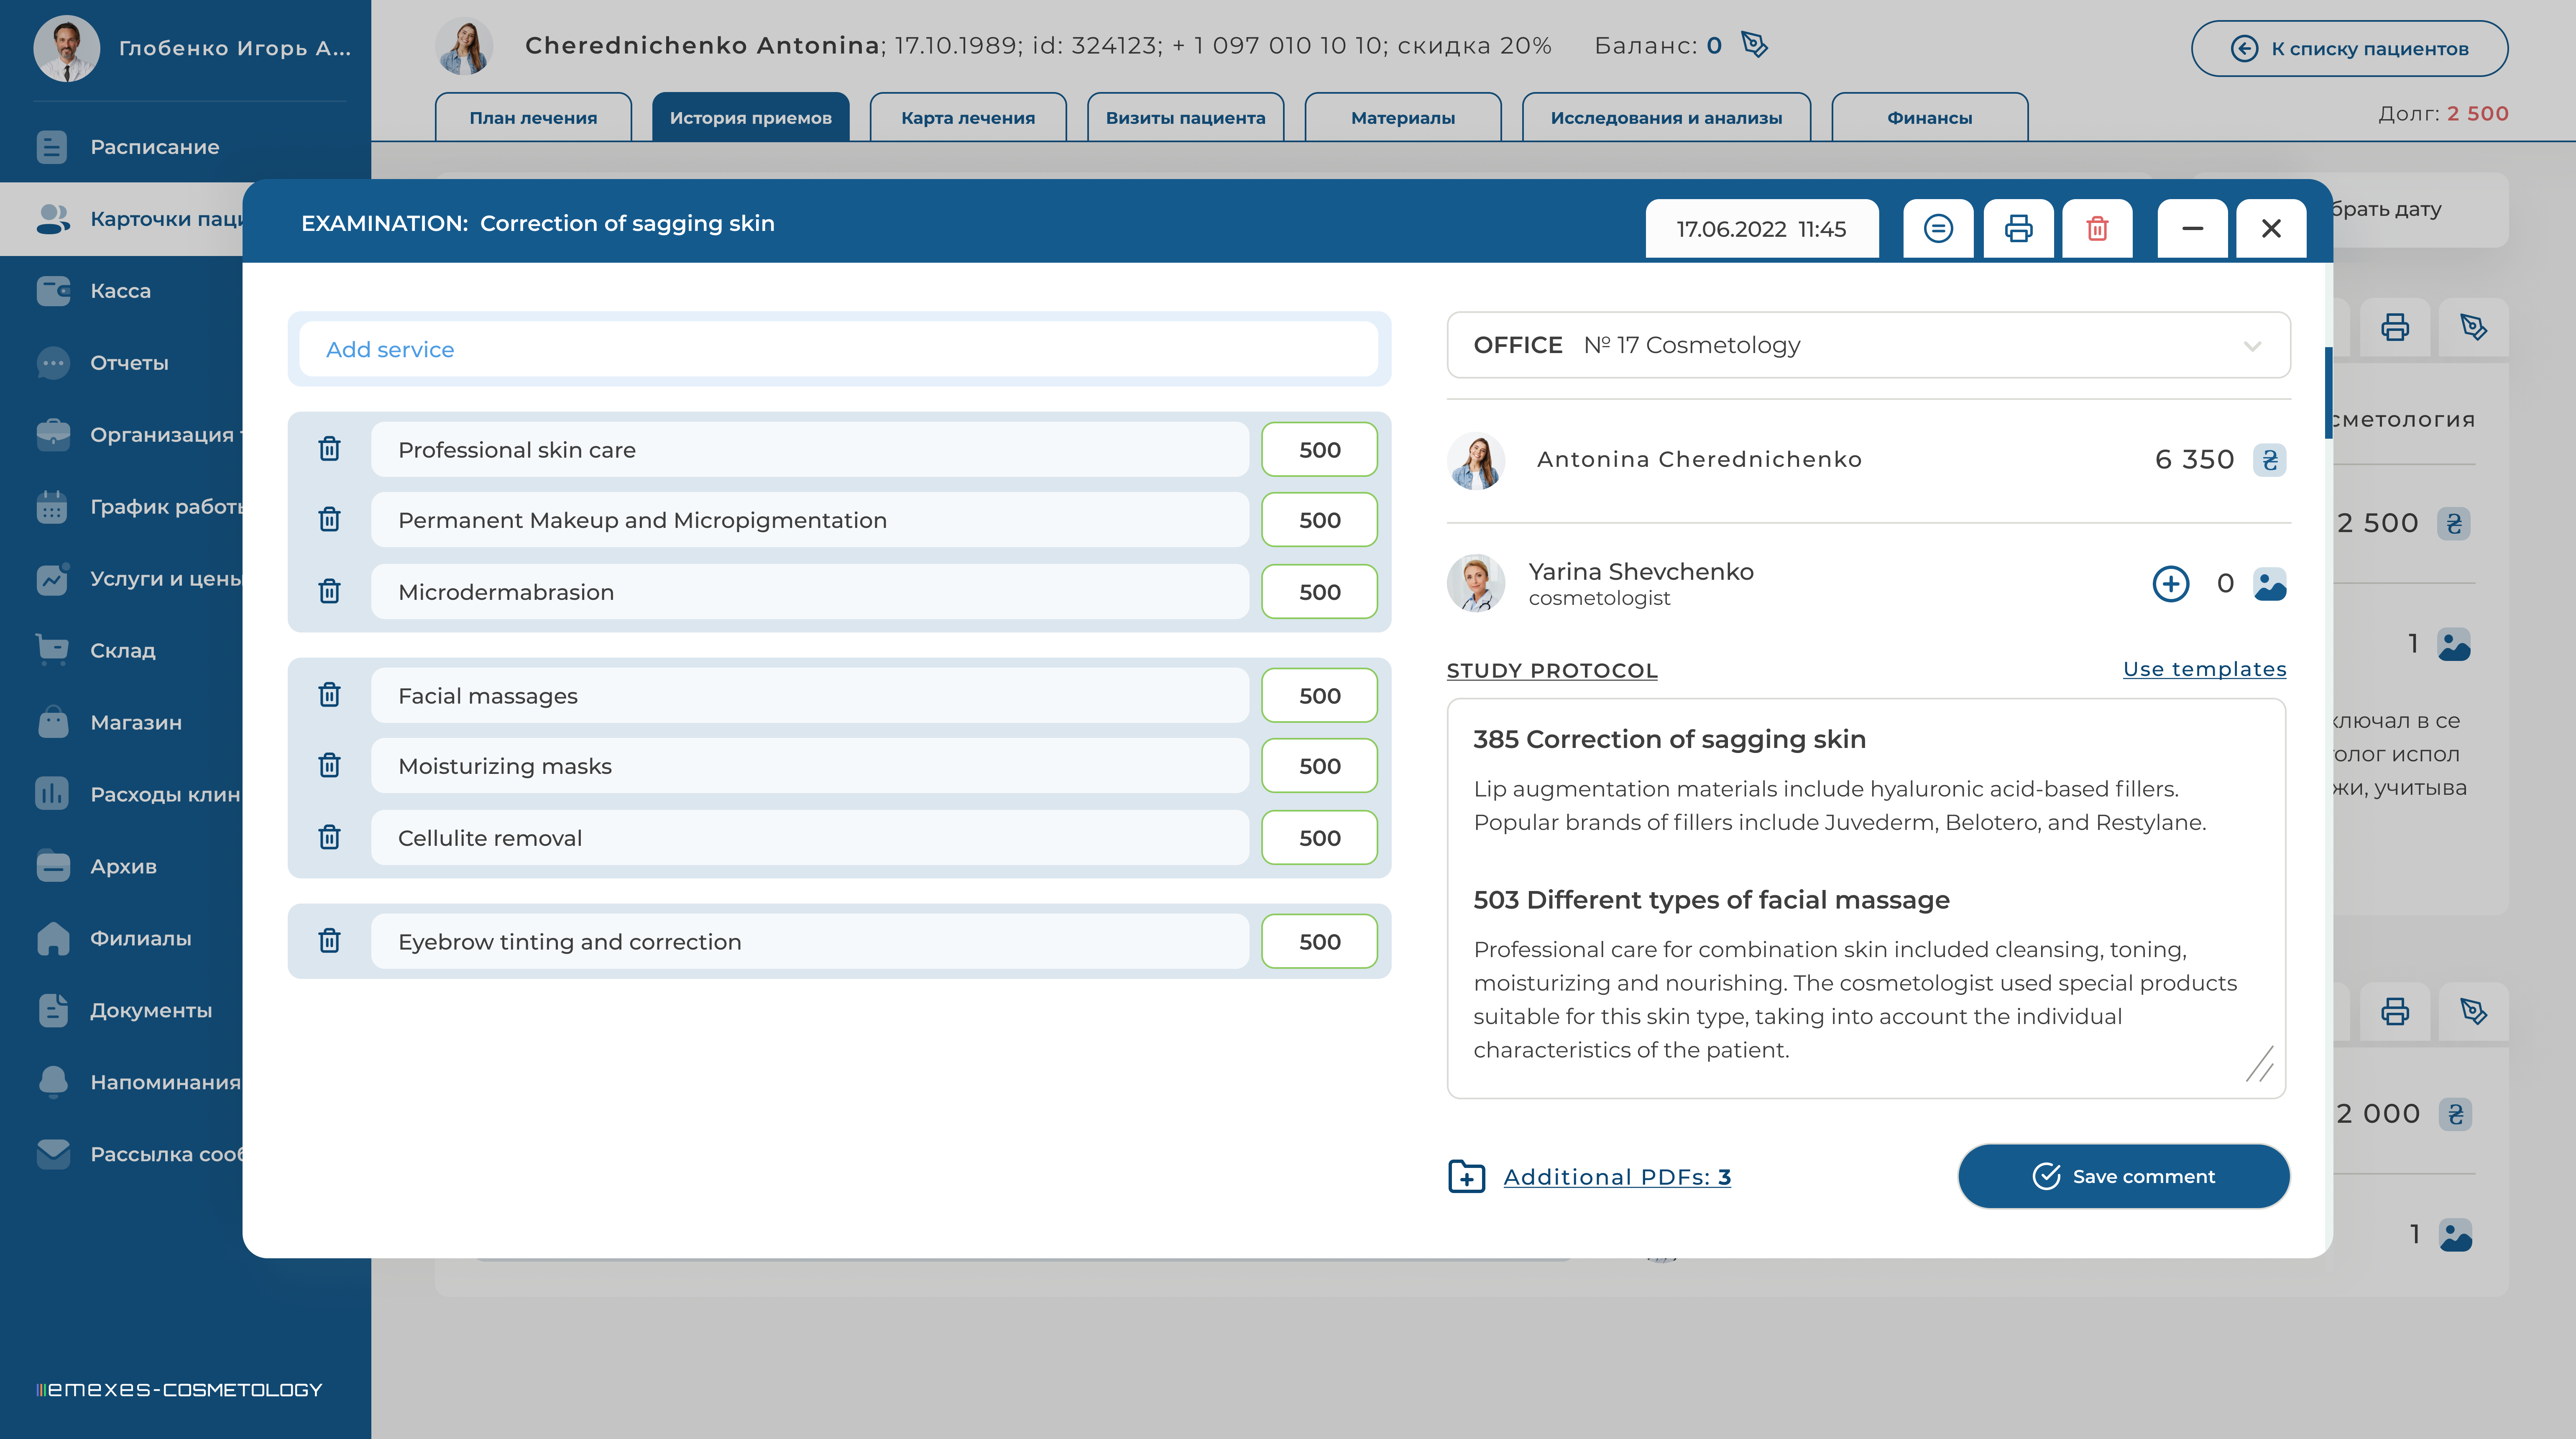
Adding a procedure is done by clicking the "Add Service" button. After that, the list of existing procedures (specified in the "Services and Prices" tab) will open, where you can select the ones you need.
Once all the procedures have been specified, the doctor can add photo materials or test results to the appointment history in "Additional Files." At the end of the appointment, the doctor or assistant can fill in the treatment protocol either manually or by using pre-created templates (see the "Workplace Management/Templates" manual).
Clicking the "Treatment Record" button will open an additional window for your convenience. When creating or editing an appointment, you can minimize its modal window to return to the list of patients or visit another tab. If you close the window, the appointment data will be saved as it was before closing, except for the treatment protocol, which must be confirmed by clicking the "Save" button.
Editing an appointment that hasn’t been paid for is fully available. You can also remove the patient's appointment.
If the patient's appointment has been paid for, it cannot be removed. Additionally, you cannot edit parameters that affect its pricing, but you can change the treatment protocol and edit added files and photos. Paid patient appointments are marked with a green check mark next to the appointment creation date.
You can edit or remove previously paid appointments only after canceling the patient's payment for that appointment.
MATERIAL DISPOSAL
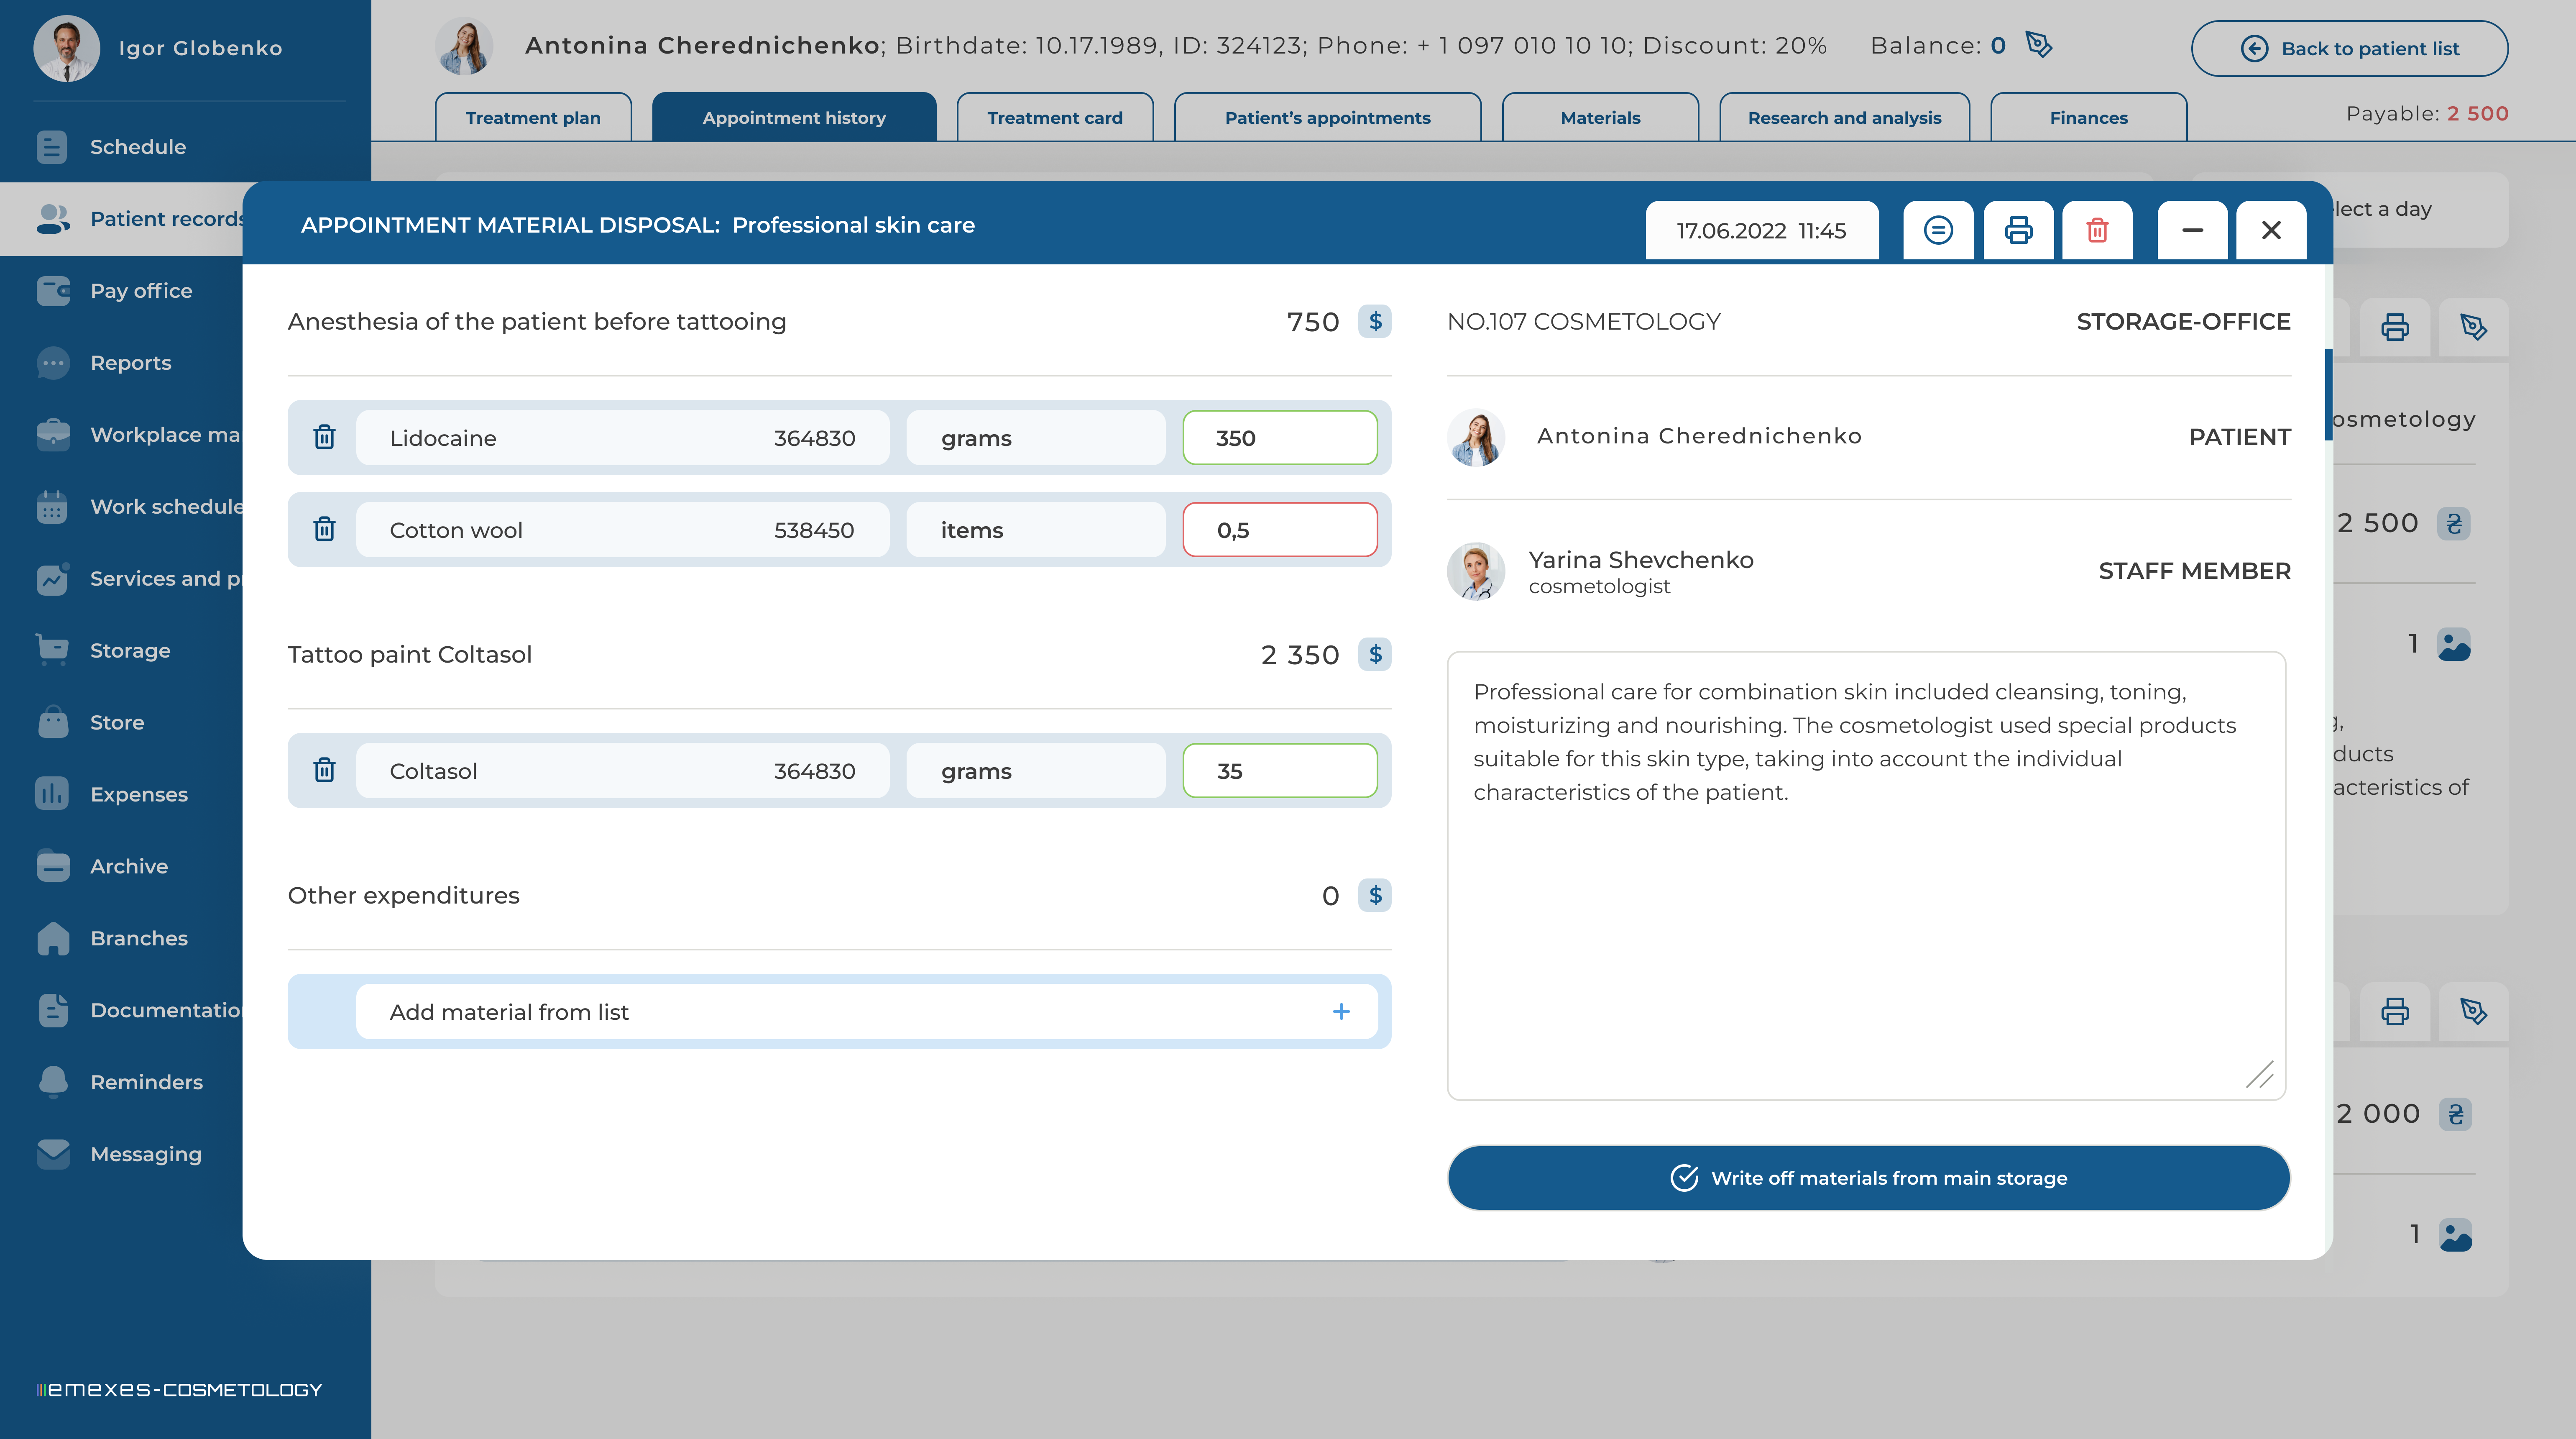
If in the "Services and Prices" tab you have specified the materials used, you will be able to write them off at the end of the appointment. To write off materials, you need to find the specific appointment in the History of Appointments tab and click the "Material Consumption" button.
As a result, a modal window will appear, showing a list of materials used during the appointment. Here you can:
- Edit the amount of materials spent (after changing the default values, the amount of materials spent will be highlighted in red).
- Remove materials from the list if they weren't used.
- Add other materials to the list if you needed additional items.
Before writing off materials, you can leave a comment with a brief explanation of why (for example, if you have written off more materials than expected). When finished, click the "Dispose" button.
Only those who participated in the appointment (assistant or doctor) can write off materials for the appointment. You can edit material disposals in the "Storage" tab. The positions that have access to edit material disposals are determined by the clinic manager and assigned in the "Workplace Management / Access Levels" tab.
Appointments with materials disposed will be marked with a green check mark next to the "Material Consumption" button.
In a clinic with secondary storage, the main prerequisite for successful material disposal is the presence of a store room in the office where the appointment took place (see the "Storage / Store Rooms" manual).