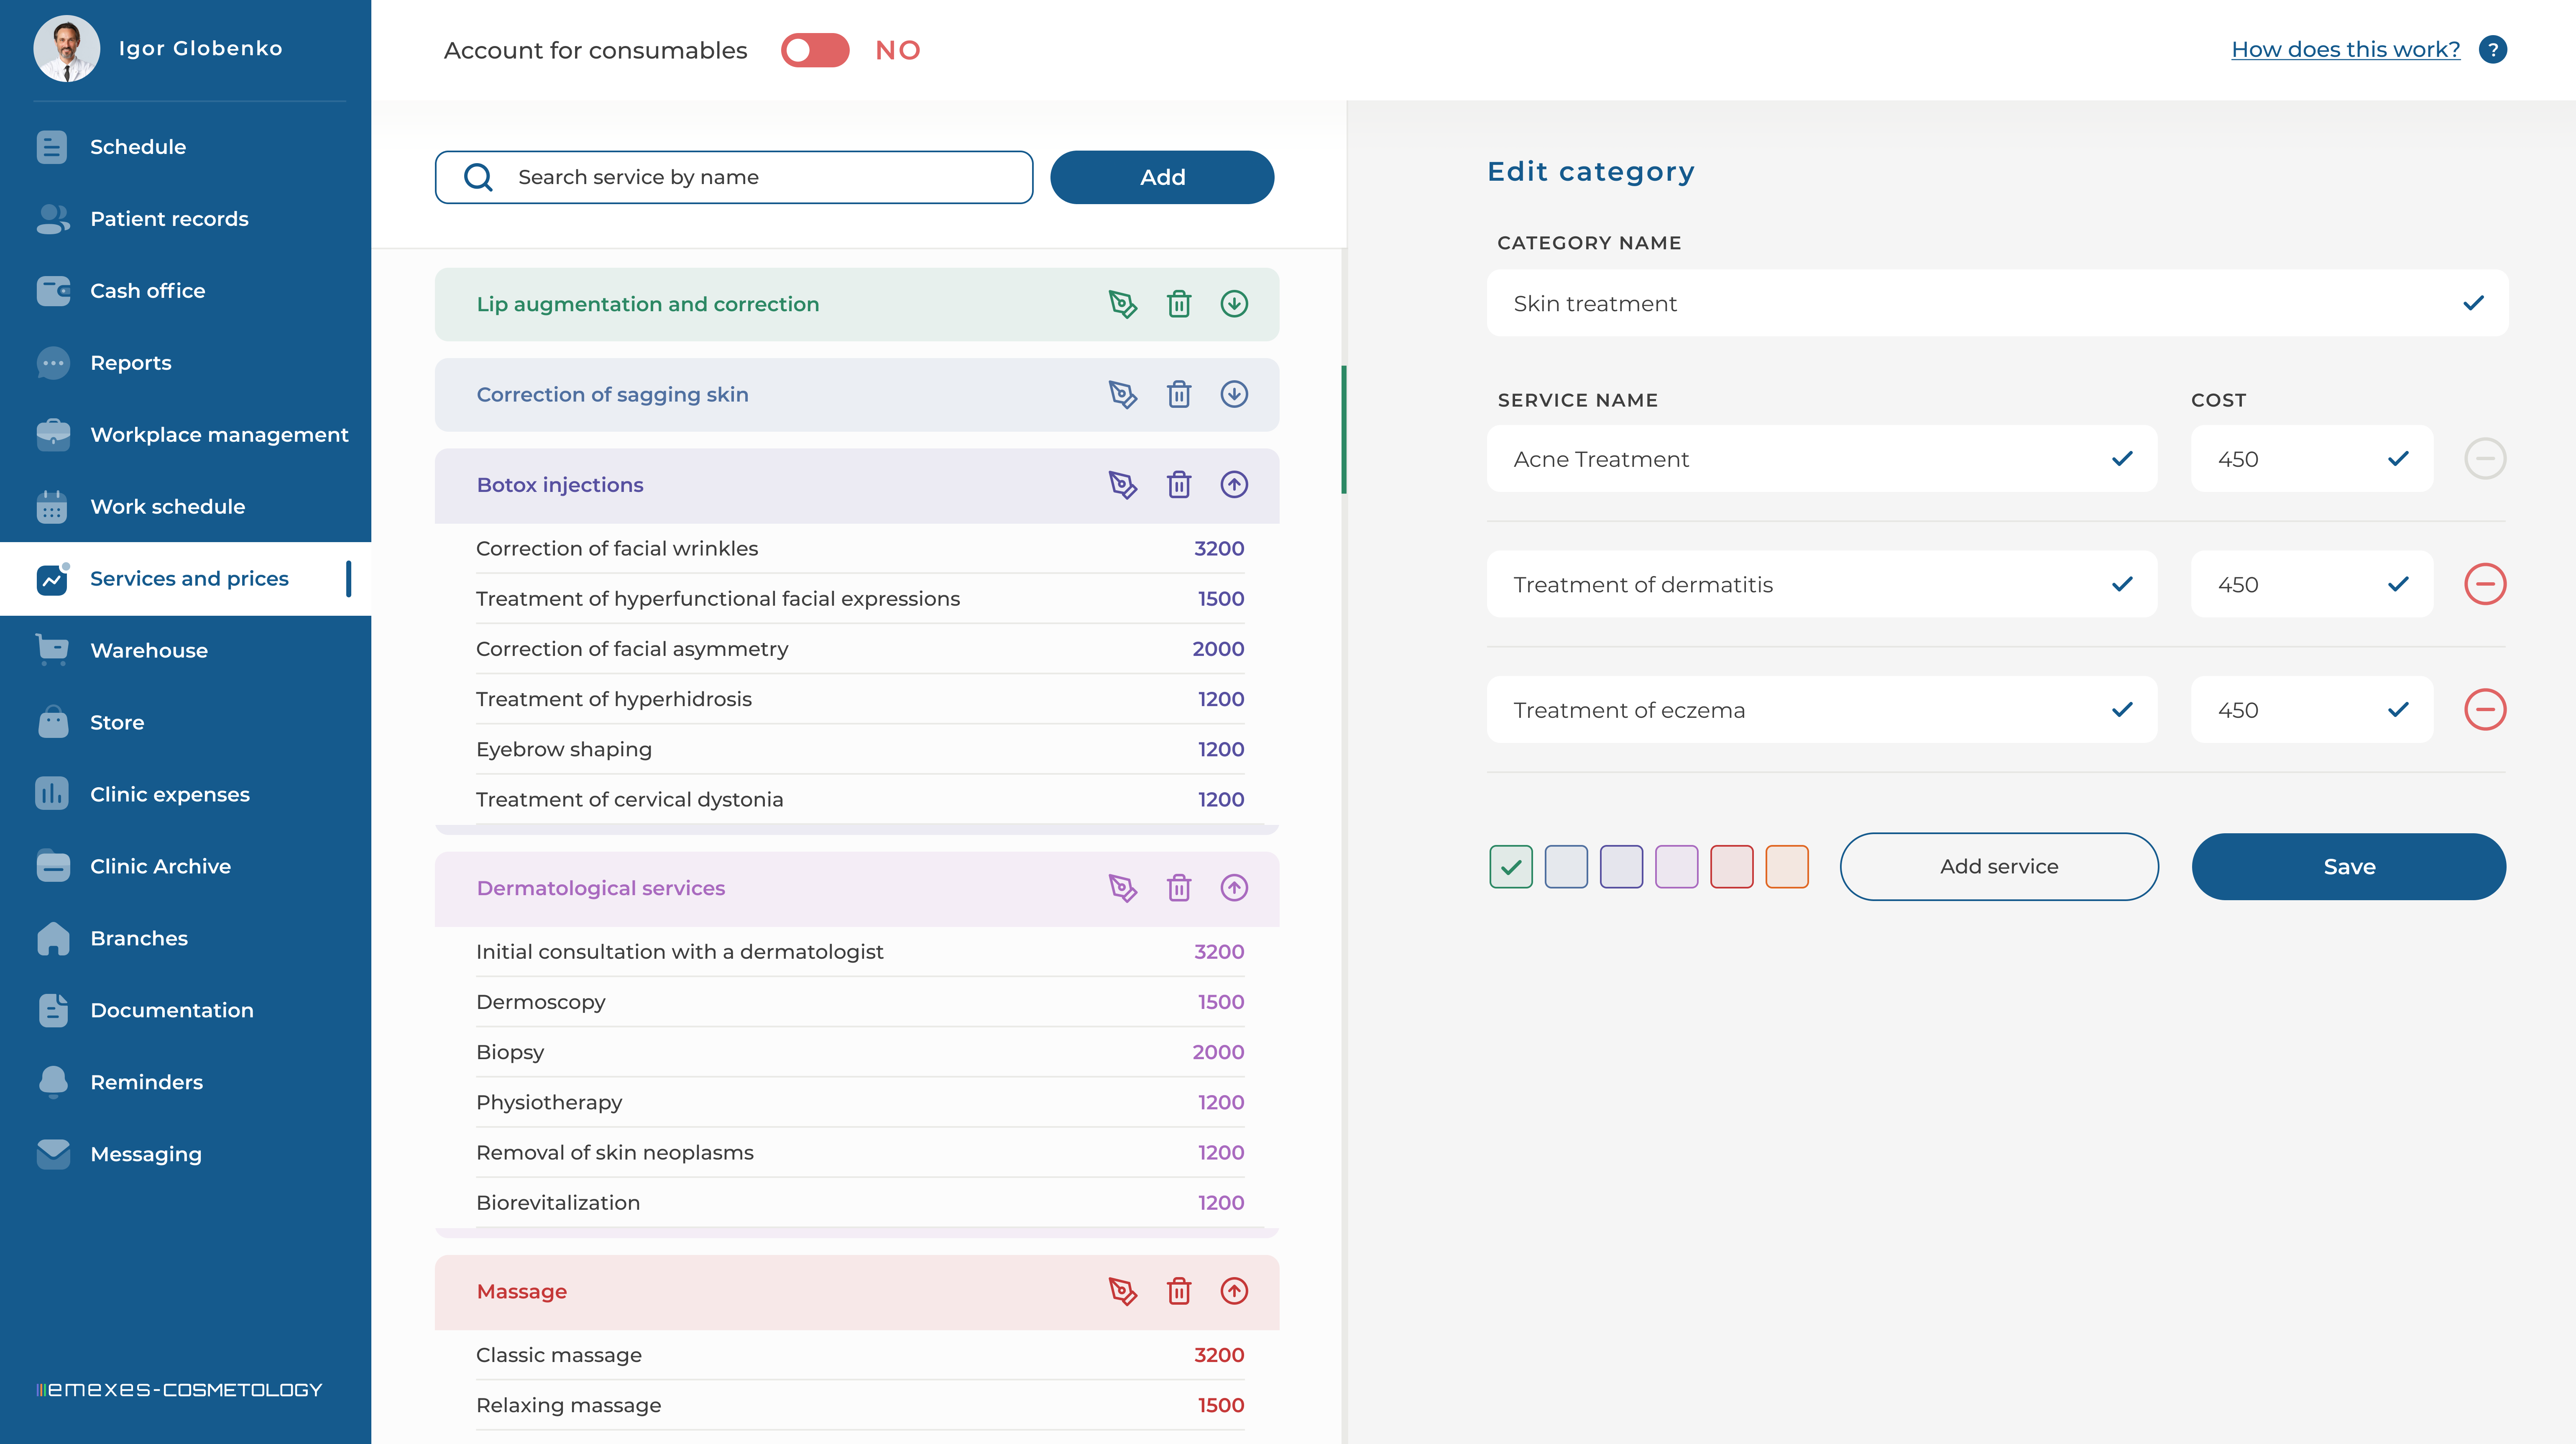
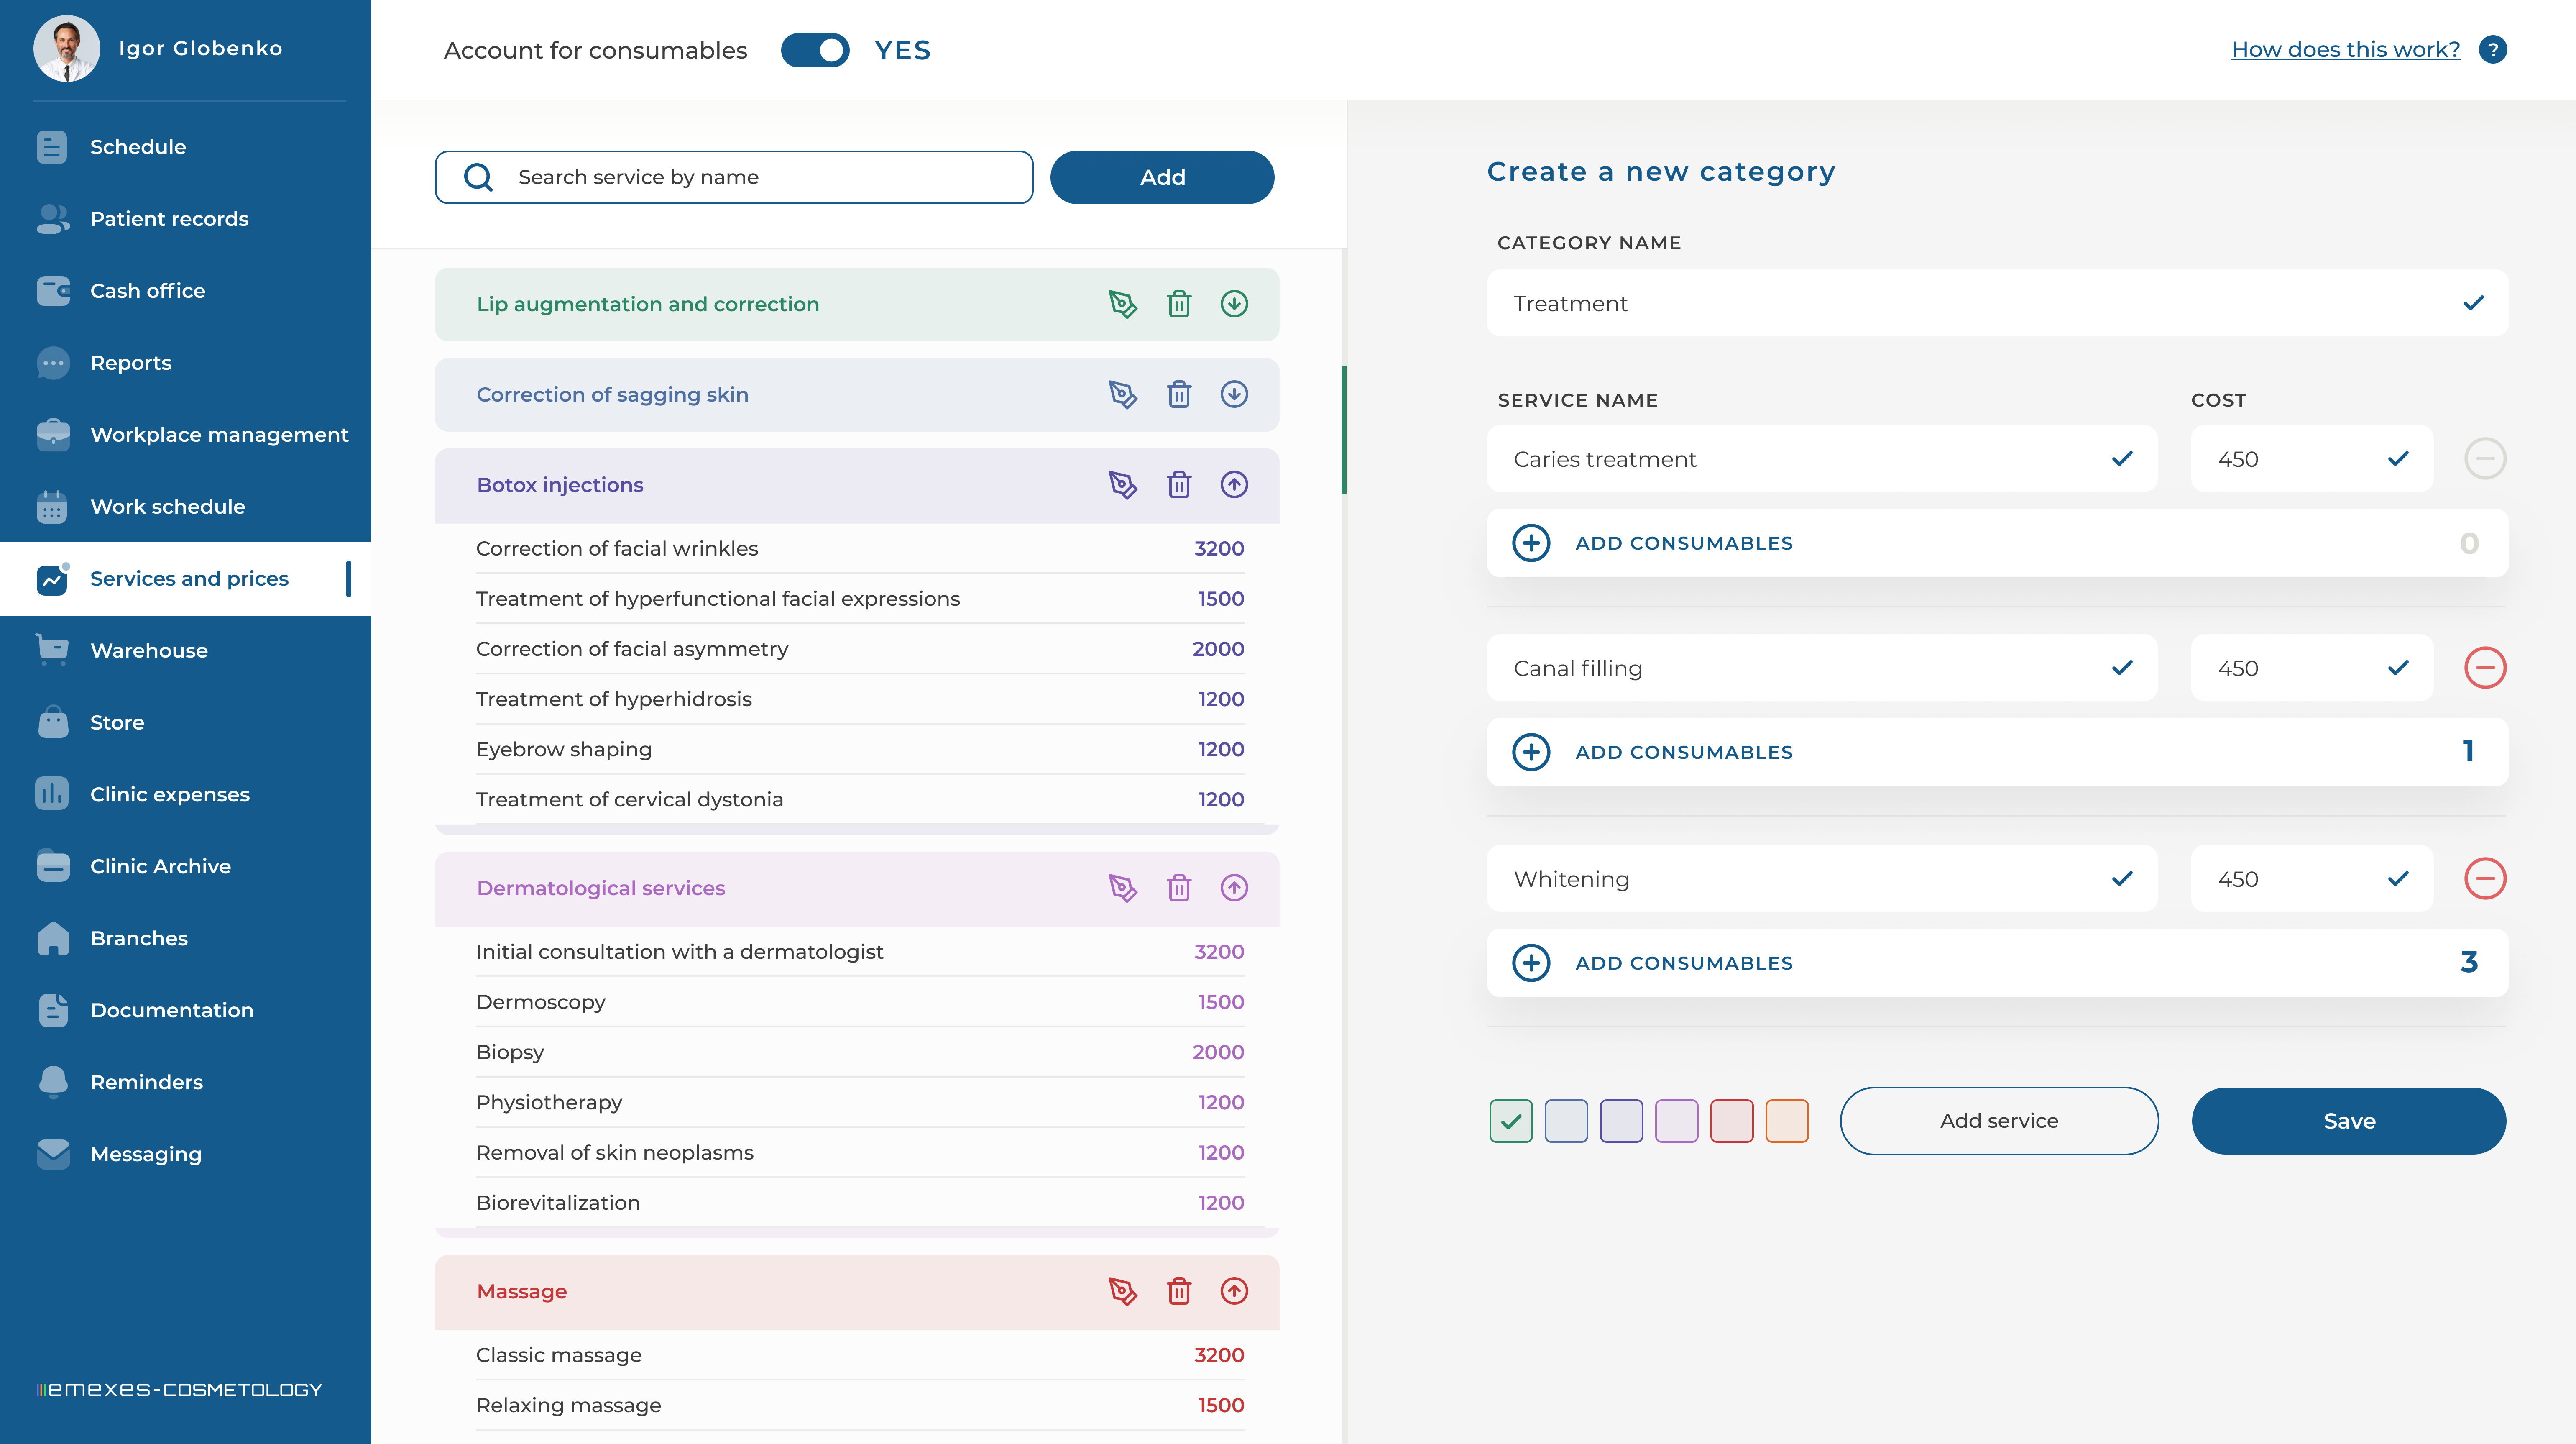
1. ADDING CATEGORIES AND SERVICES
Each service is added individually within a pre-existing category. To create a new list of services, the clinic administrator must enter the name of the category to which these services will belong, then provide the name of each service and its cost in the right part of the screen. To add each new service, click the "Add more" button. There is no limit to the number of services within a single category.
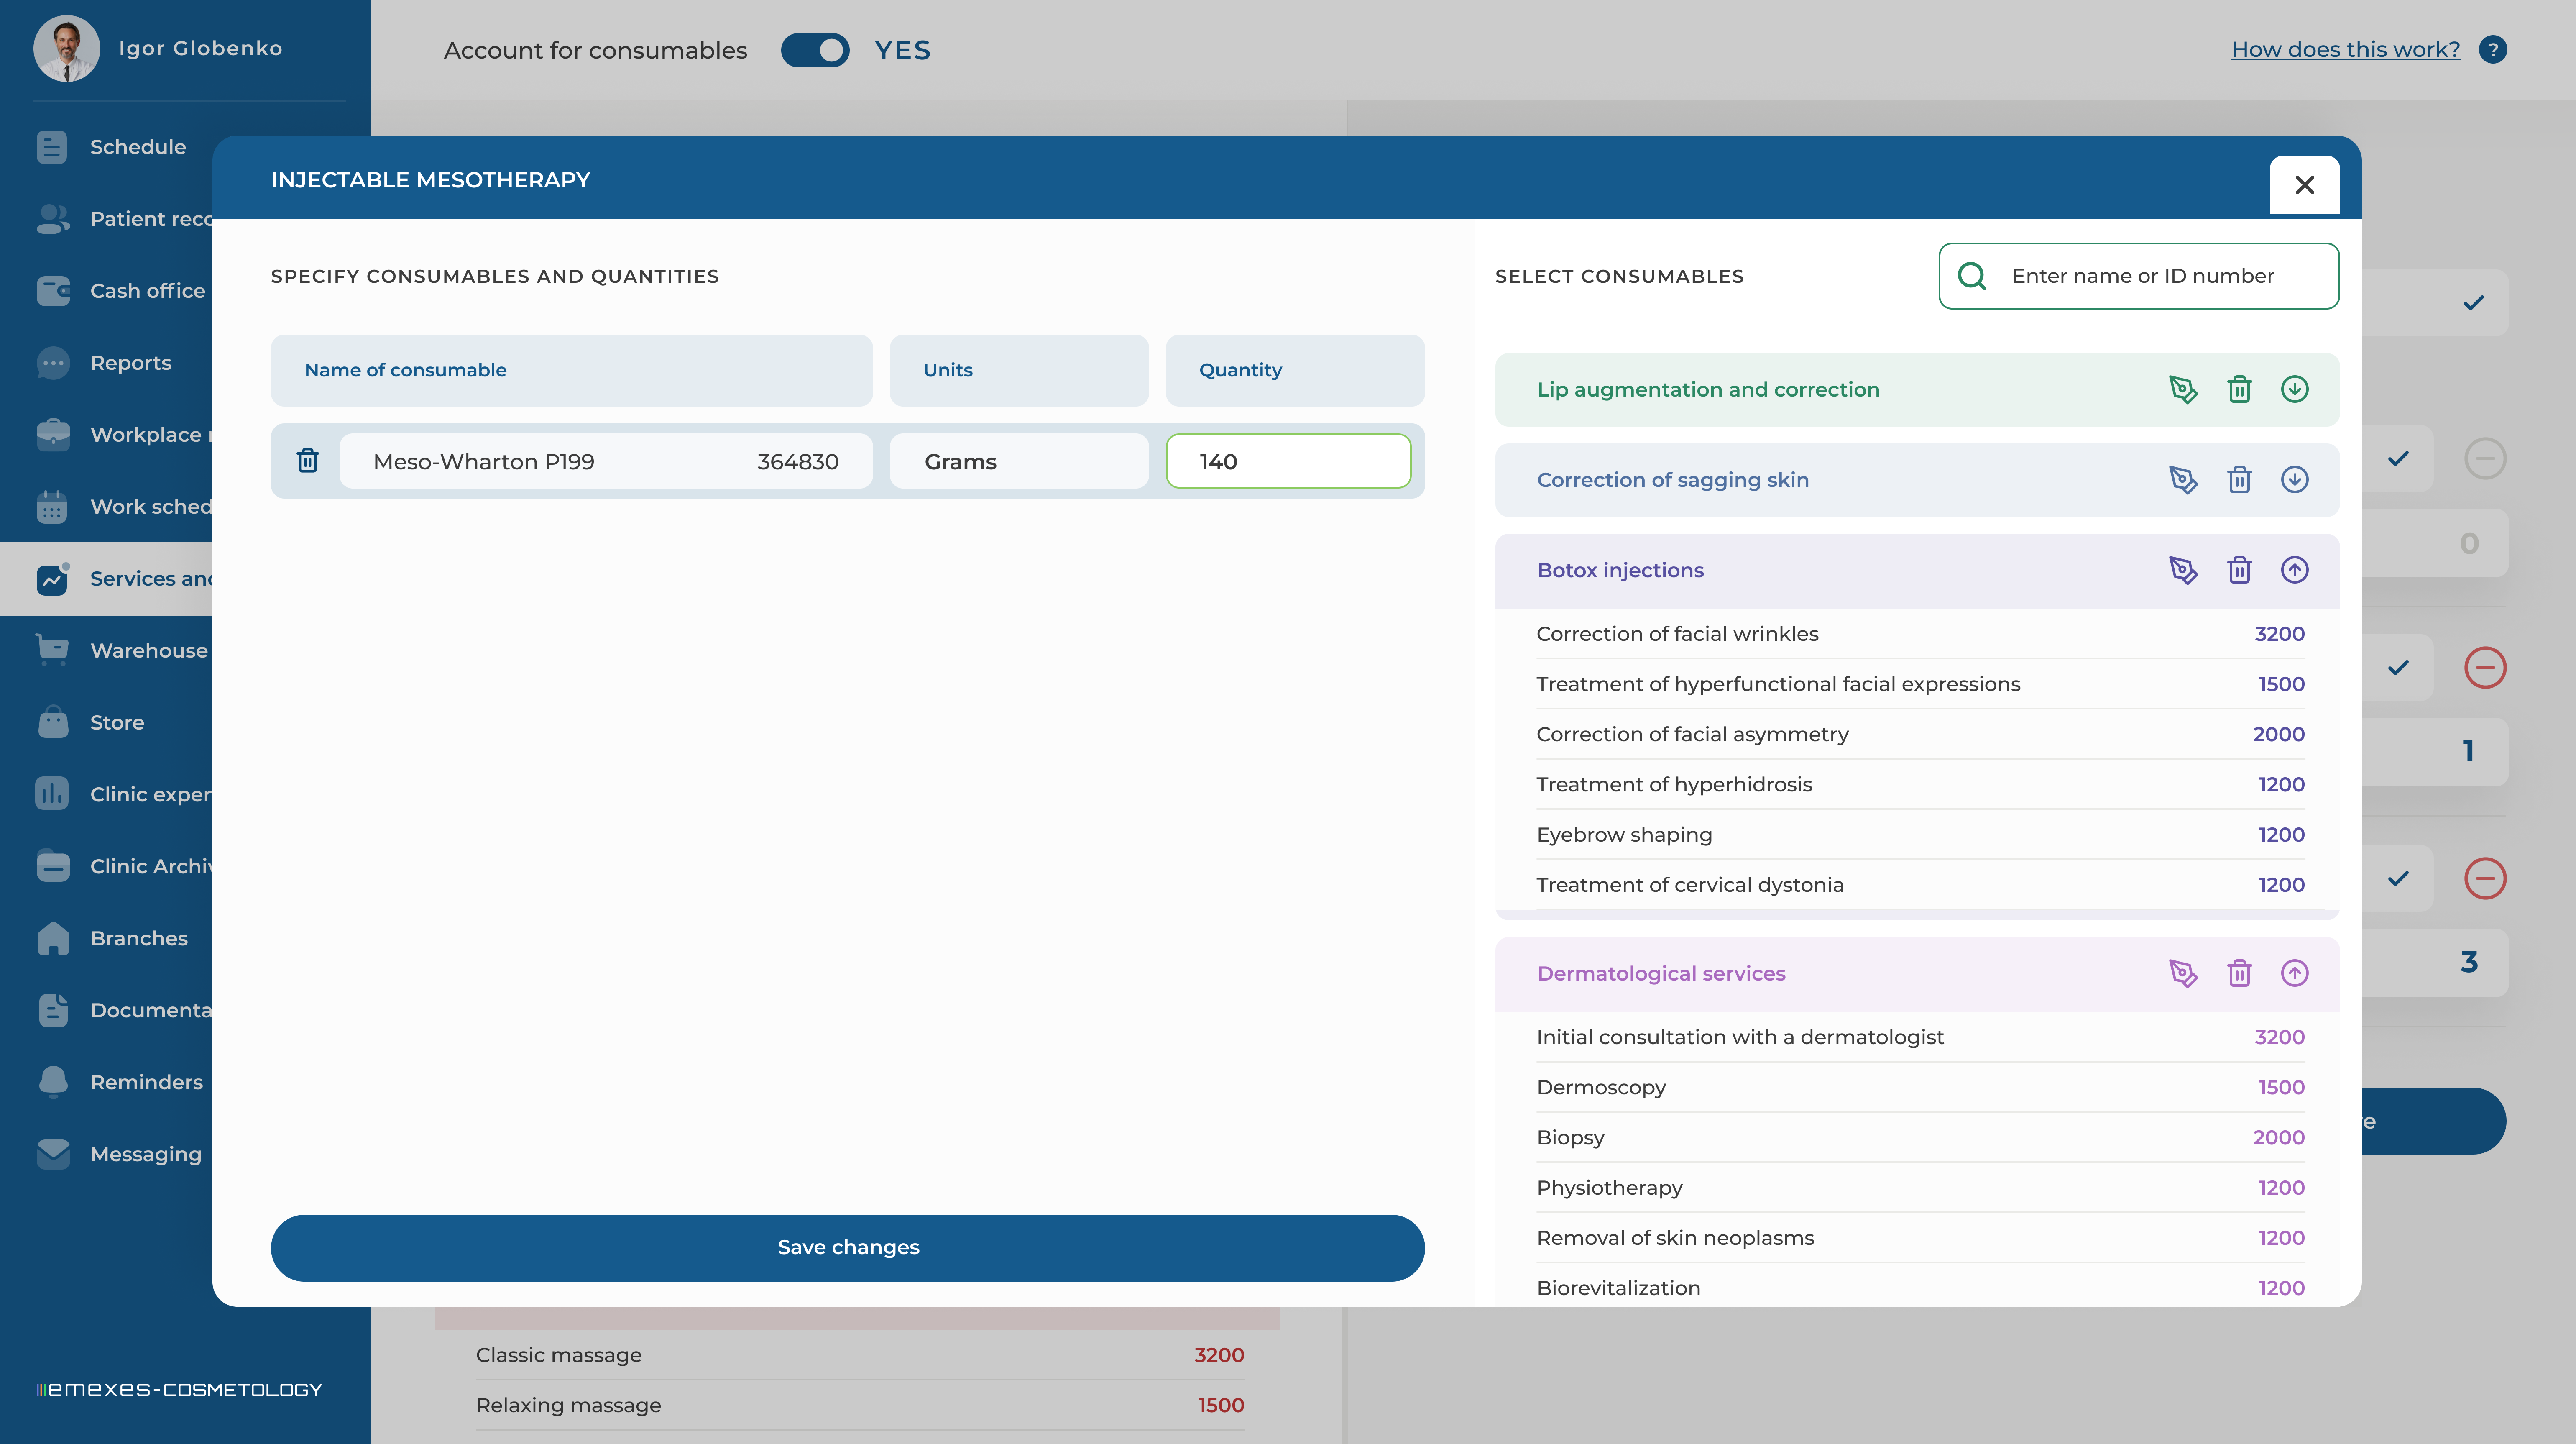
You can also add consumables for each service, enabling the doctor to quickly write off the consumables from their store room at the end of the appointment with just a few clicks. When adding consumables, specify the quantity required to perform the particular service. If this feature is not needed, you can disable it by moving the slider to the "DO NOT ACCOUNT" position in the Services and Prices tab.
P.S. All materials used during services must first be created in the "Warehouse" tab.
Once you've finished adding services and their prices, assign a color to the category to visually differentiate it from other service categories, and then click "Save." If you've previously accessed the category editing menu but want to add a new category, simply click "Add" next to the service search bar, and the menu for adding a new category will appear on the right side of the page.
2. EDITING
To change the color of a category, add a service, or modify its price or name, click the edit icon next to the desired category. You can also remove services from categories here, but remember that each category must contain at least one service. On the left side of the screen, you can adjust the order in which categories and services are displayed, and also remove an entire category. All of these actions directly affect the service selection tab when creating an appointment and will change the order in which categories are displayed there.