1. CLINIC OFFICES
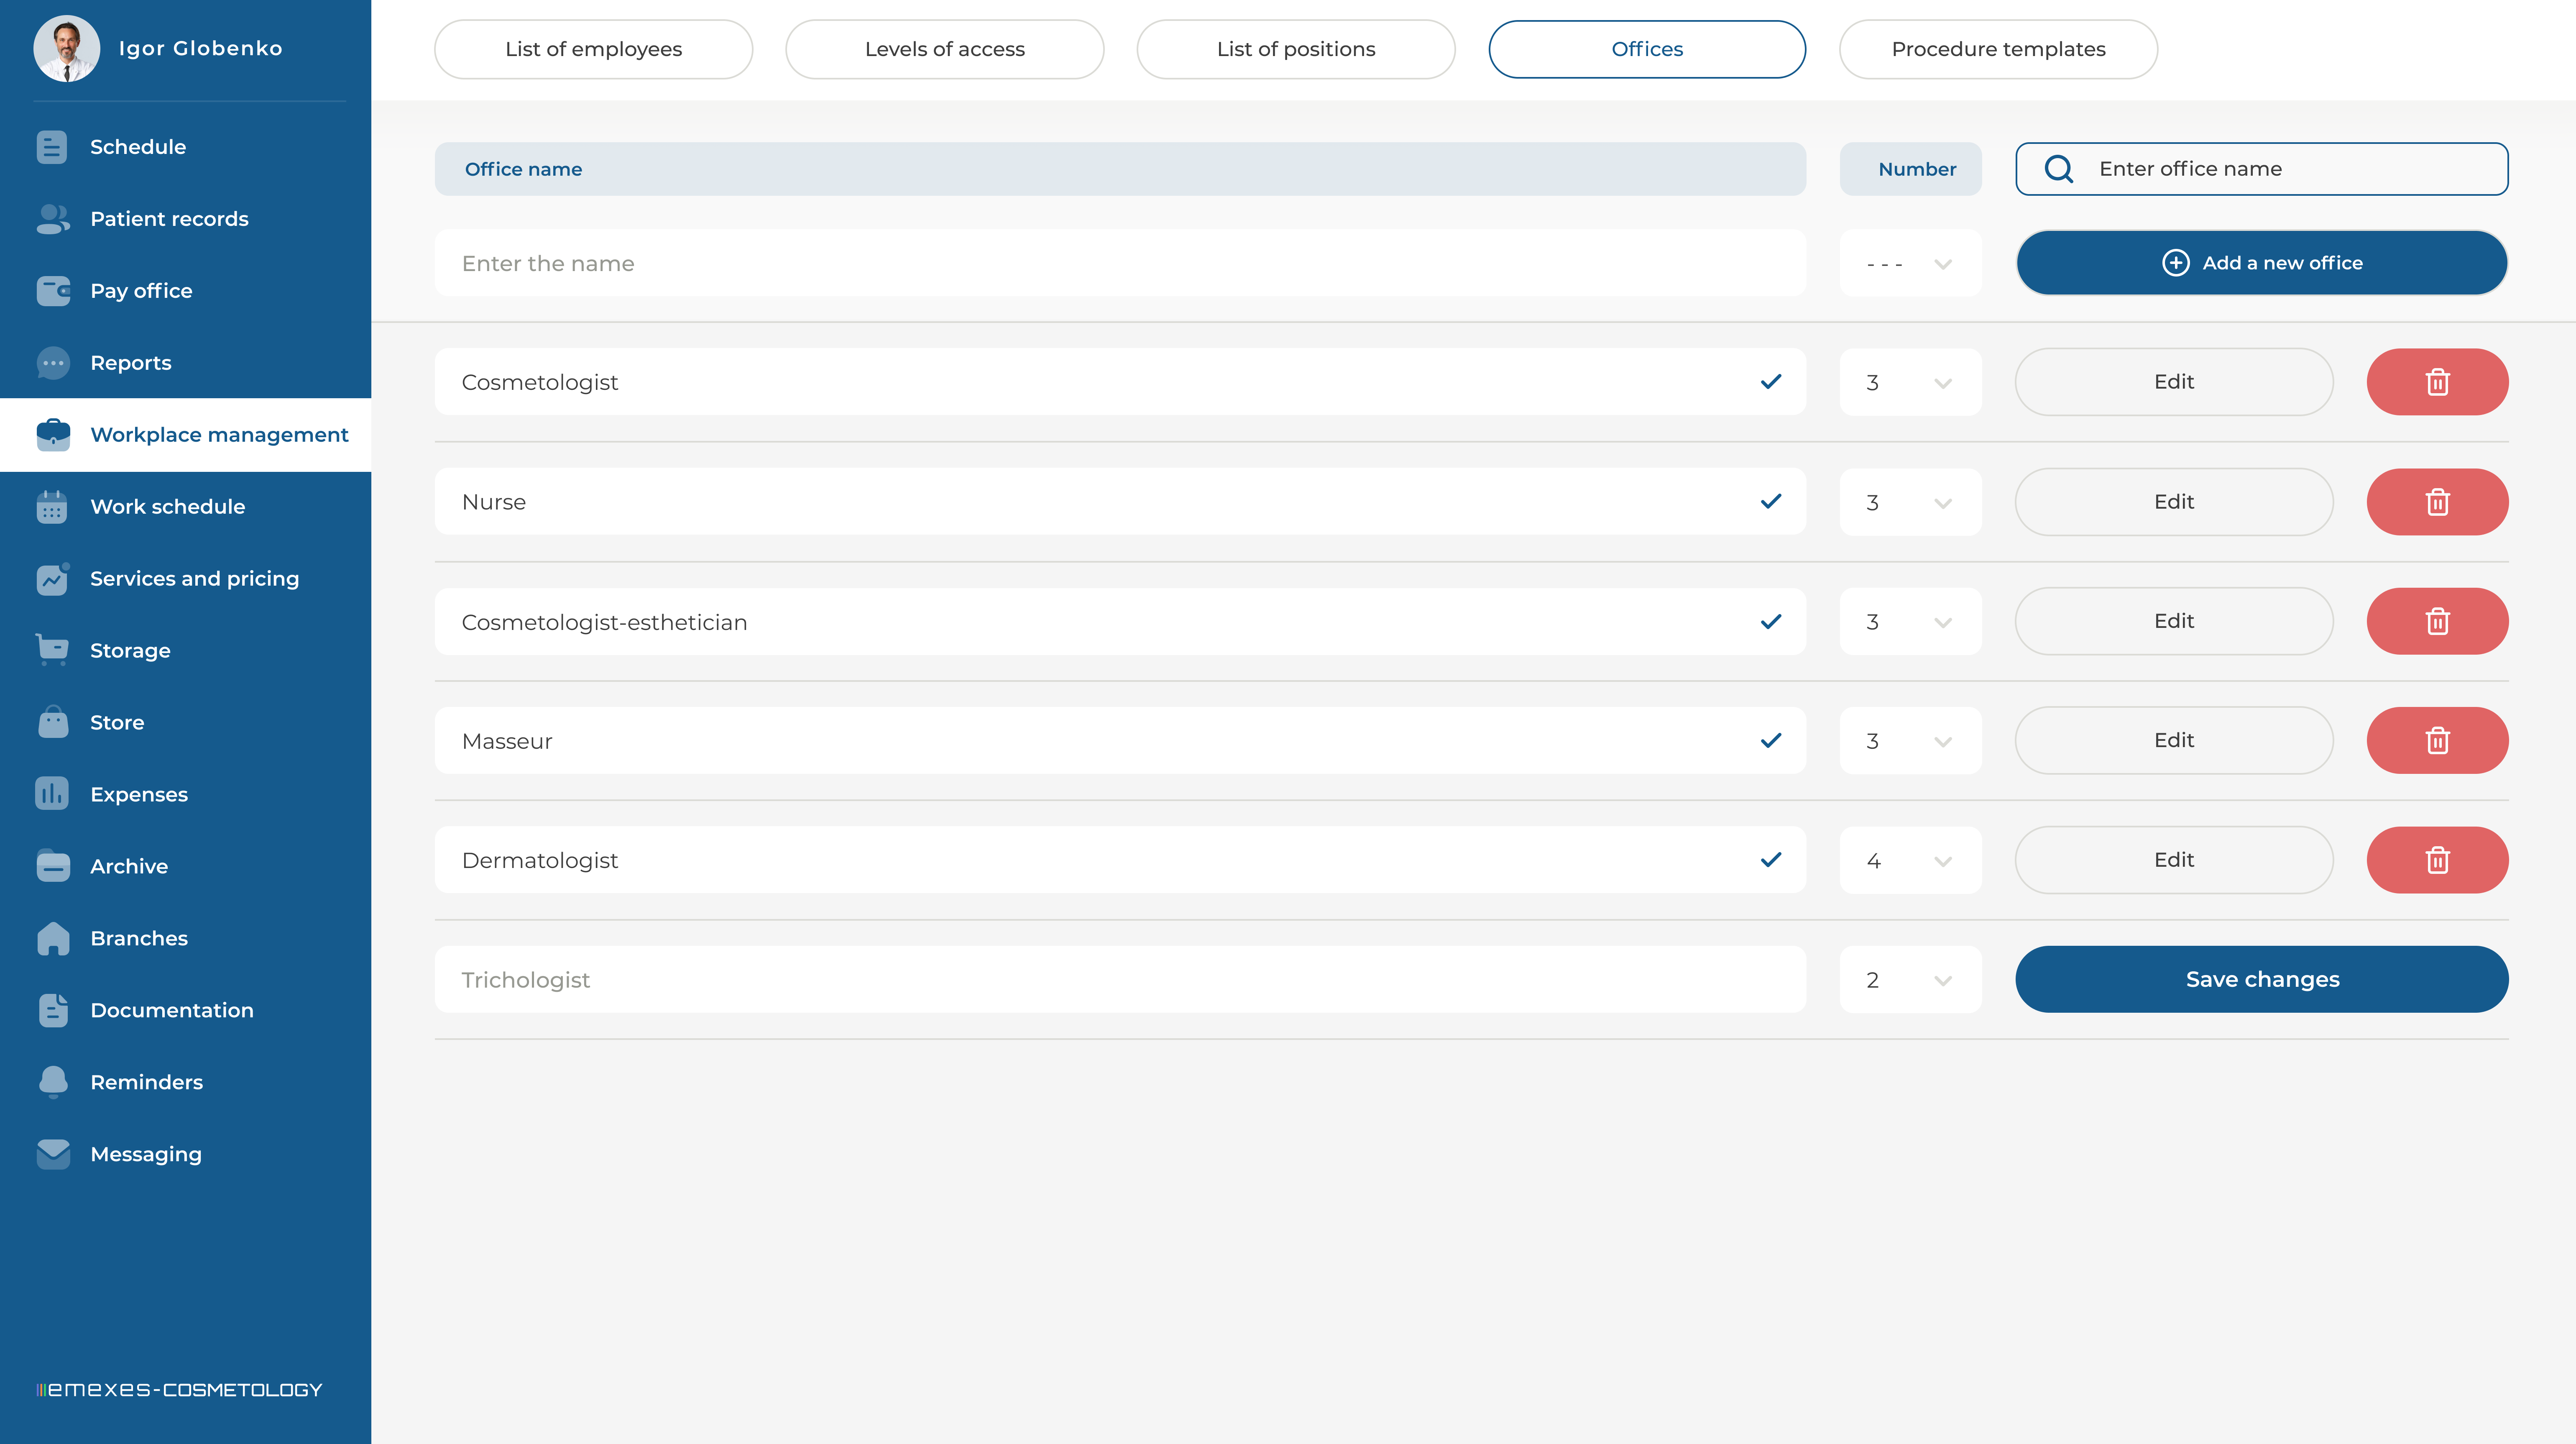
In order to organize the clinic's operation in the management system, the administrator must first create all the necessary offices, assign them names, and assign numbers. After that, all the offices you have created will be displayed in the clinic schedule.
When using the version with separate storerooms for each office, an office storeroom with the corresponding number will be created automatically along with the office in the Storage tab (see the Manual section, Storage / Office storerooms). The row for creating a new office is always at the top, above the existing ones.
Office names and numbers are editable, and the offices themselves can be removed (provided there is no material movement history in the corresponding storeroom).
2. POSITIONS LIST
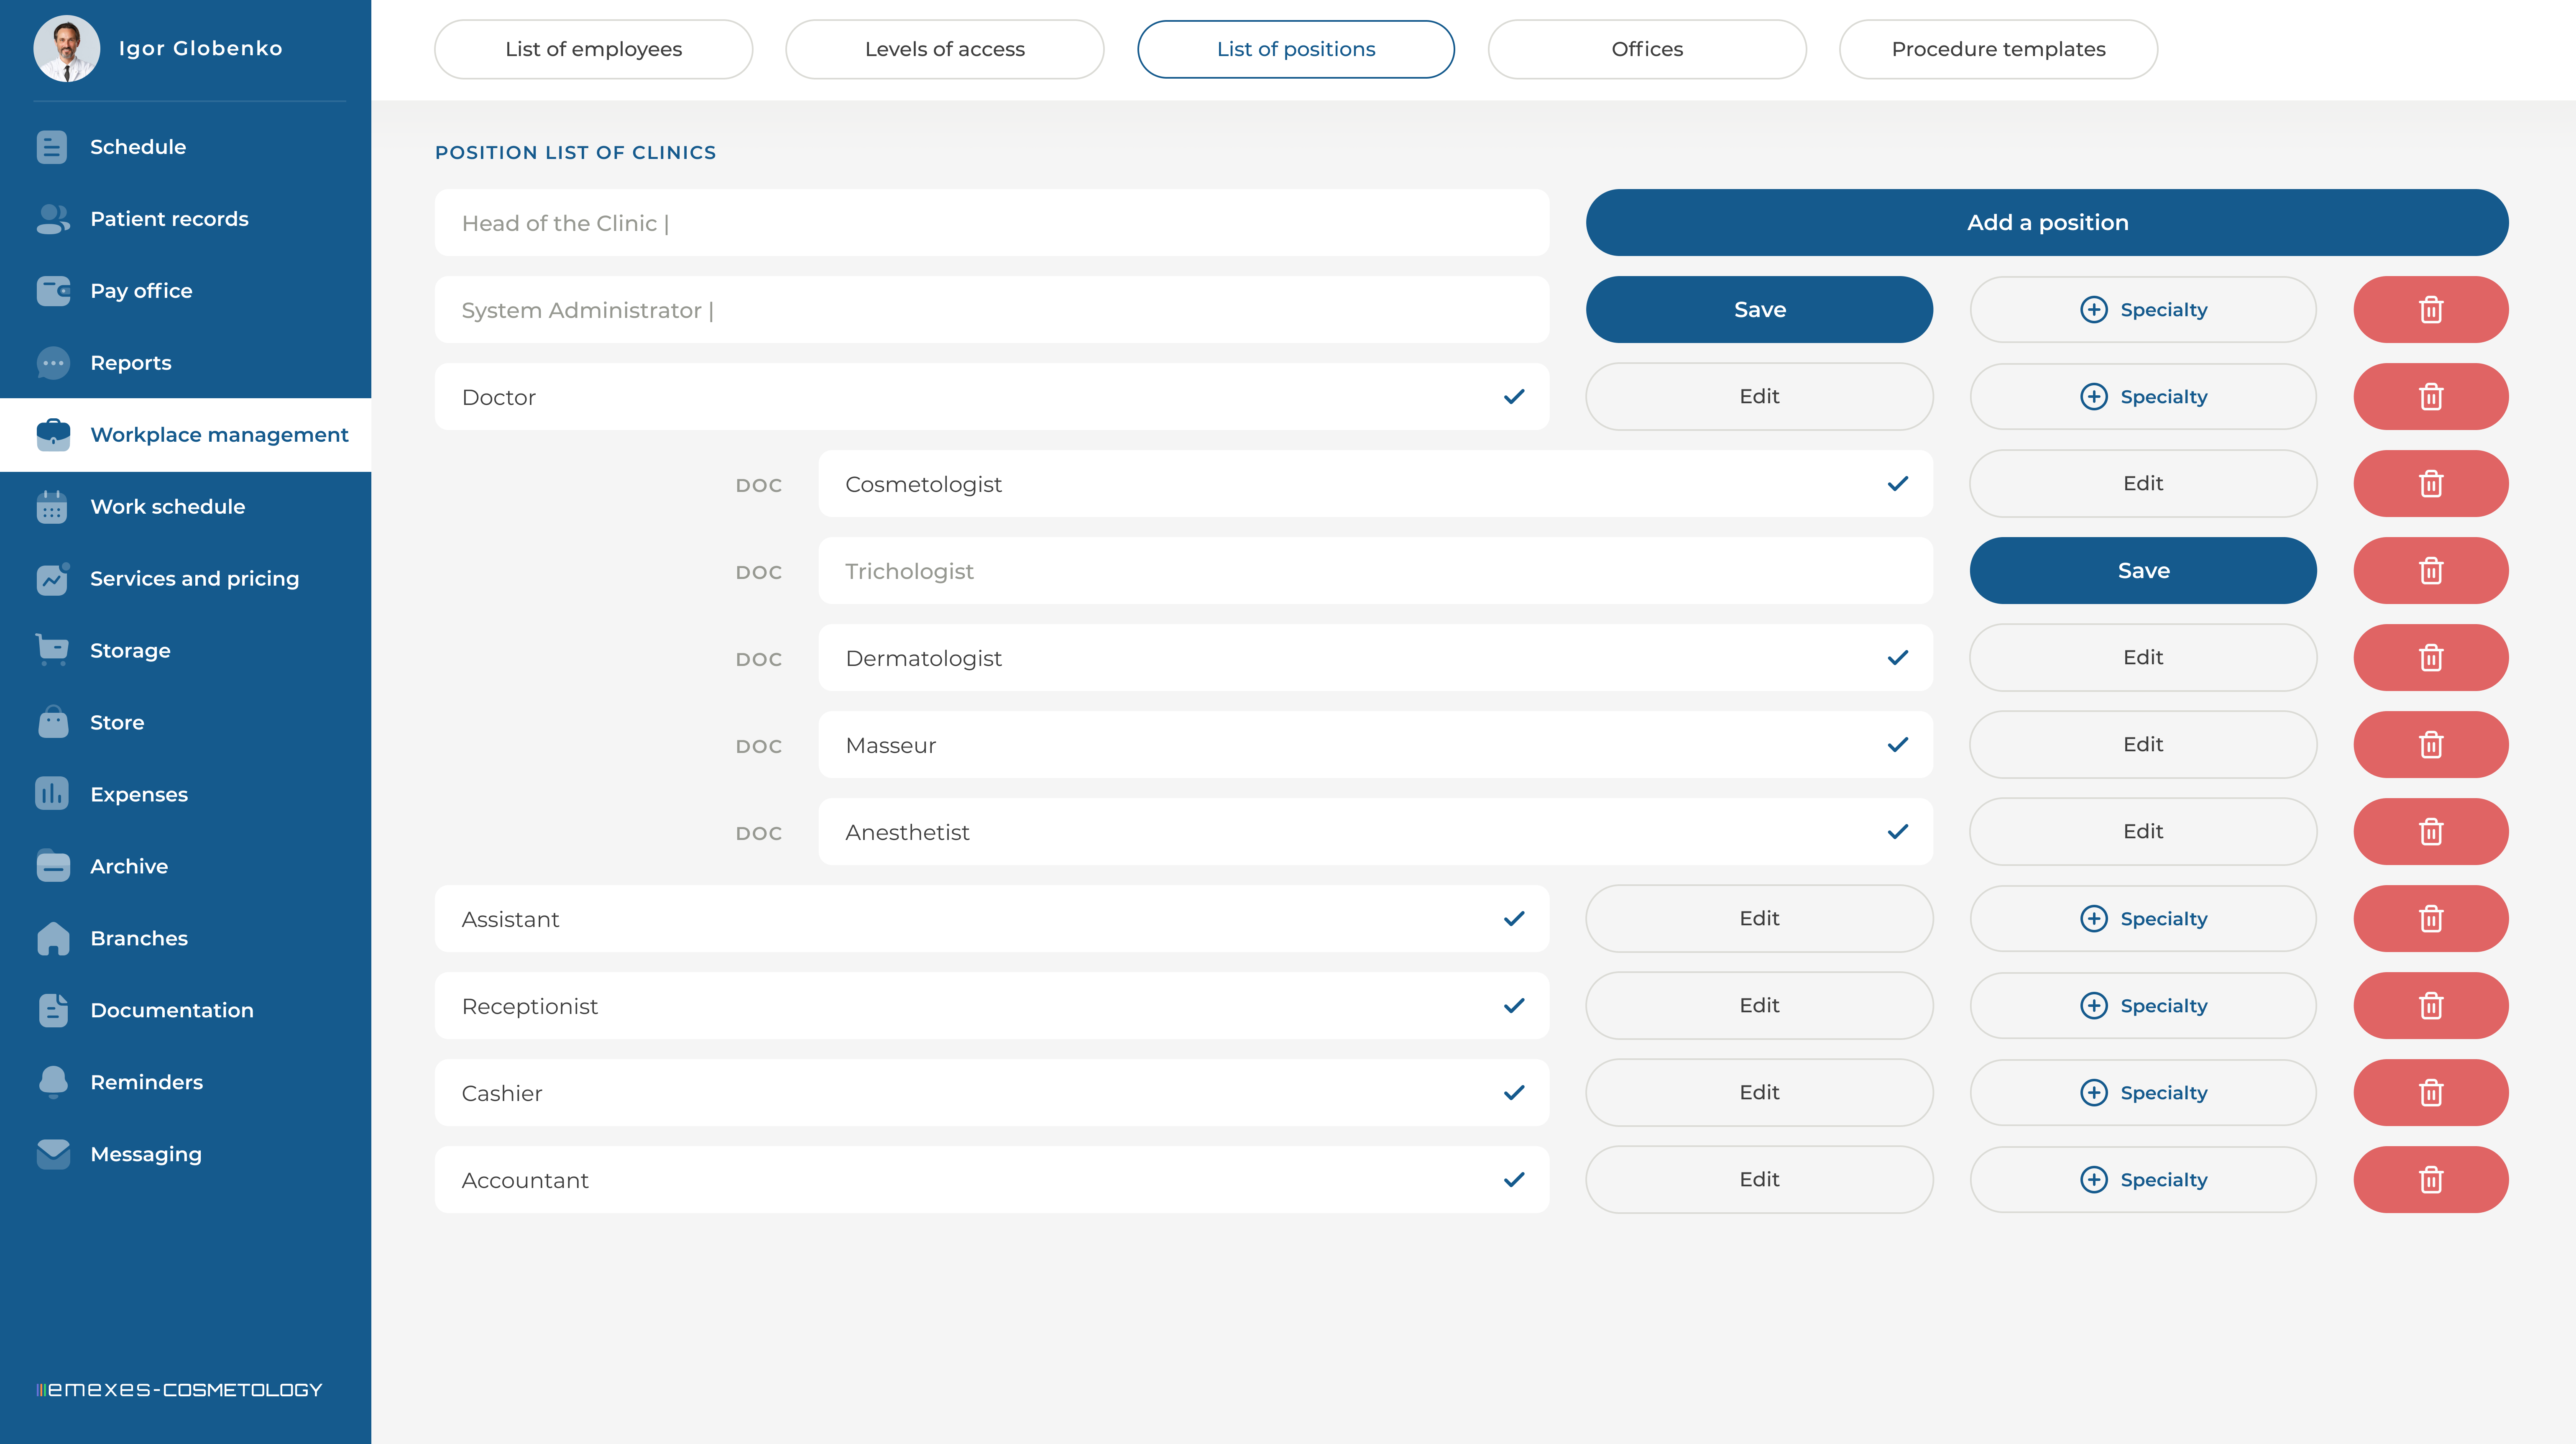
Once the offices have been created, the administrator needs to create all the positions and specializations required for the clinic in order to assign them to the newly created employees.
To add a position, go to the POSITION LIST section and, in the first line at the top of the list, enter the position name and click "Add Position".
The added position will appear at the bottom of the list, where you can edit it, delete it, or add a specialization to it.
To assign a specialization to a position, find the line of the newly created position and click the "+ Specialization" button. A line will appear below the position, where you can enter the name of the specialization and click "Save". After saving, the new specialization can be edited or deleted.
All created specializations divide the position into several specific roles. This means that when assigning an employee to a position with specializations, you must select a specific specialization—you cannot assign just the position without it. For example, you cannot assign an employee the role of "Doctor" without specifying the specialization, such as "Doctor - Cosmetologist".
The Physician and Assistant positions are created by default and cannot be edited, except for their specializations. This is because only physicians and assistants can be assigned a permanent office and included in the schedule.
3. ACCESS LEVELS
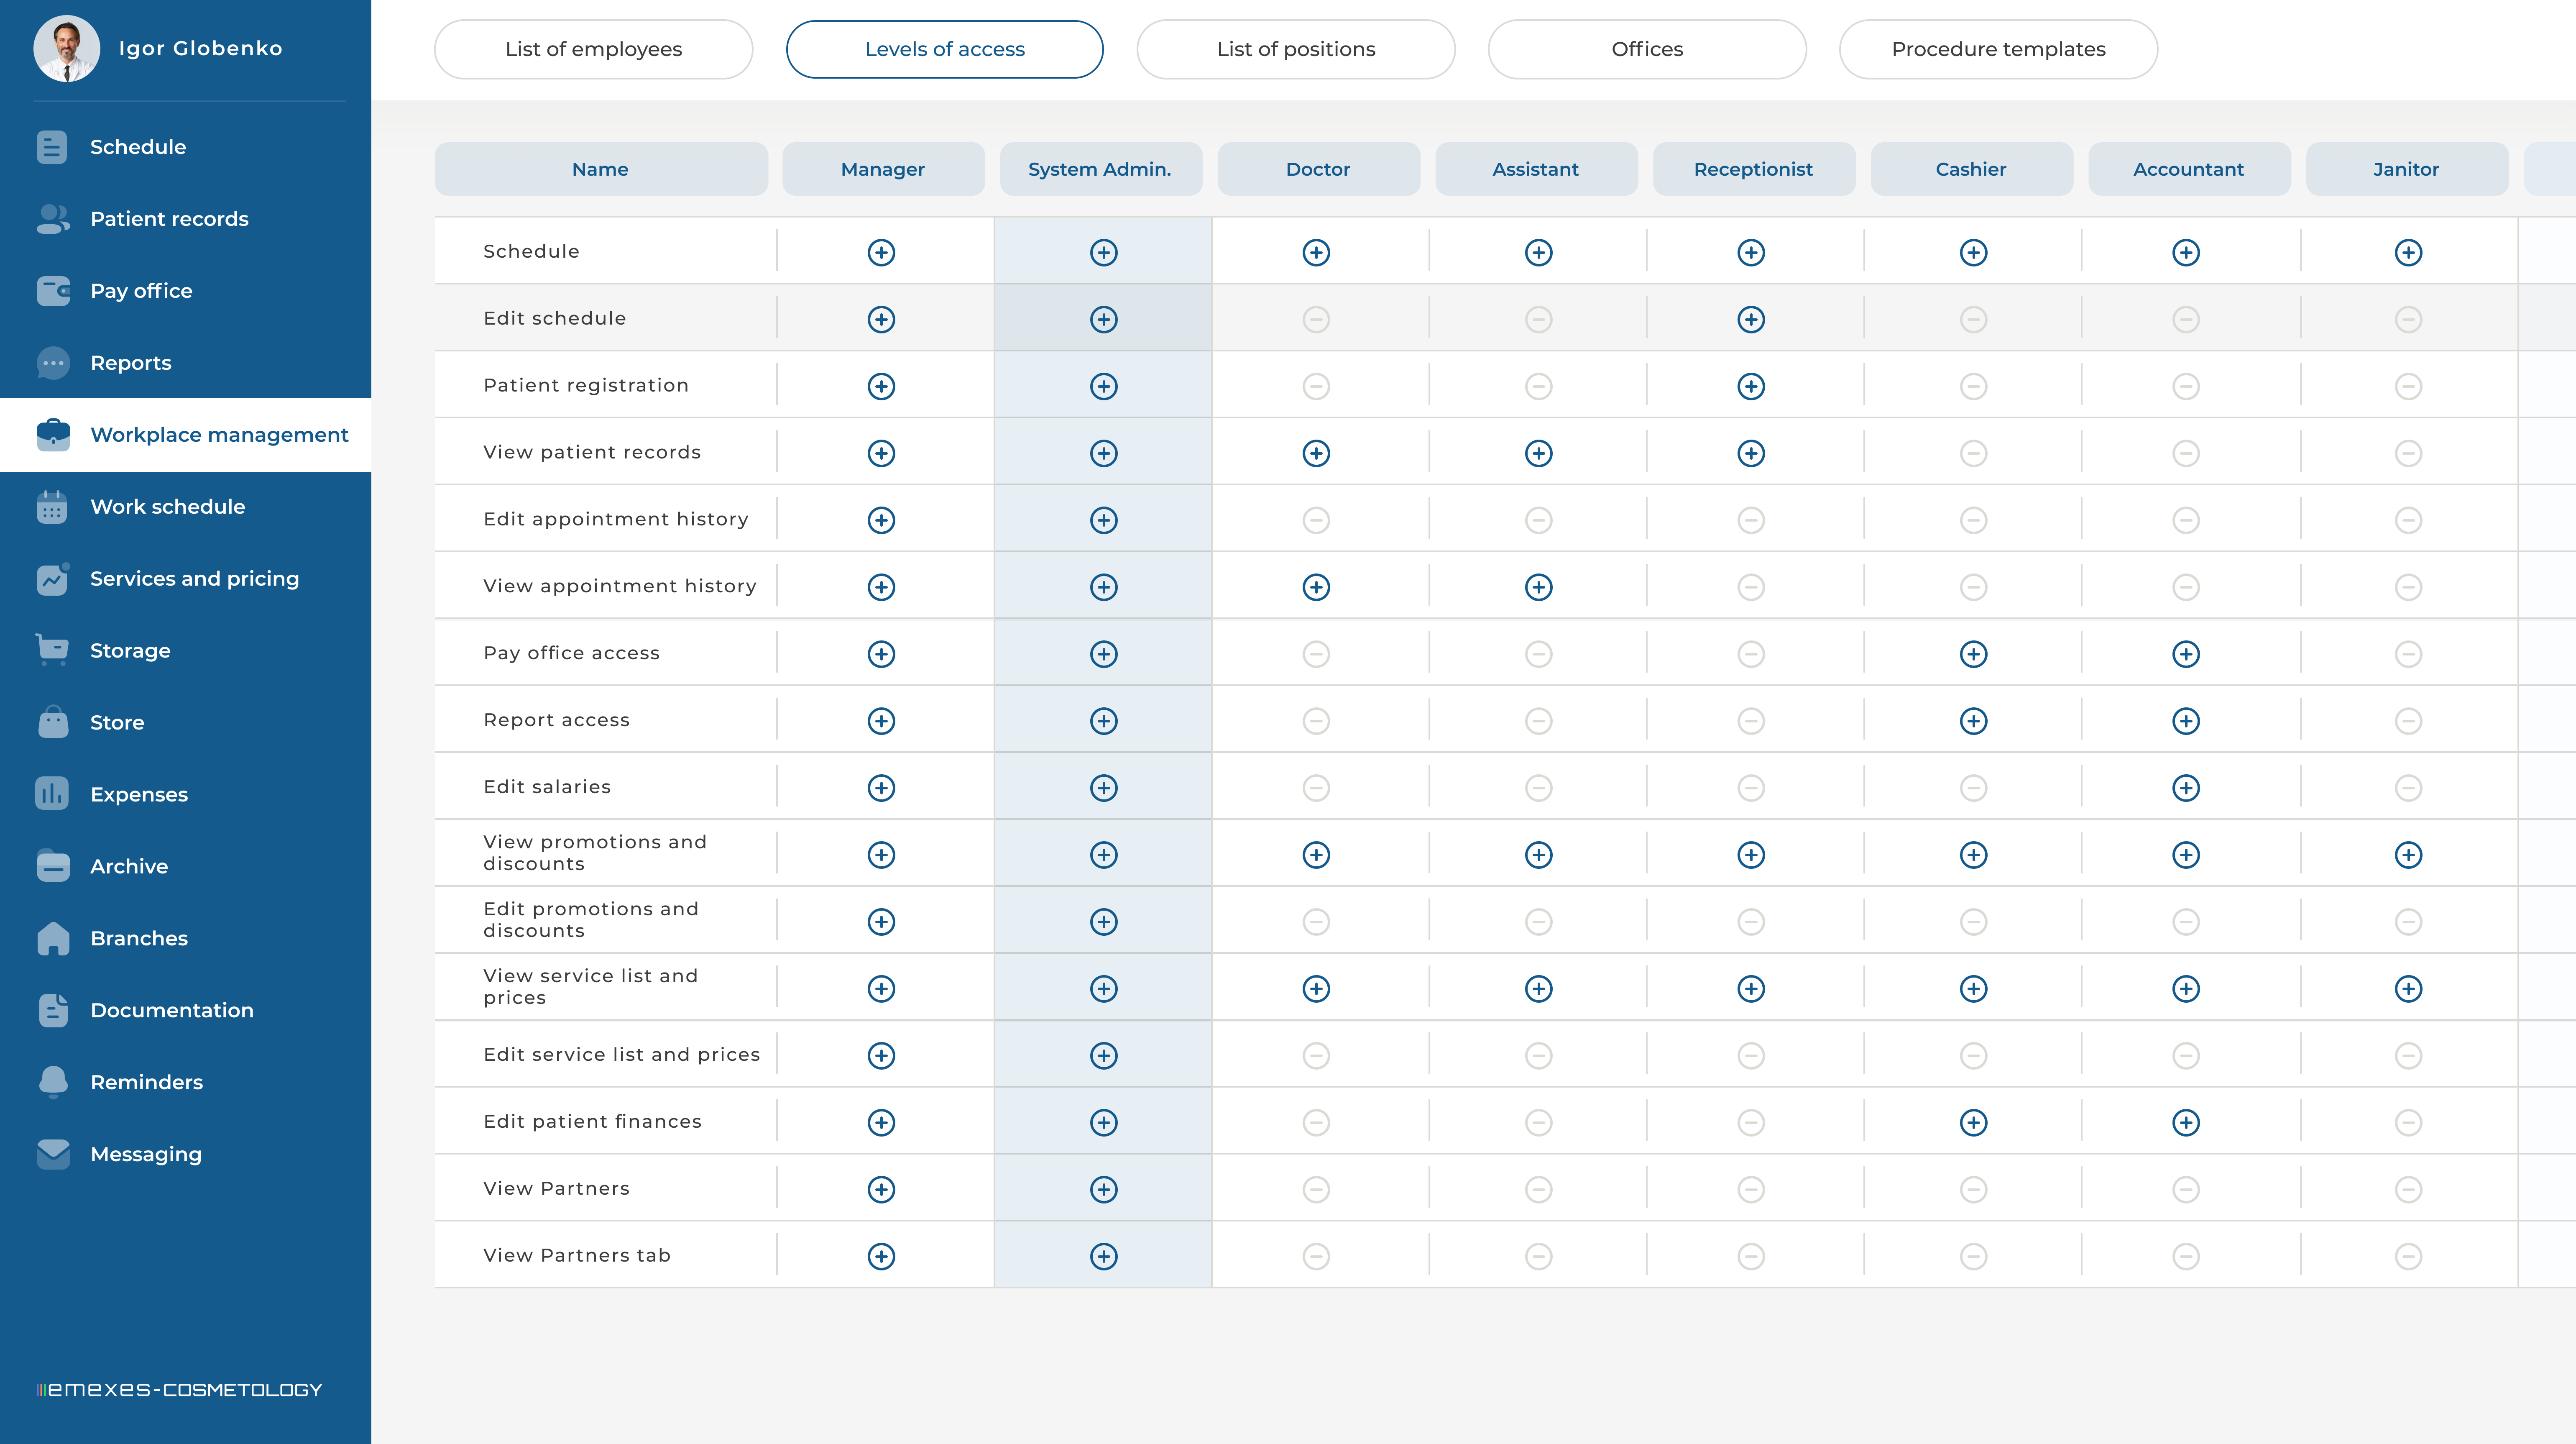
Once all required positions have been created, the administrator must assign the appropriate access levels that will allow or restrict those positions from performing certain actions and viewing specific information.
Access levels are assigned only to positions—specializations will inherit the same access level as the position to which they belong.
The horizontal axis displays all the positions you have created, while the vertical axis lists the actions that can be allowed or denied for each position.
To grant access to an action, click on the minus icon ("-") in the desired cell. This will enable the action, and the minus will change to a plus icon ("+"), indicating that access is now allowed. To revoke access, simply repeat the process in reverse.
4. CREATING AN EMPLOYEE FILE
Next, in the LIST OF EMPLOYEES section, the administrator enters all clinic employees into the management system.
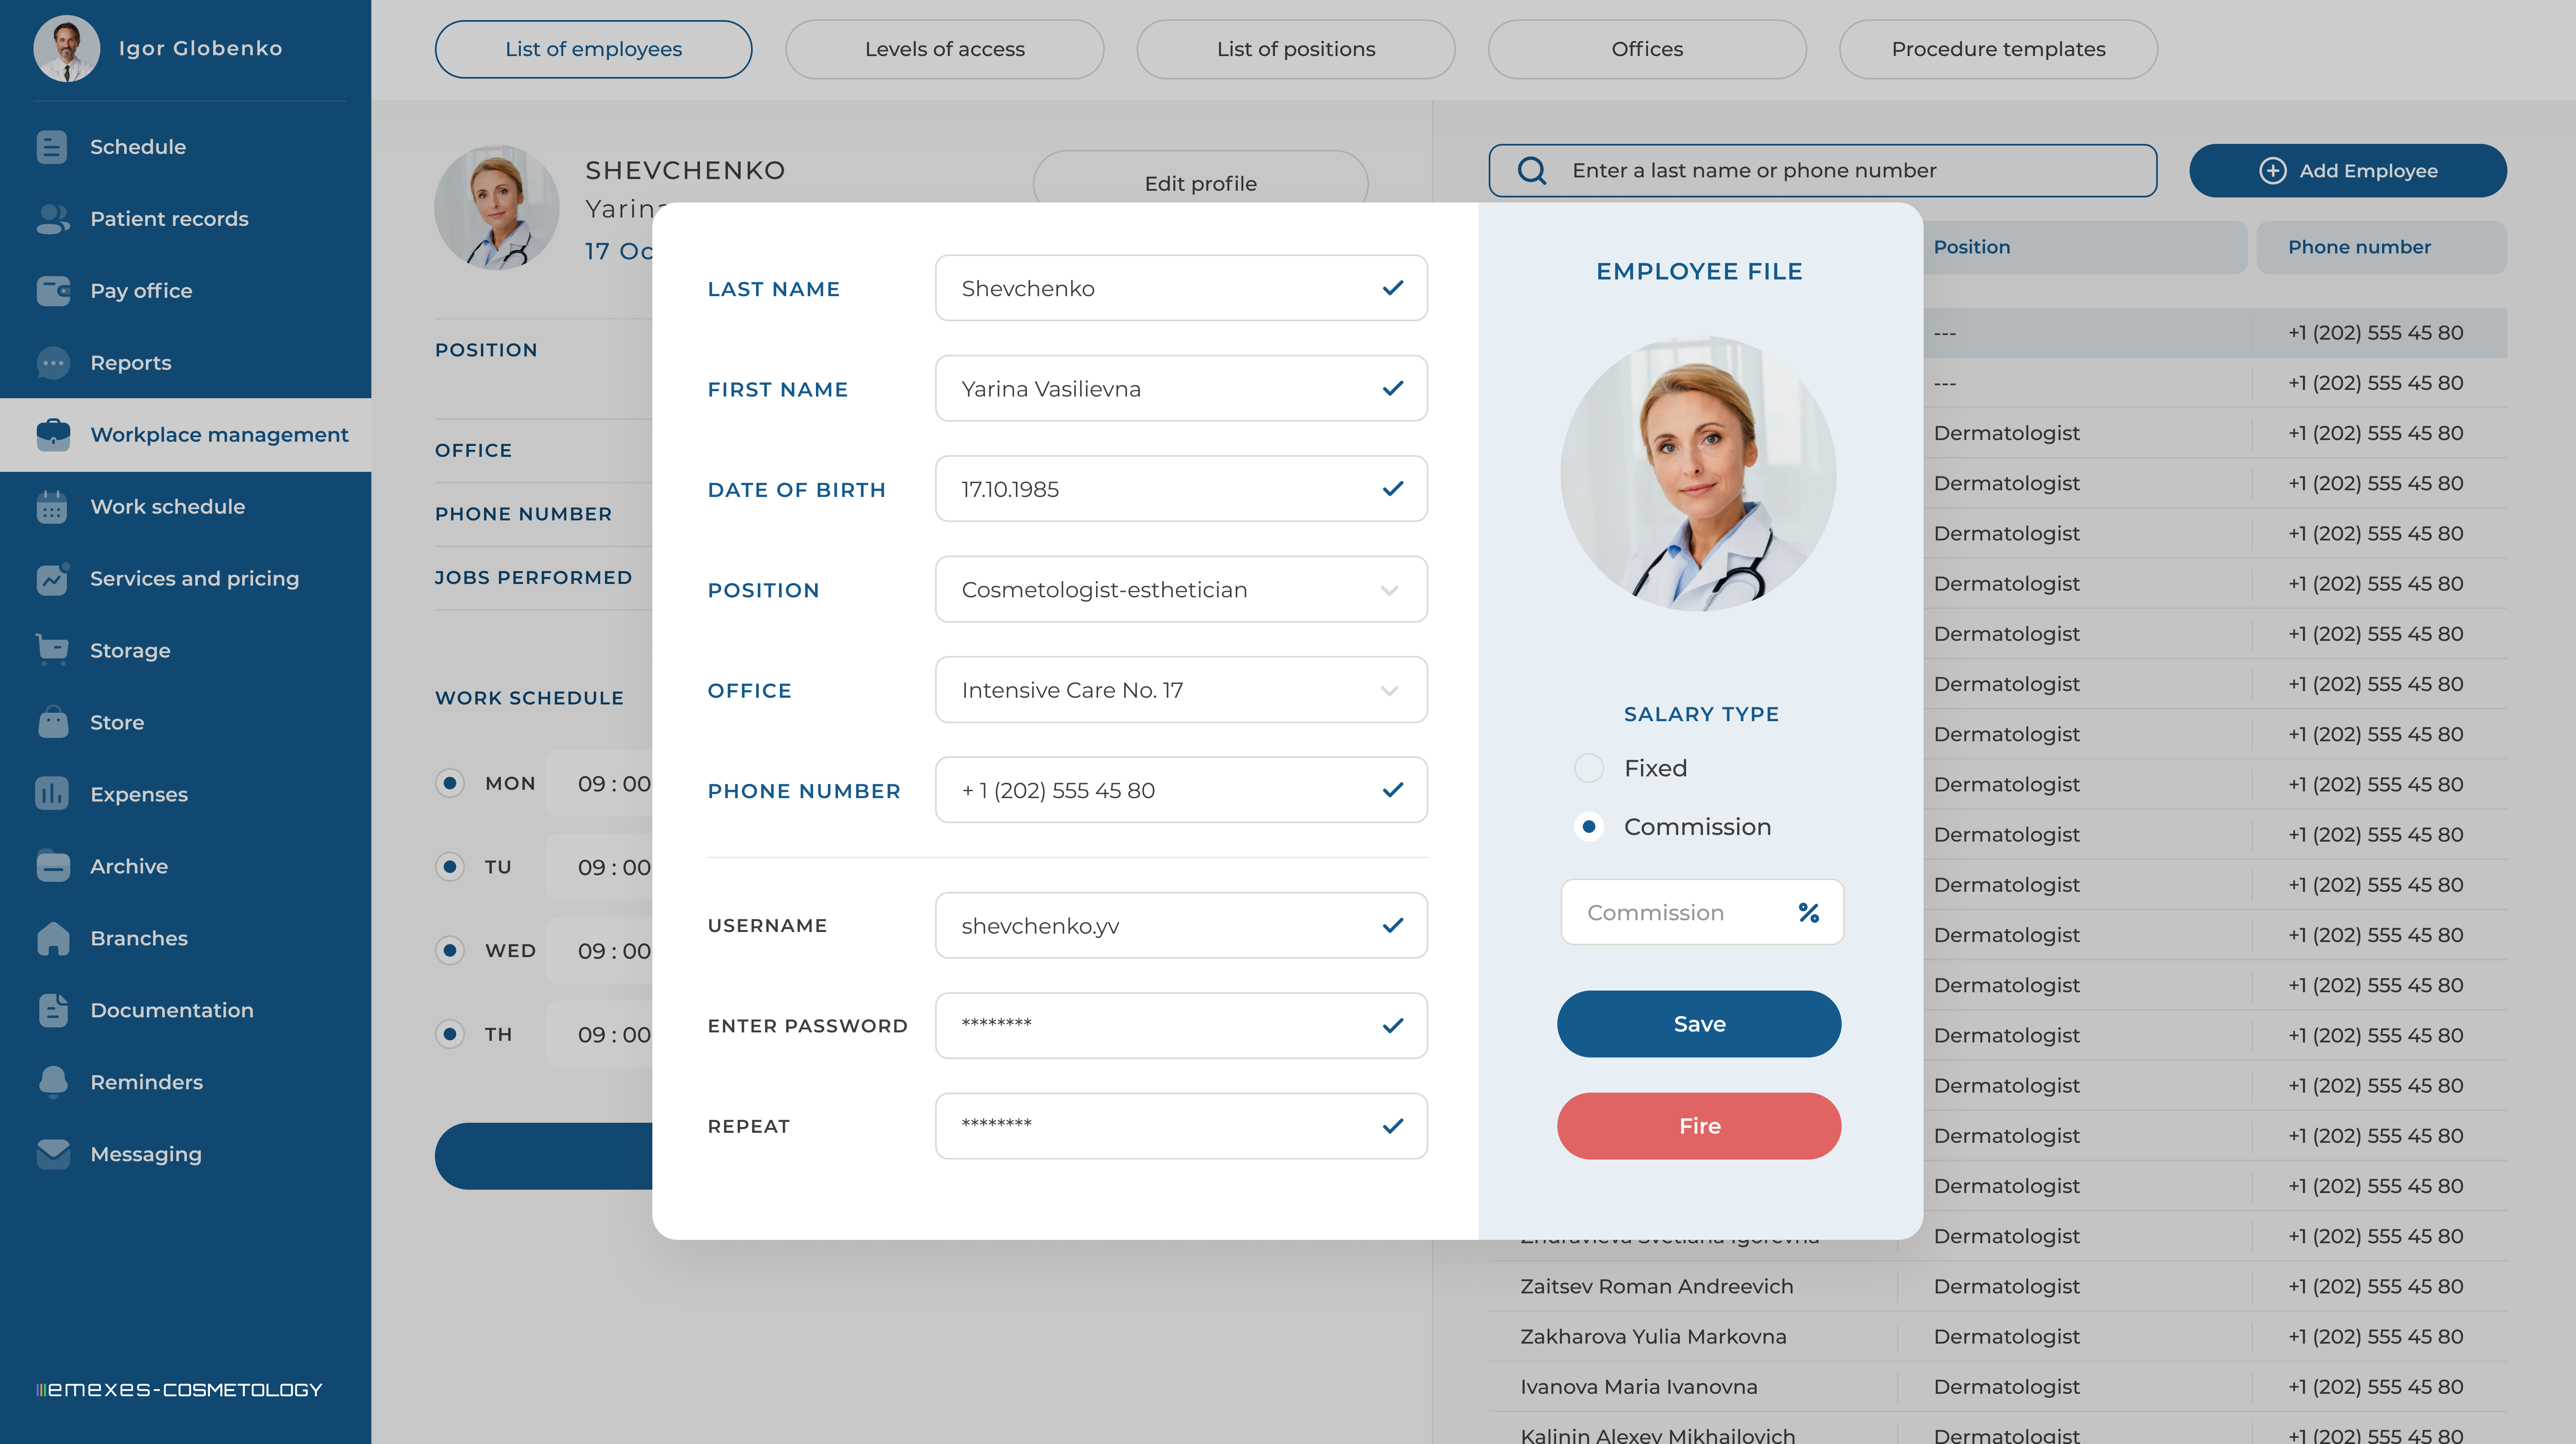
When adding an employee, you must enter their personal information, assign one or more positions, assign an office if necessary, and specify the type of salary.
If the employee's salary is not fixed, you need to enter the commission percentage that will be charged to the patient after the appointment is completed.
Then, set a username and password for the employee and click the "Save" button. The employee's profile will then be added to the general list.
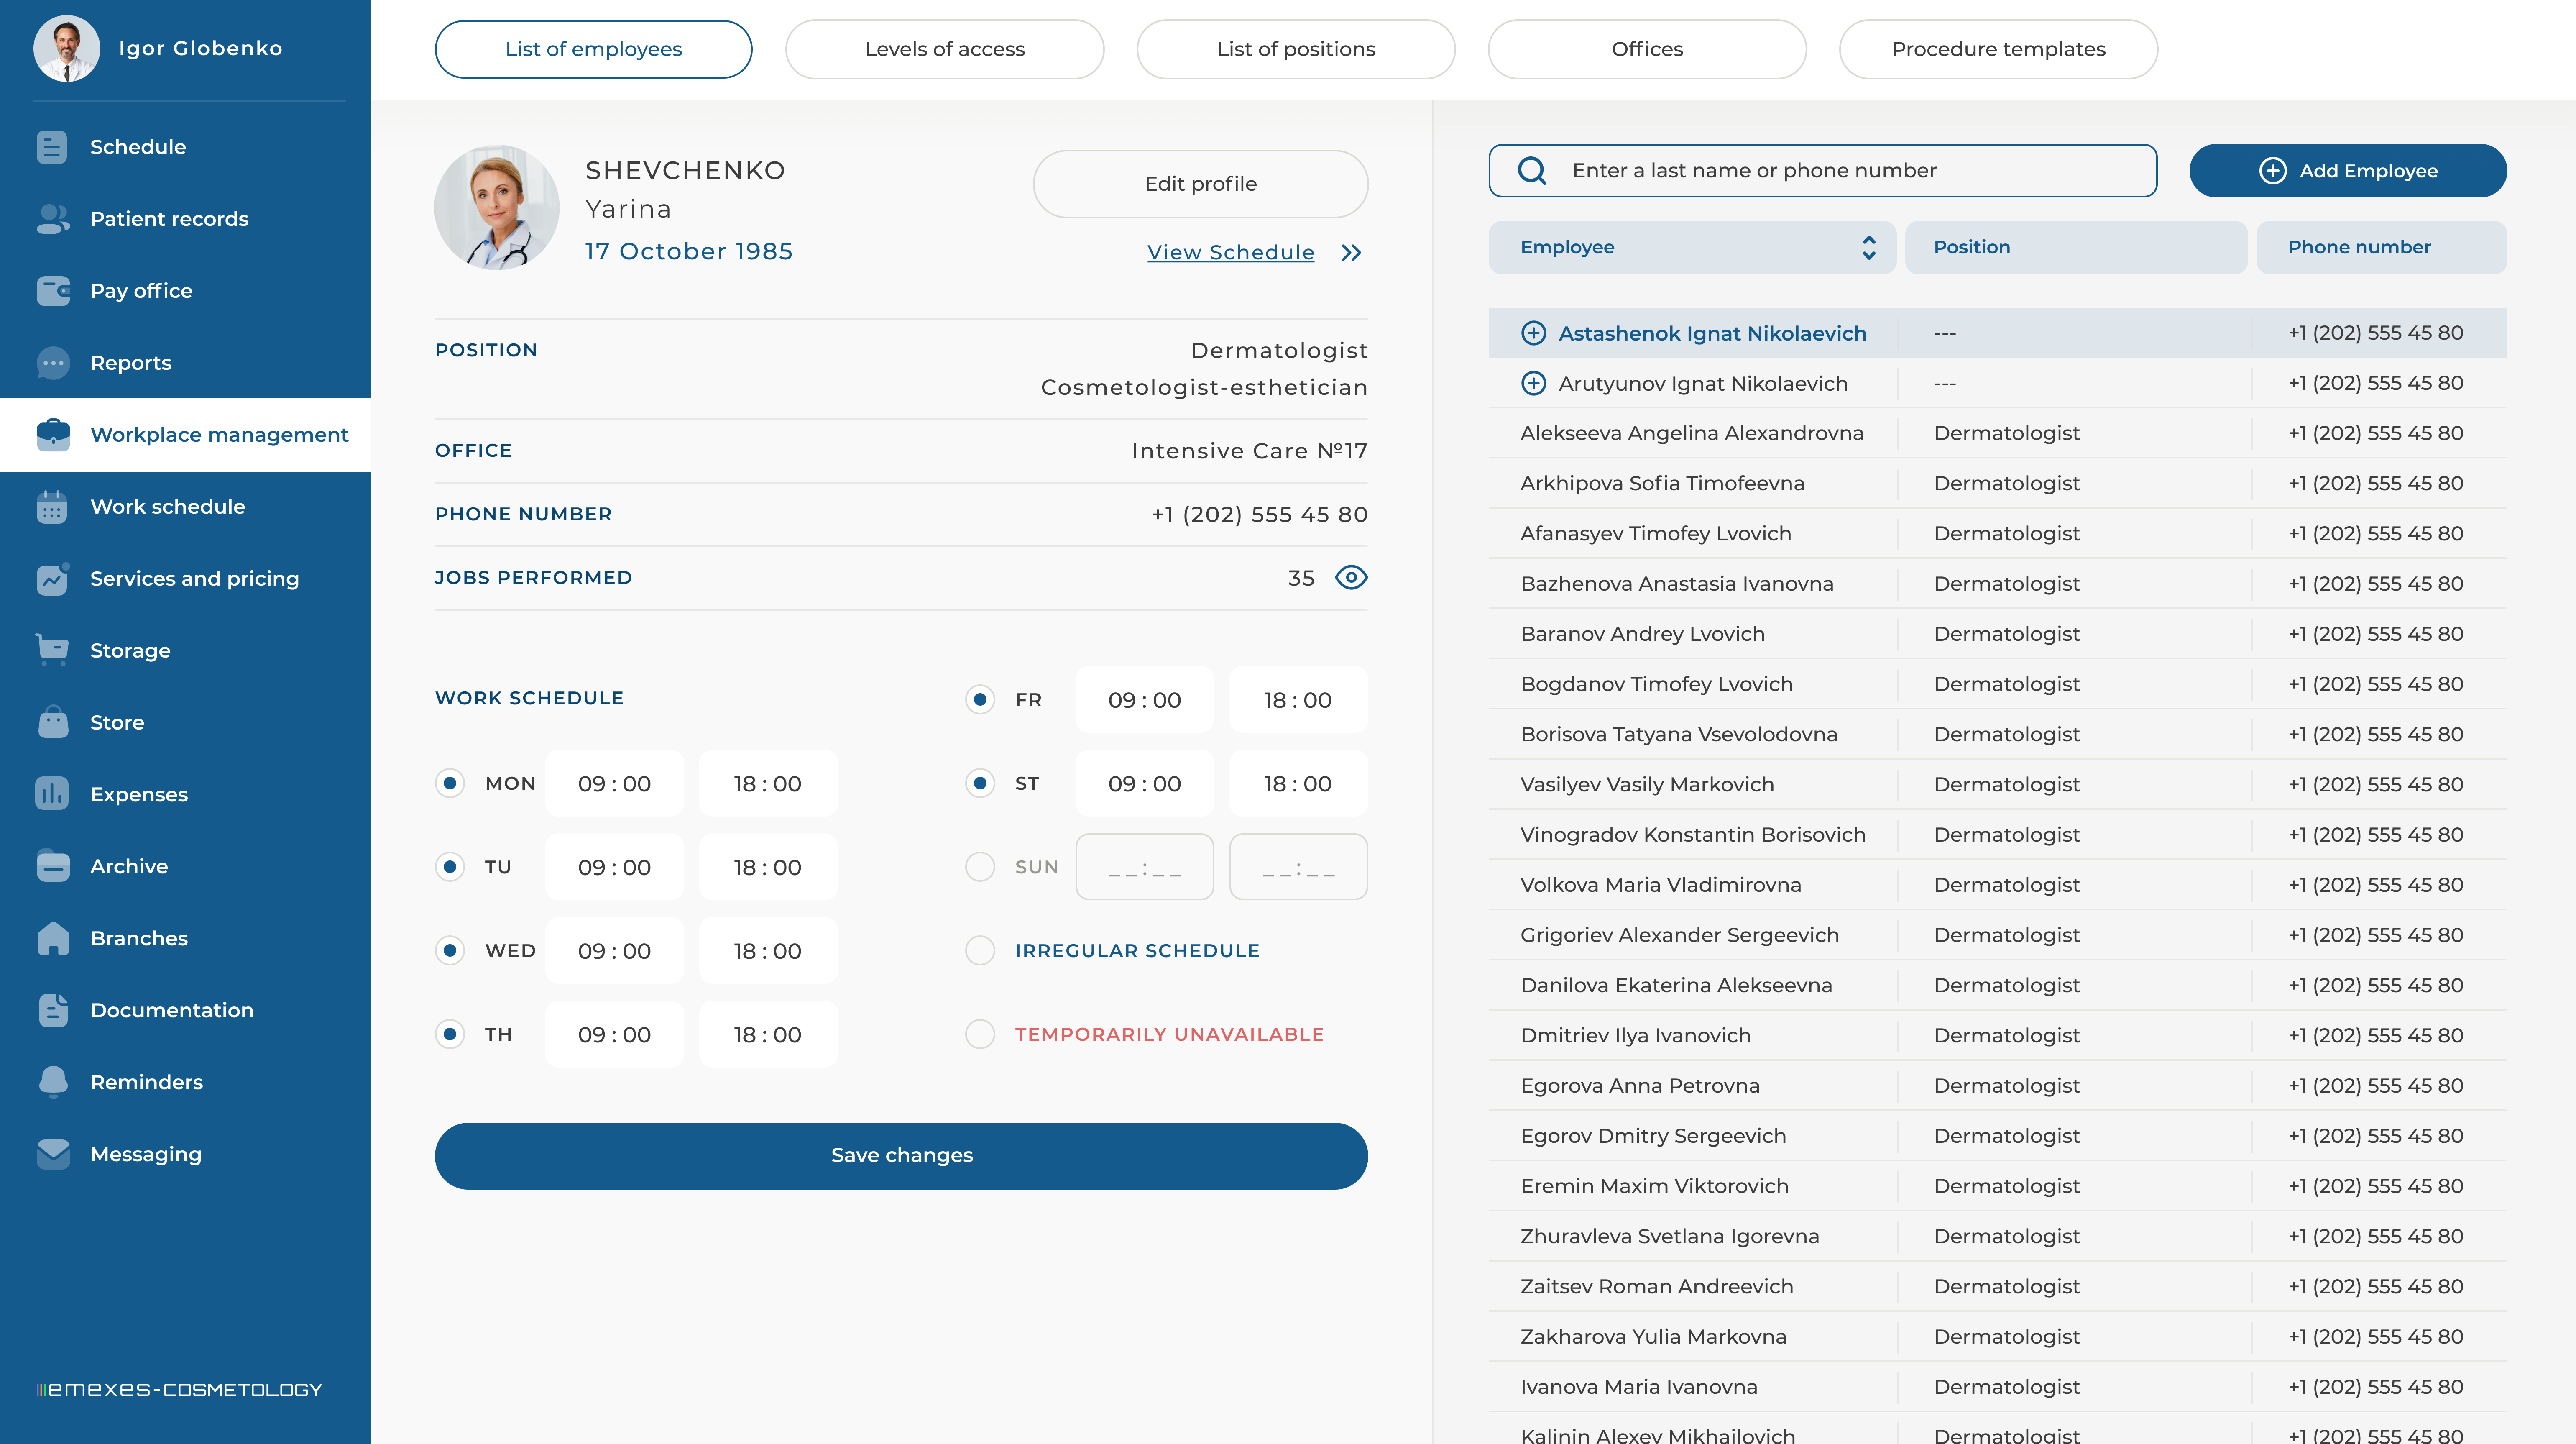
To set the employee's work schedule, select them from the list. Their profile information will then be displayed on the left side of the screen.
Here, you can specify the length of an employee’s workday for different days of the week or set an irregular work schedule, which allows you to add it to the clinic’s schedule manually.
To assign a work schedule to an employee, click "Save changes to work schedule."
Employees assigned to an office will automatically appear in the clinic’s schedule according to their work schedule.
The system creates default shifts for doctors and their assistants for all upcoming days, as long as their work schedule fits within the clinic’s schedule.
If this condition is not met, the default shifts will be limited to the clinic's working hours.
Shifts for employees with irregular schedules cannot be created automatically in the clinic schedule. These employees must manually create shifts in an unoccupied office.
When the administrator needs to adjust the schedule due to the long-term absence of an employee on vacation, they must create a "temporarily absent" note in the employee’s work schedule.
In this case, the employee will be removed from the clinic's schedule and will no longer appear in scheduled appointments.
If the absent employee is a physician, another specialist can be assigned to their office as a temporary replacement.
At the end of the vacation, to restore the schedule, the doctor should be reassigned to their office and returned to the current schedule.
Before doing so, their replacement (if any) must first be removed from the office.
You can edit an employee’s data and view the services they have performed by clicking the eye icon.
Employees can also be dismissed, in which case their profile remains in the system with a “Dismissed” label.
Such employees can be reinstated at a later time if needed.
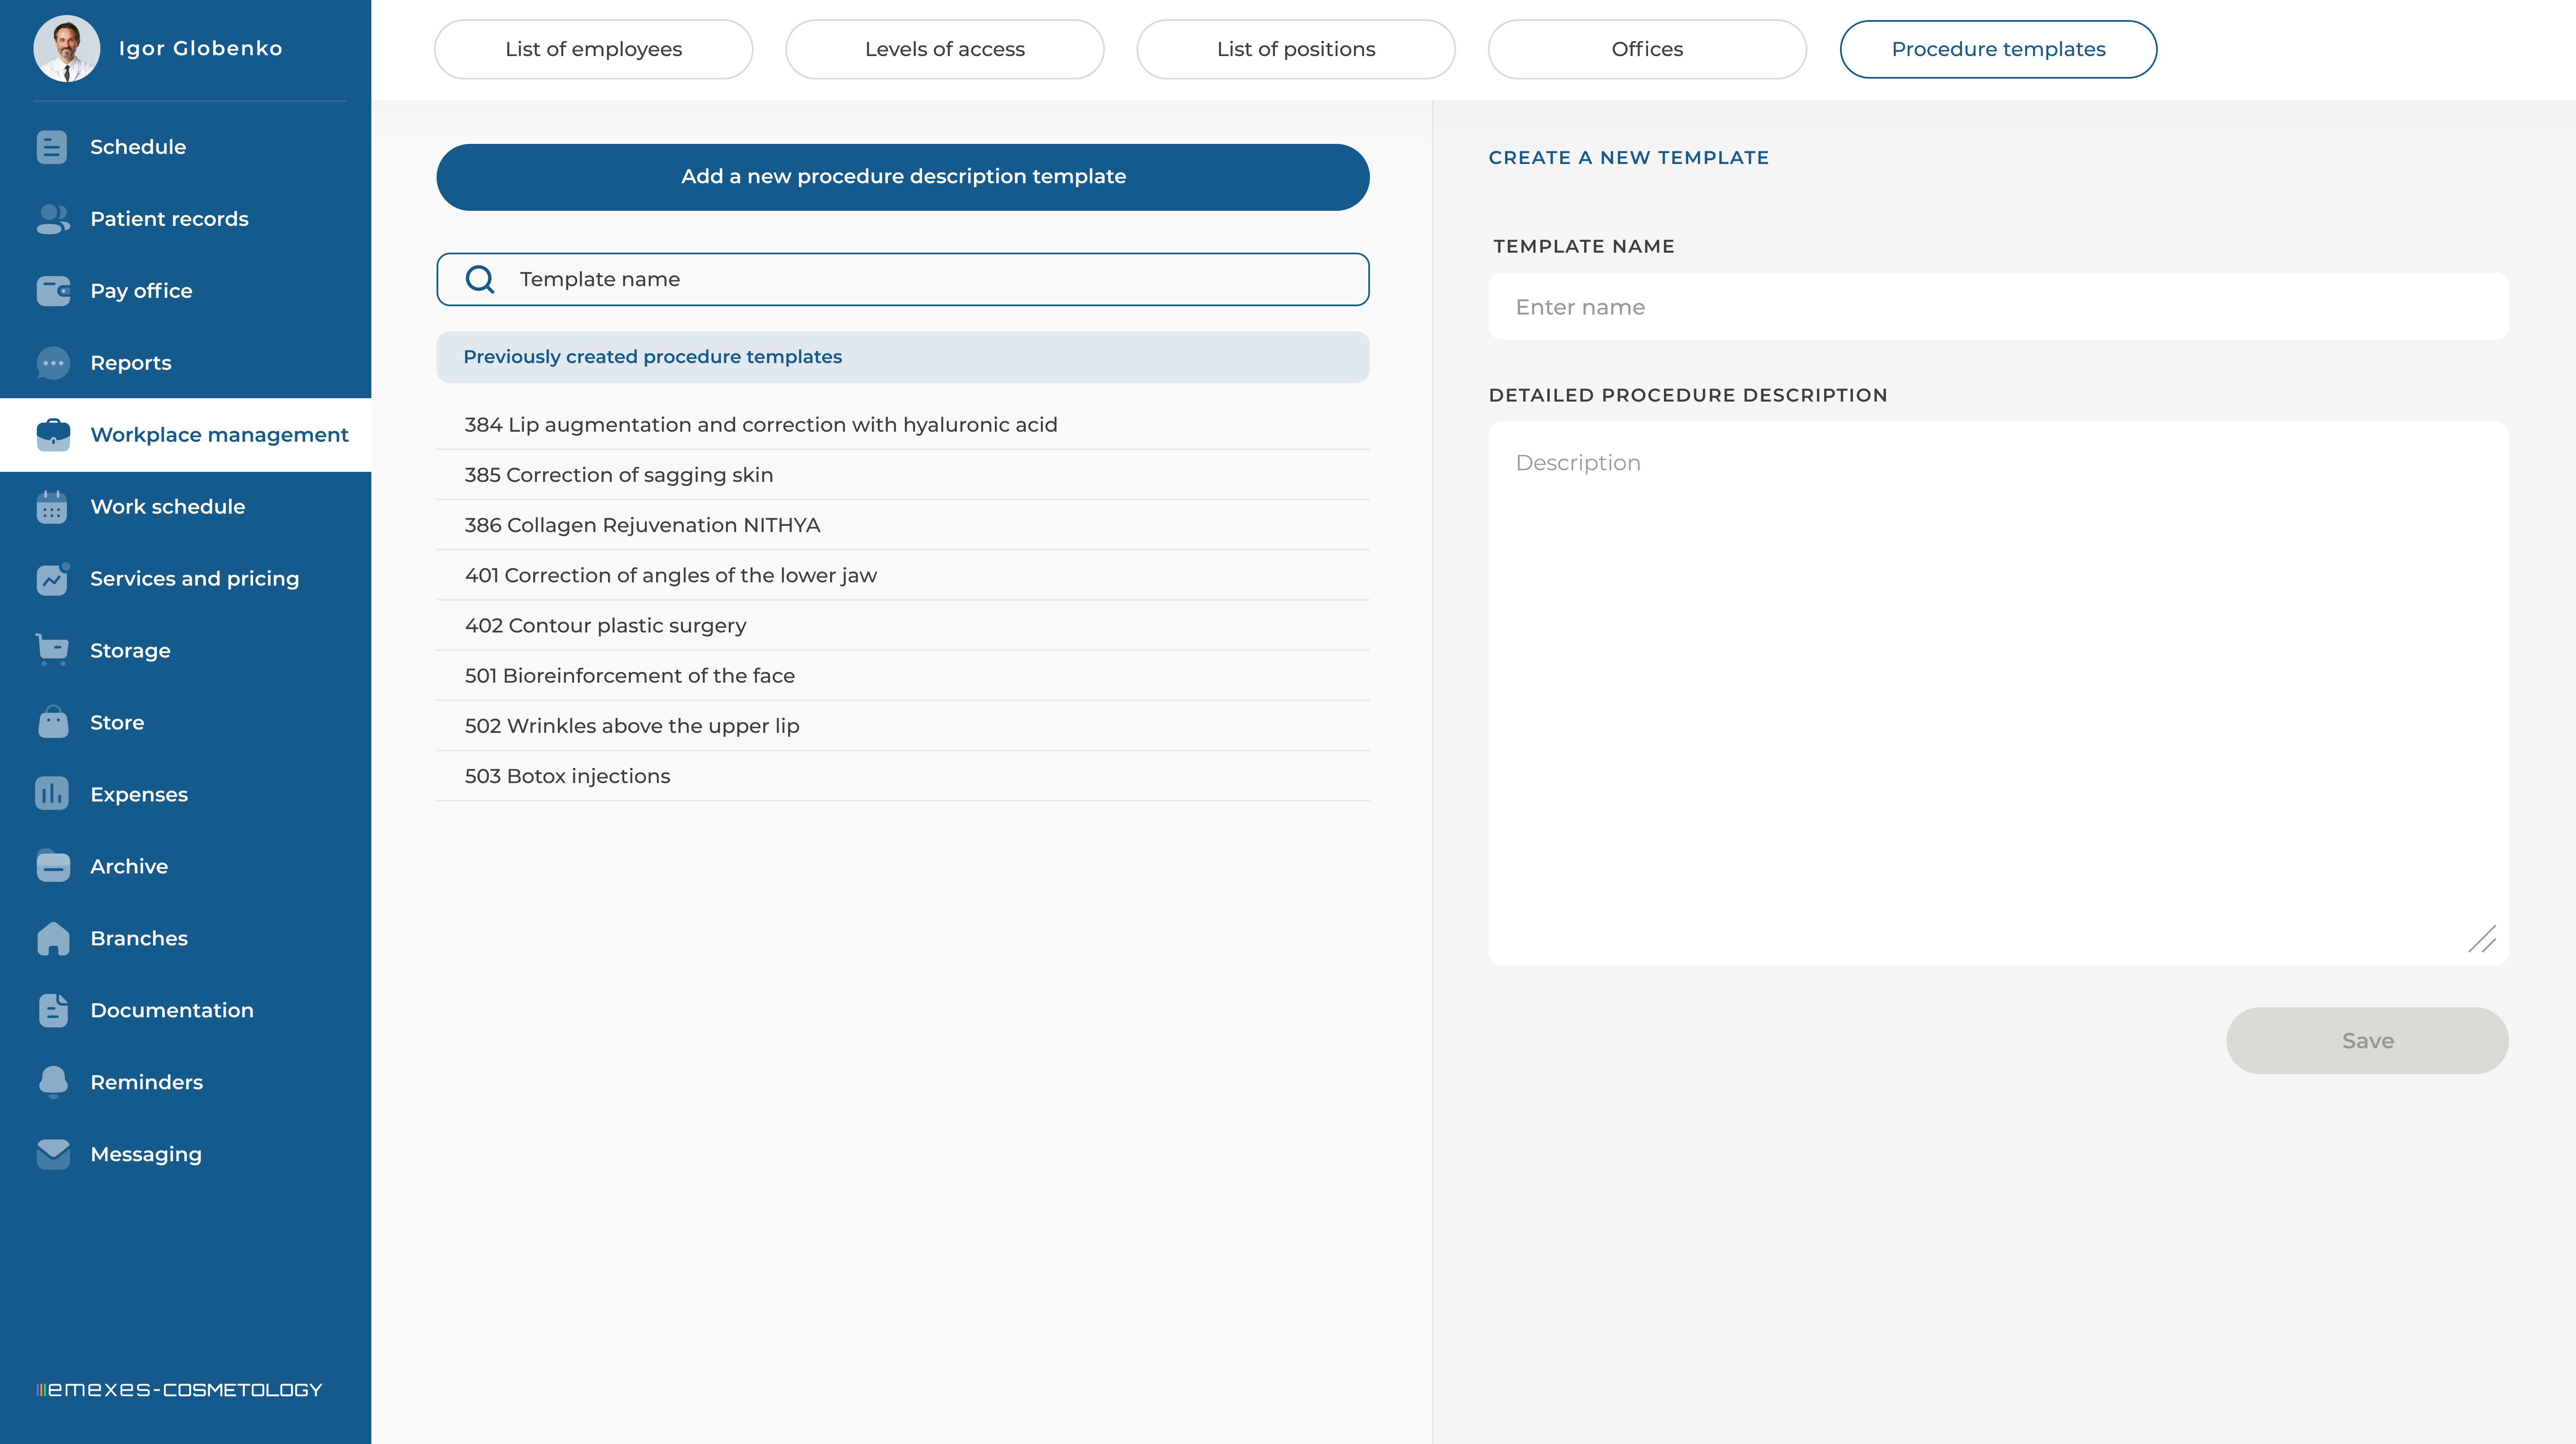
5. PROCEDURE TEMPLATES
In this section, you can also add templates to automatically fill in treatment protocols. Adding templates is simple: just enter the name of the template in either a descriptive or code format, and below, enter the procedure description. After that, the template will be added to the list. There is no limit to the number of templates you can create. Any of the added templates can be edited or deleted.