

The system offers two options for material storage, enabling quantitative tracking and allowing materials to be written off after appointments or for other reasons.
Storage is organized as follows: First, all medications and materials used by the clinic should be added to the "Materials" section, categorized by name and ID number. When adding a new material to a category, you also need to specify the unit of measurement and its minimum quantity. The minimum quantity indicates the threshold at which the material will appear in the "Requires replenishment" section, helping you quickly reorder products from the supplier.
1. MATERIAL RECEPTION
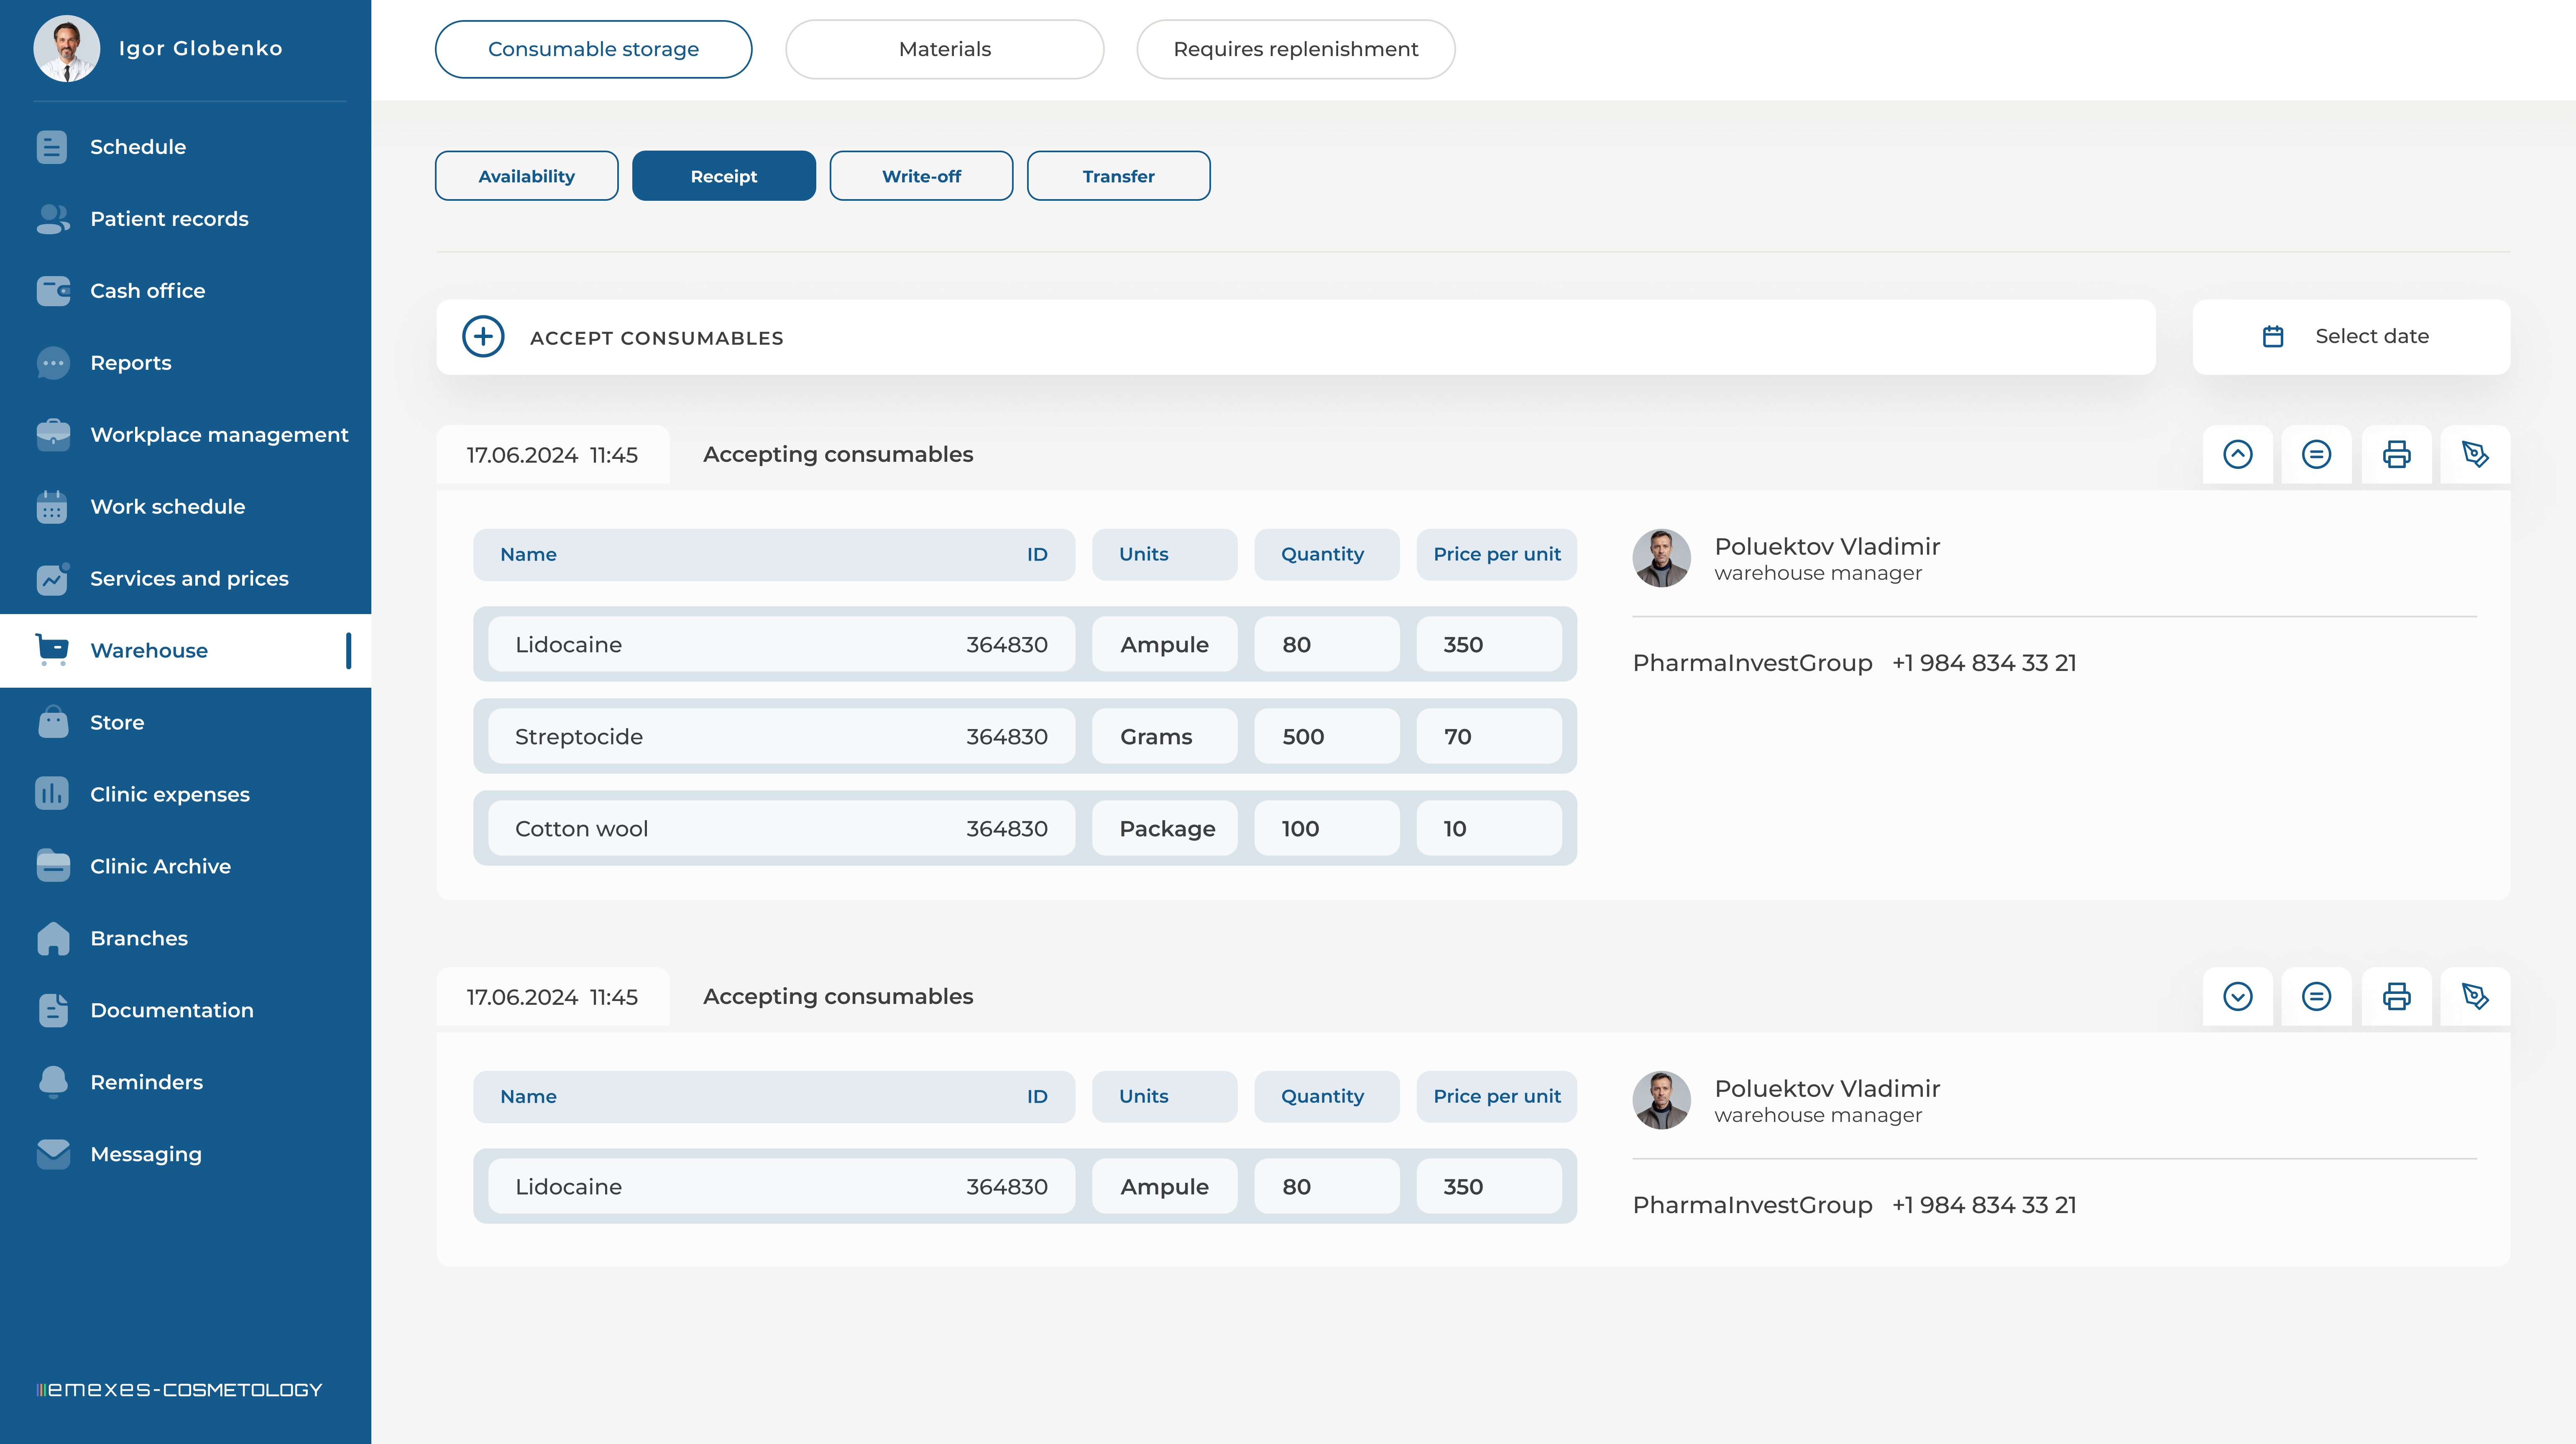
After adding all the materials used by the clinic to the database, you will be able to receive these materials into the warehouse. To do this, go to the MATERIALS STORAGE section, click on "Reception," and select "Receive materials."
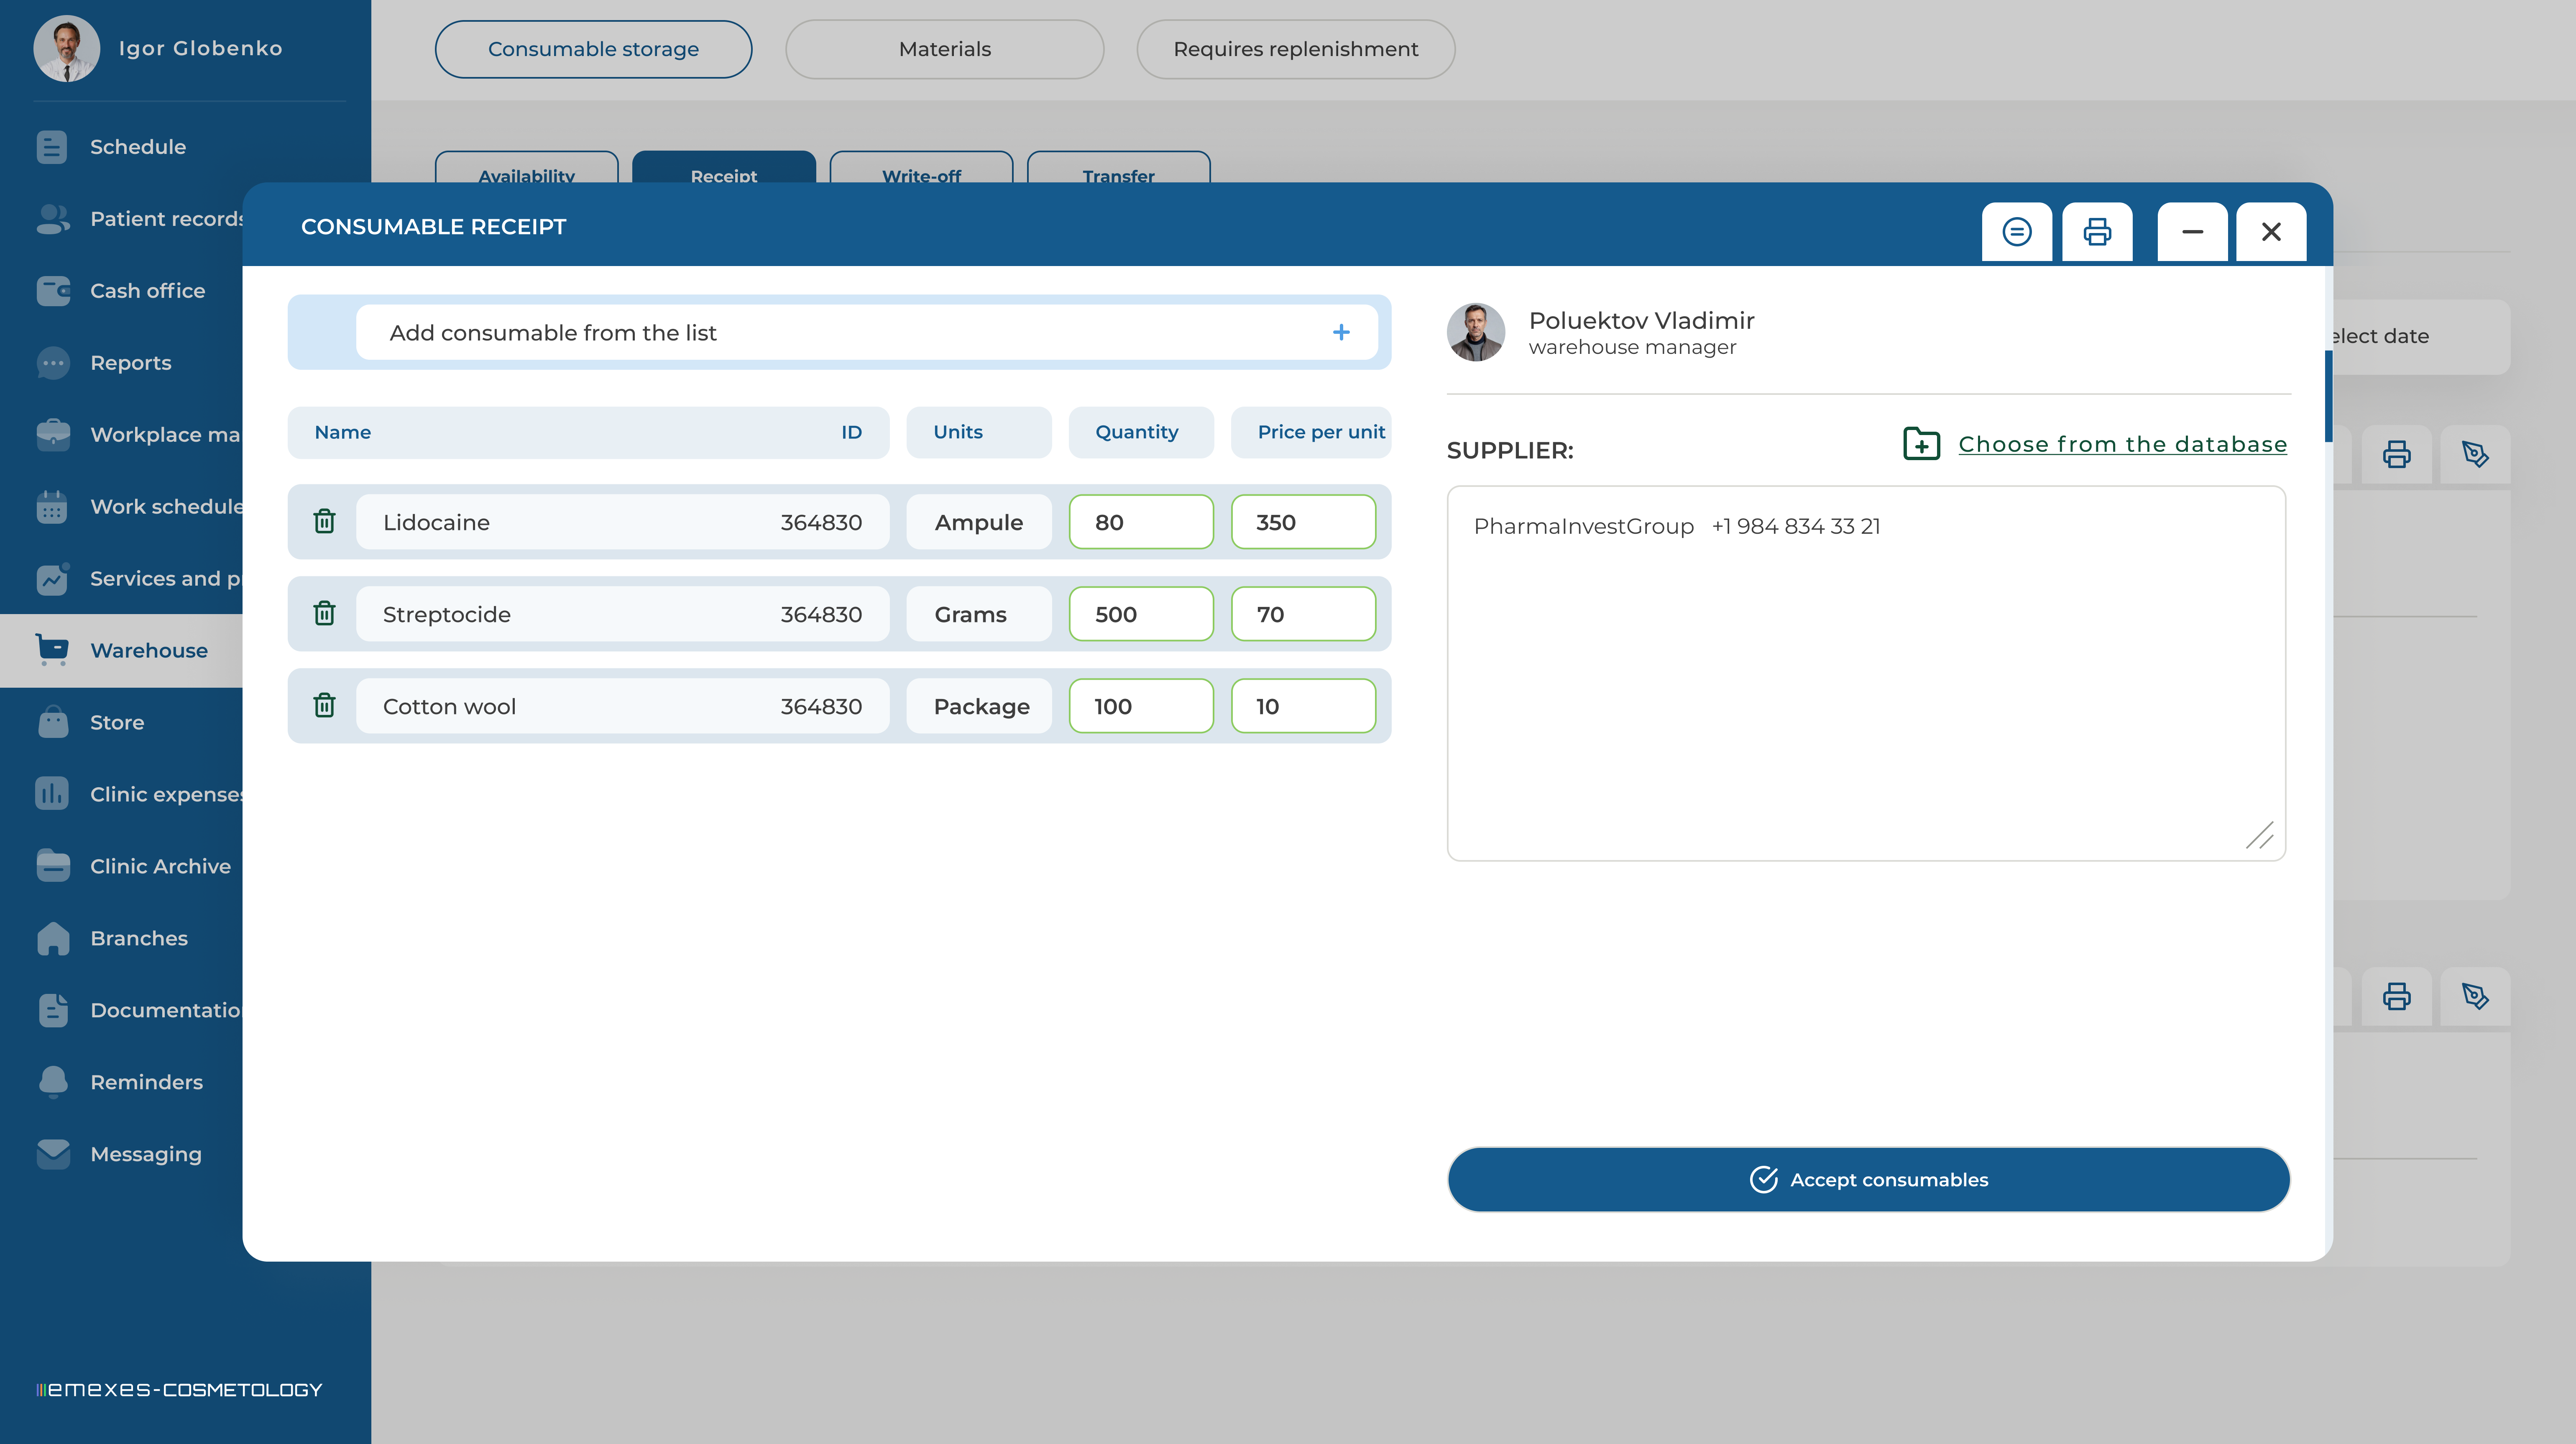
A window will appear where you can choose materials from the list of those used by the clinic (if no materials are listed, they must first be added in the "Materials" section).
After selecting the materials that have arrived, the inventory custodian enters their quantity according to the specified units of measurement, along with the price per unit.
Next, the employee receiving the materials specifies the supplier and their contact details, then clicks "ACCEPT MATERIALS." The accepted materials will then appear in the AVAILABLE section of the MATERIALS STORAGE.
Additionally, in the "Reception" section, you can view the archive of all previous material receipts to the warehouse.
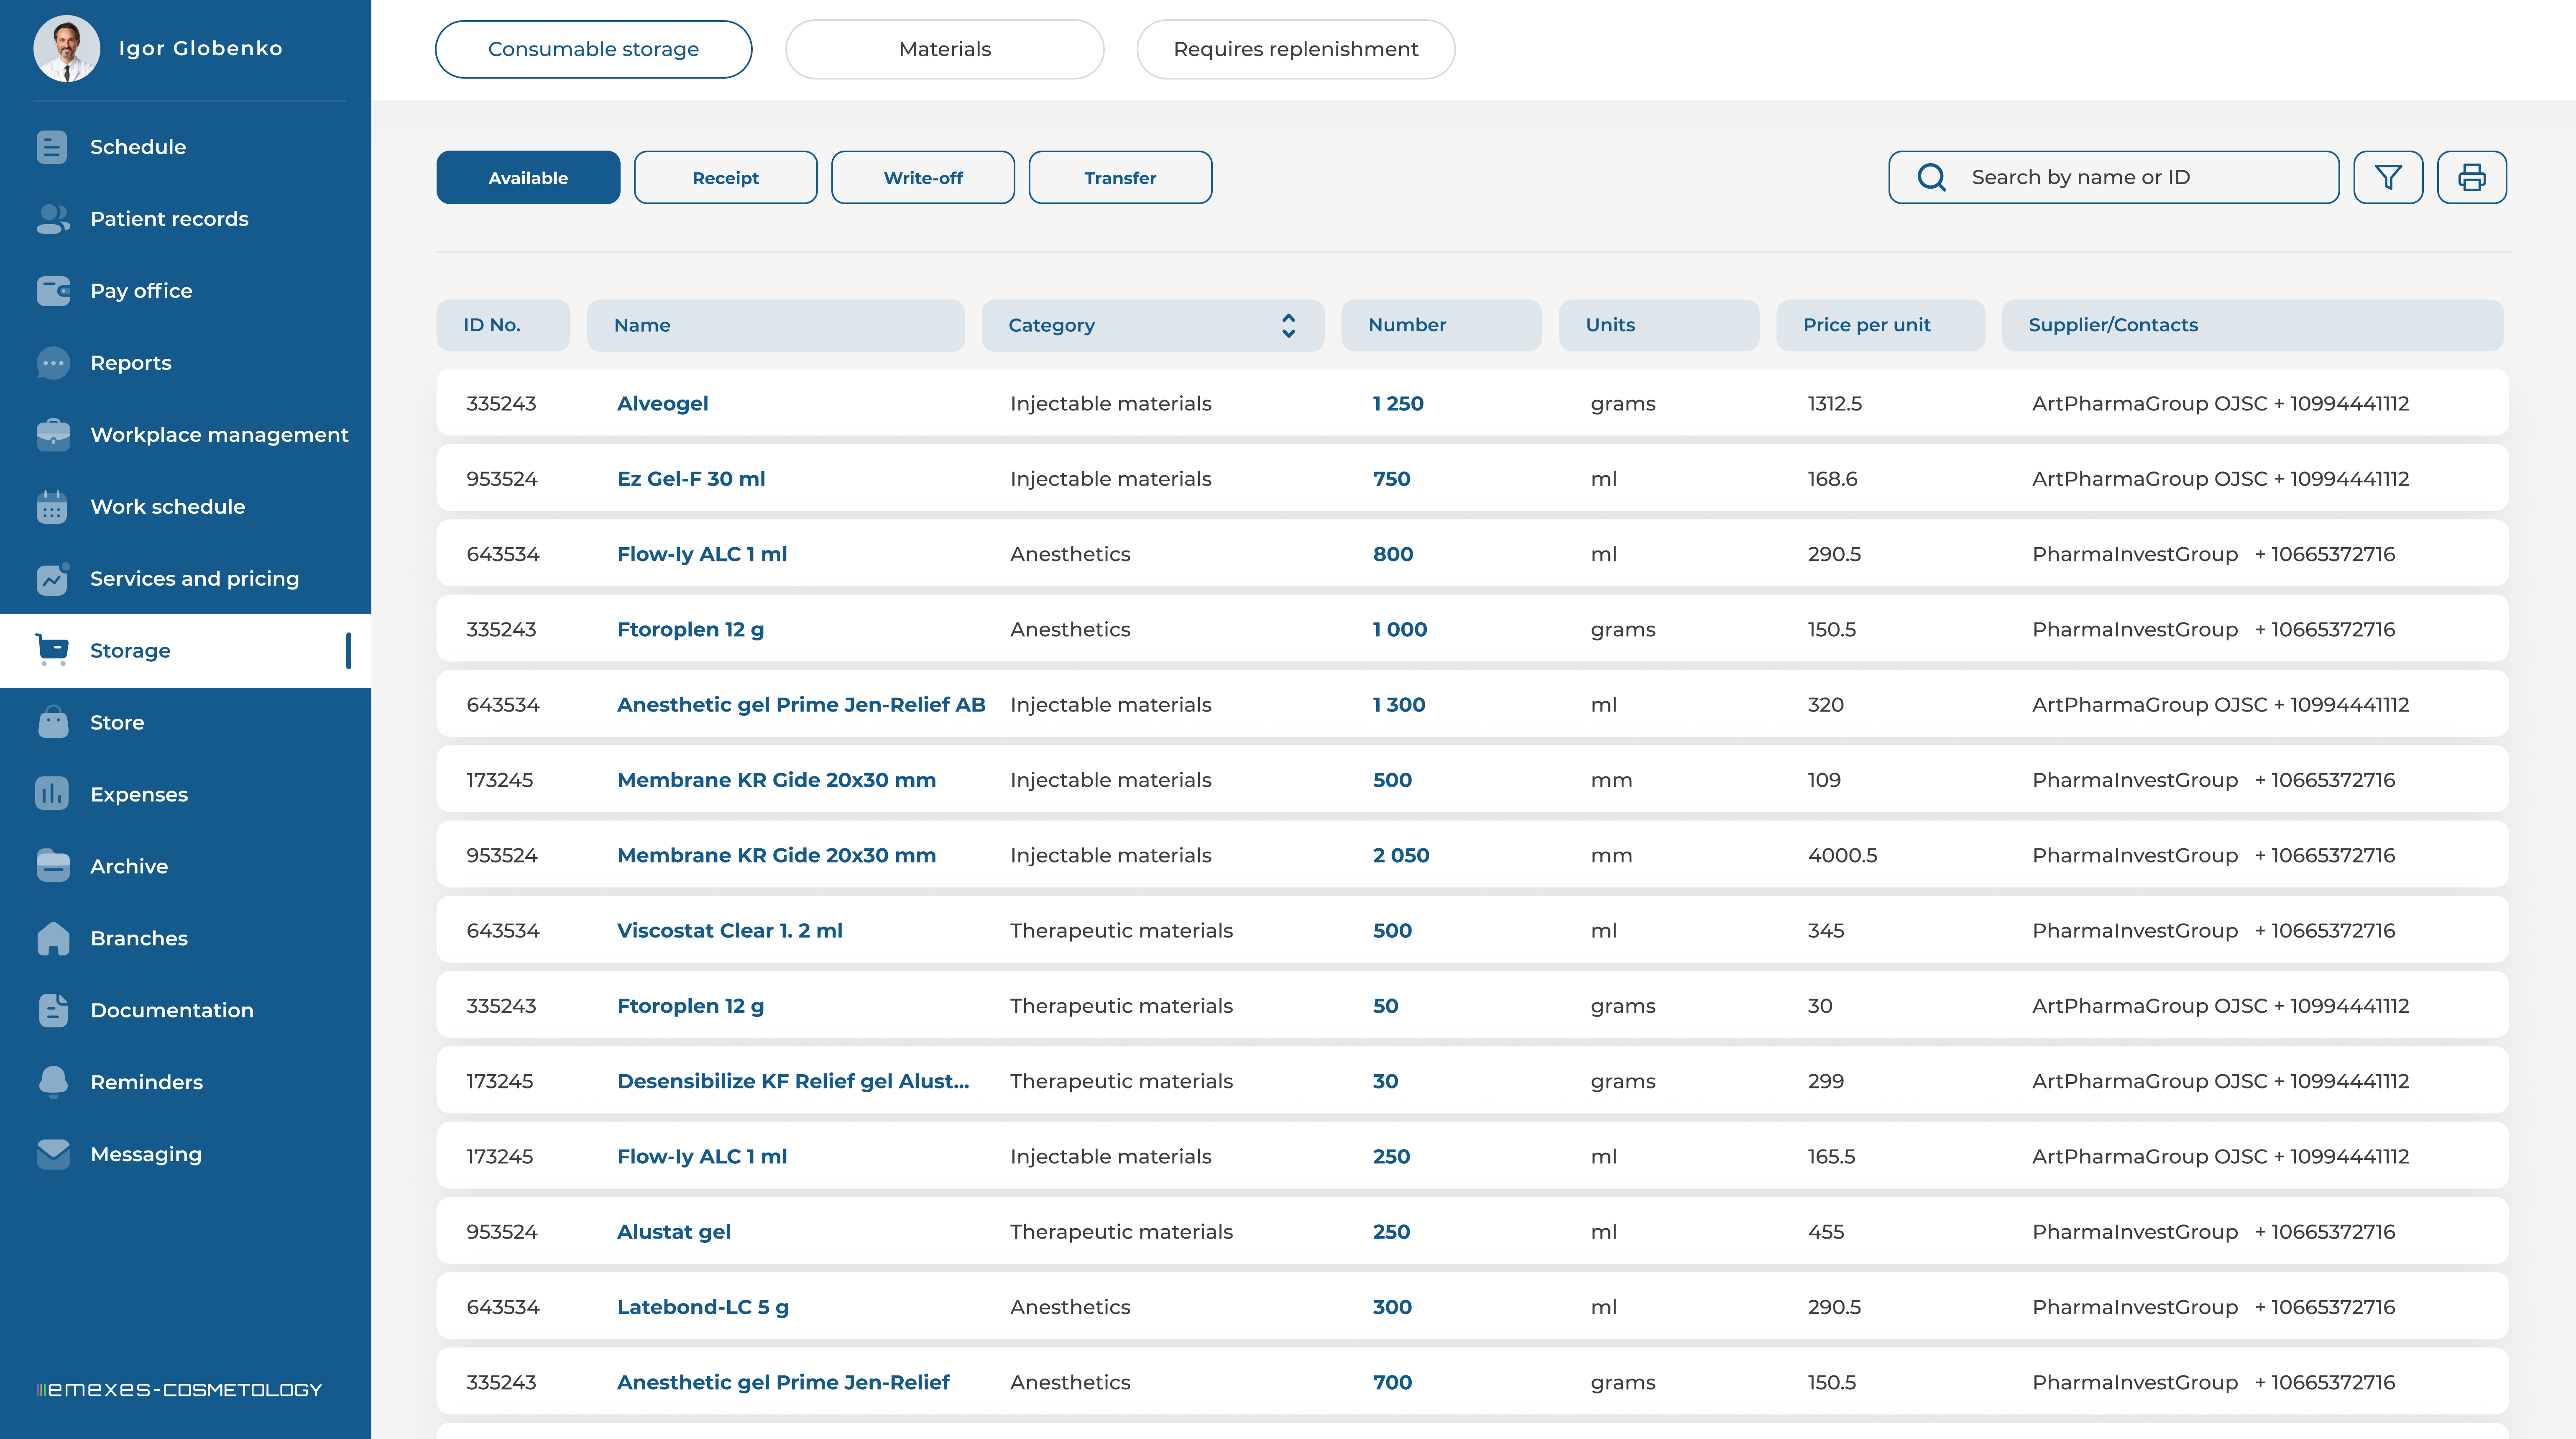
2. MATERIAL AVAILABILITY
The material availability table in the main storage contains a list of all materials stored. The table displays the material name, its ID number, the category it belongs to, the quantity in stock, units of measurement, the last supplier of the product, and the current price per unit (as specified in the reception report). By clicking on any item, you can view a detailed report on the movement of that material.
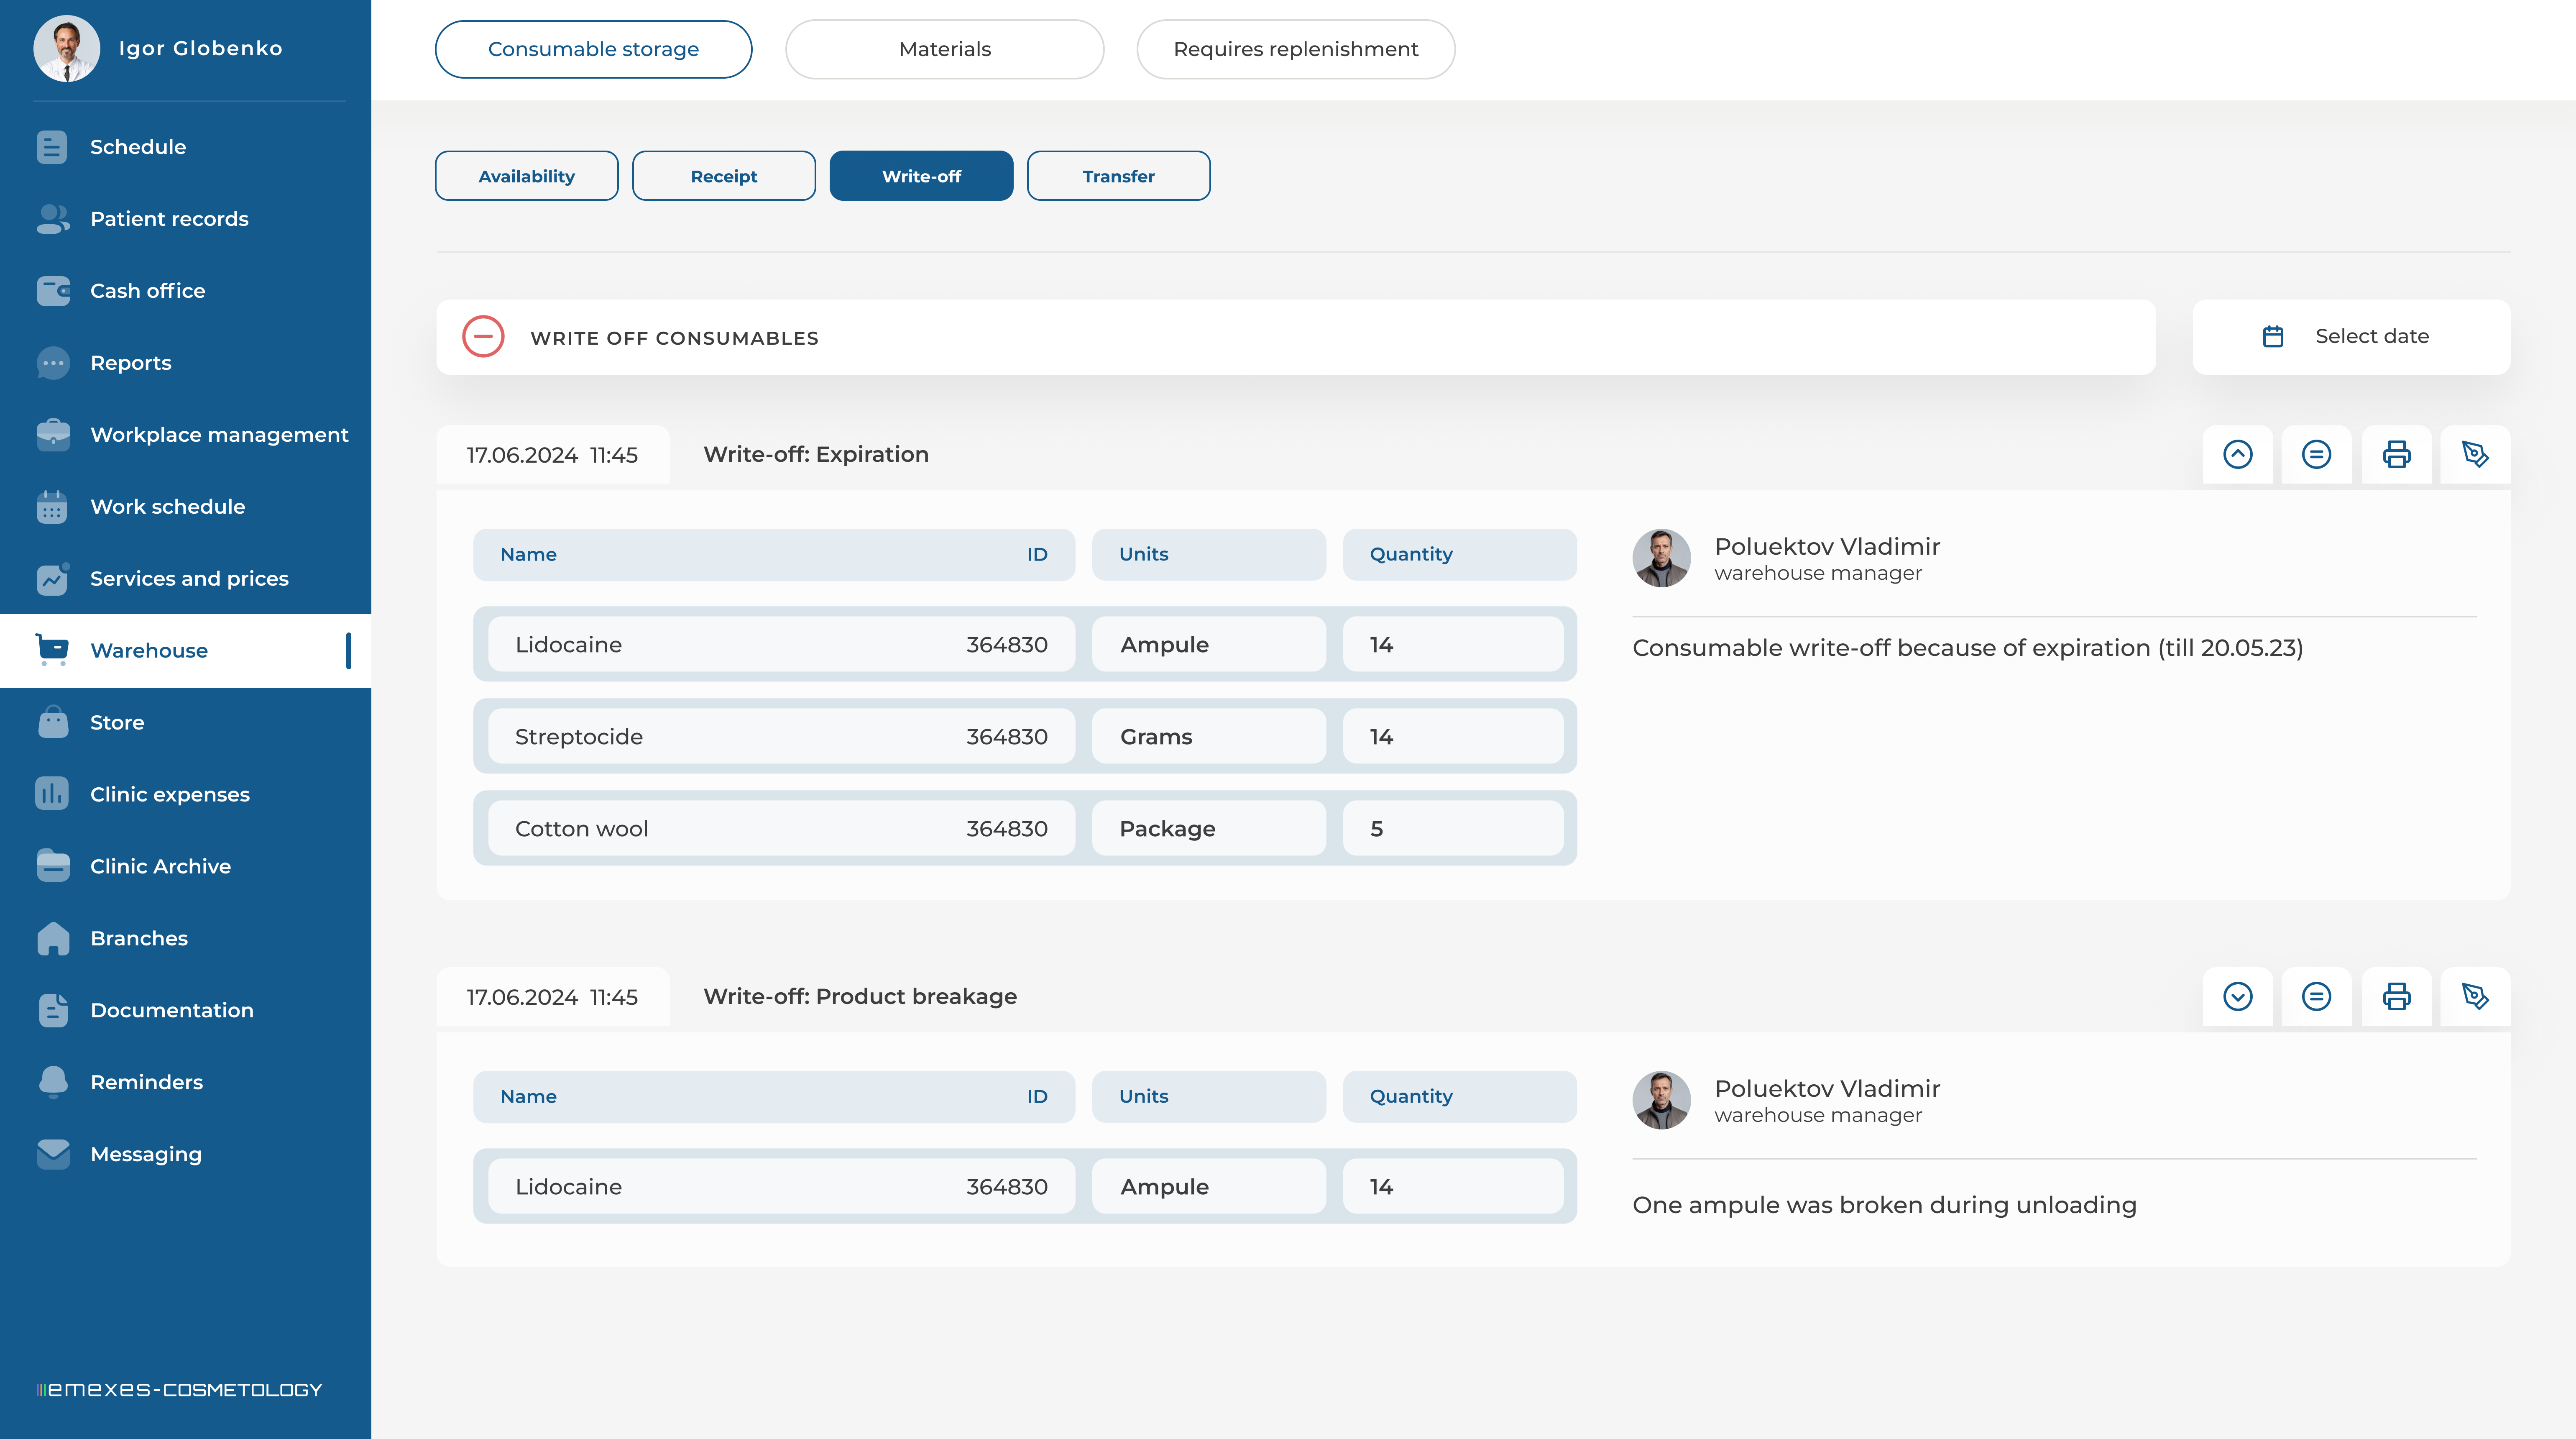
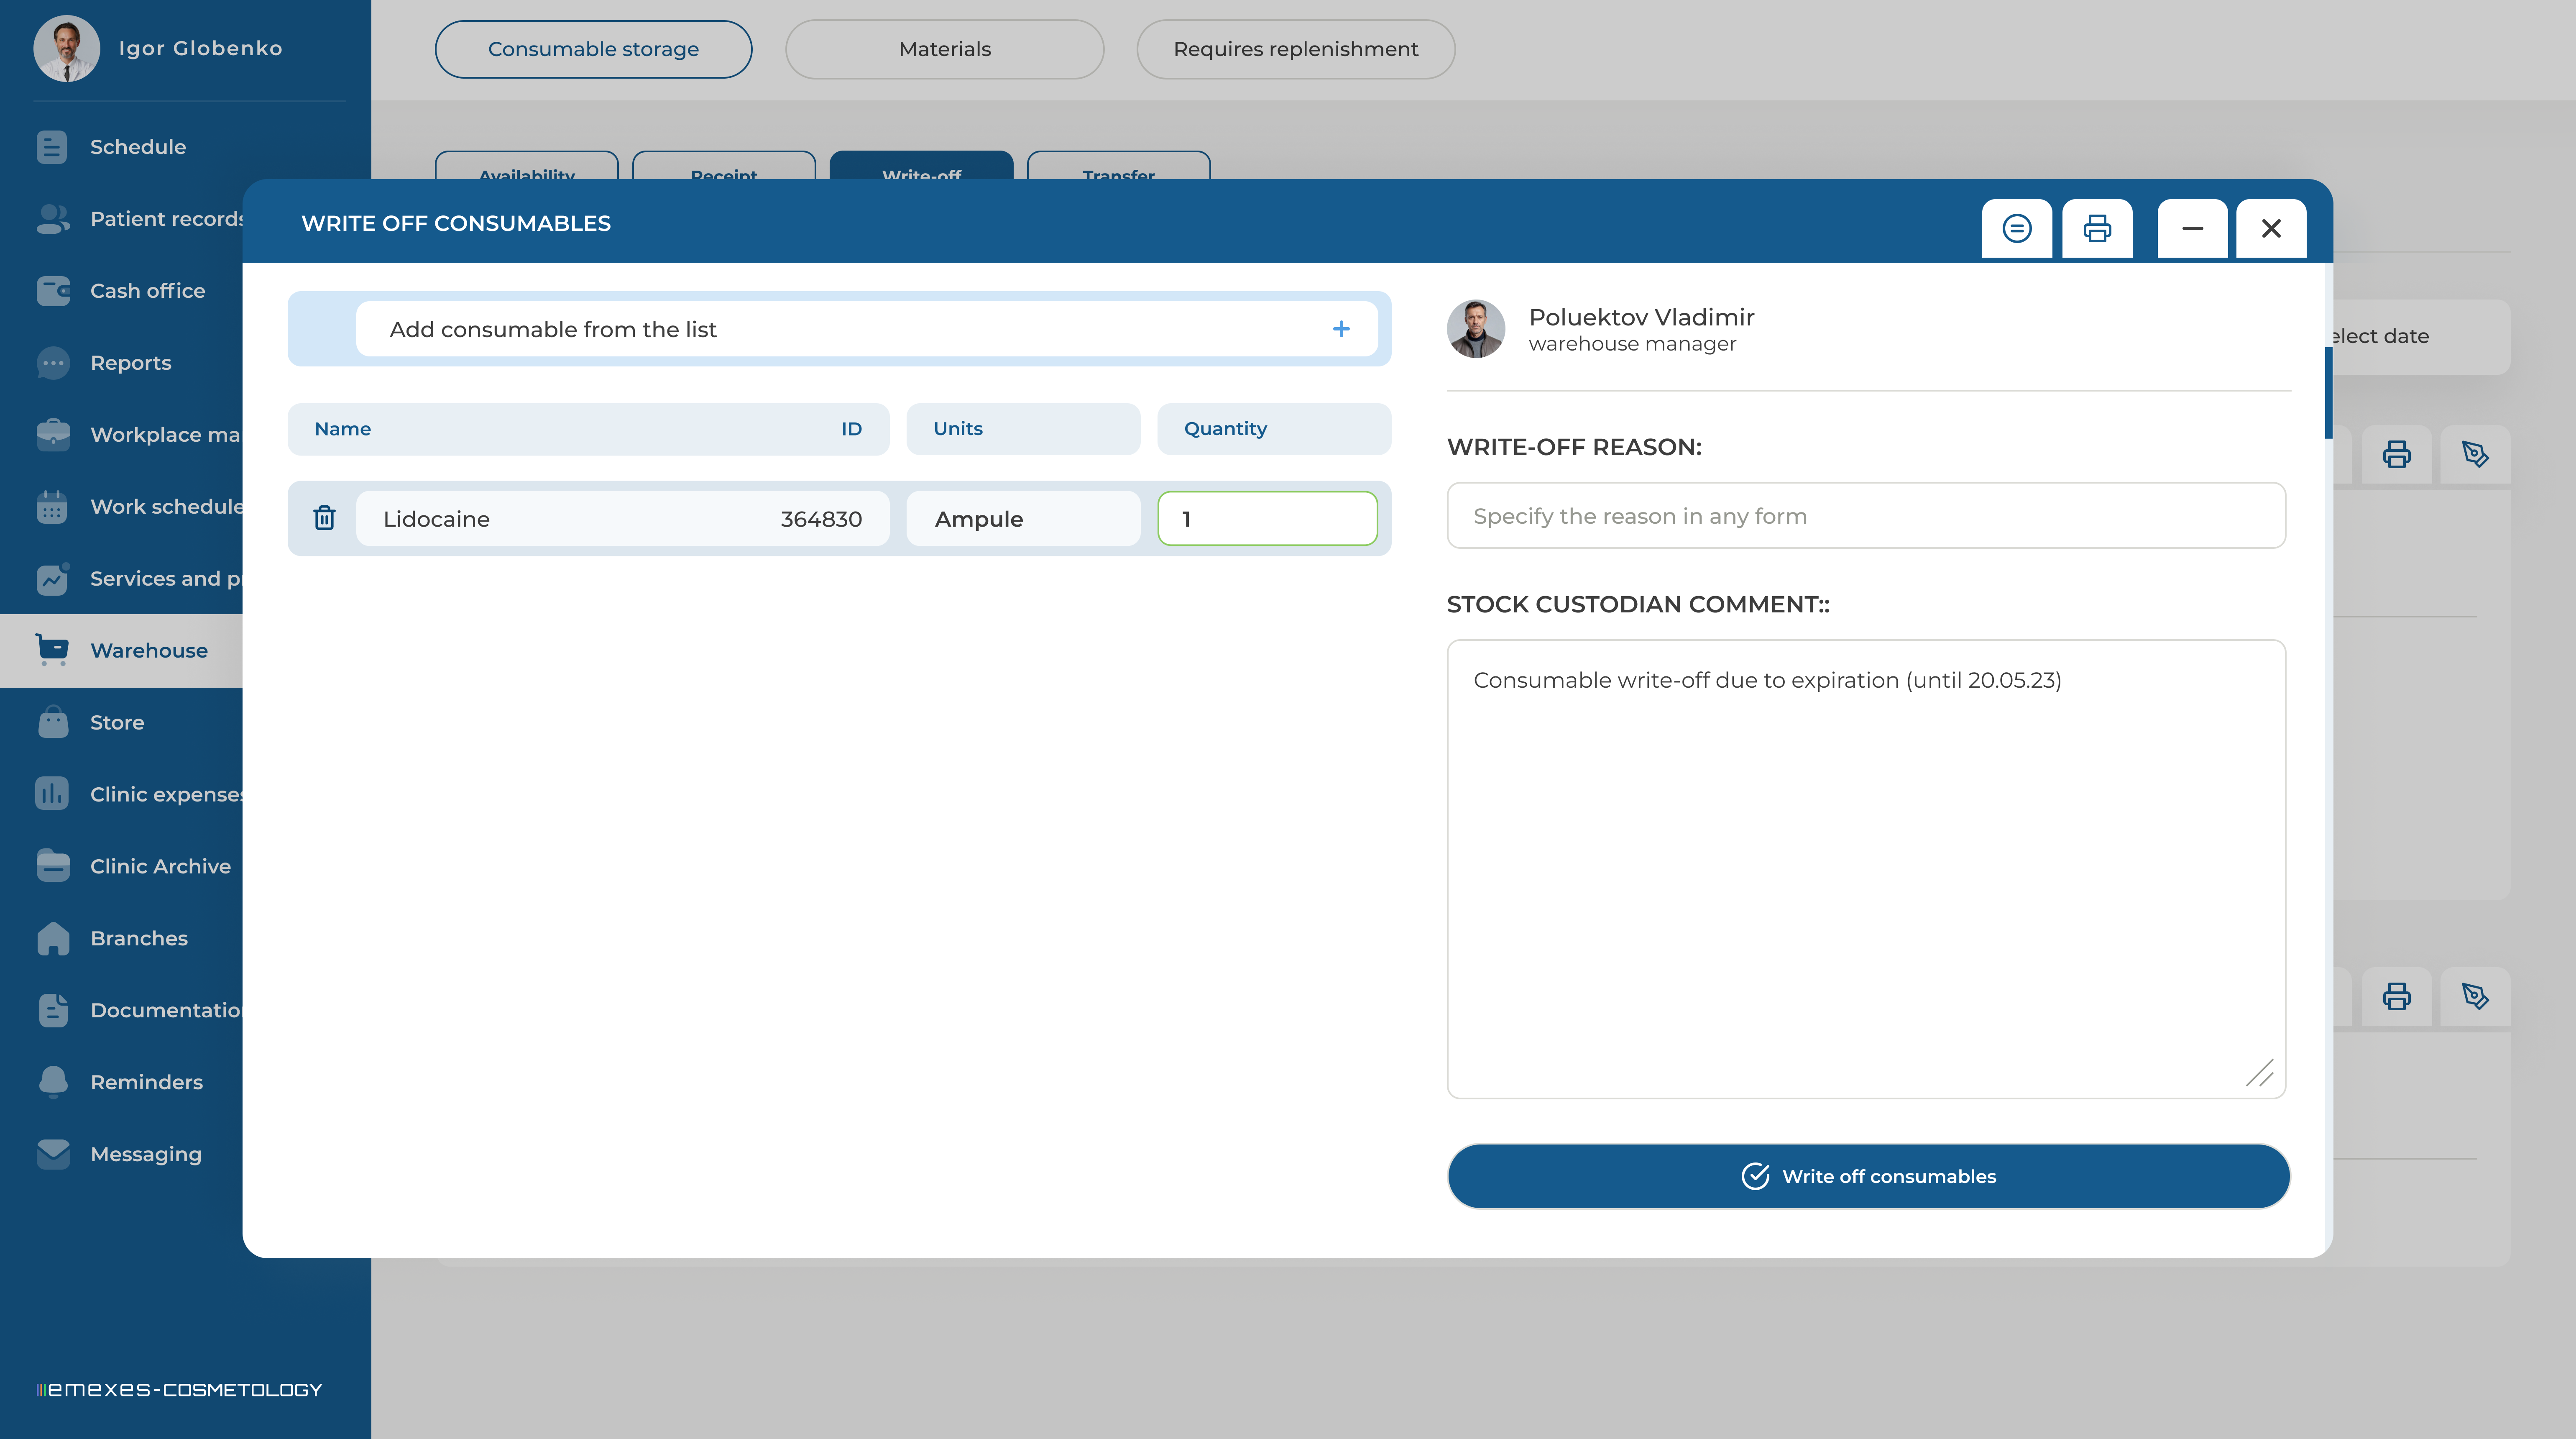
3. MATERIAL DISPOSAL
Materials can be written off either manually or automatically. To write off materials manually, go to the "Material Disposal" section and click "Dispose." In the modal window, select the desired material, specify the quantity to be written off, and provide the reason for the disposal (e.g., "Product damaged"). If needed, leave a comment and confirm the disposal by clicking the "Dispose" button.
Automatic disposal works as follows: if, in the "Services and Prices" tab, you have assigned consumables to each service and enabled the "Account for material consumption" option, the "Material consumption" button will appear in the patient's record after the appointment. By clicking this button, you will see the materials used and their cost, and you can edit their quantities or add any additional materials used. After adding a comment and clicking "Dispose," the system will automatically write off the materials. Only those involved in the appointment (the Assistant or the doctor) can write off the materials once the appointment is completed.
4. RUNNING OUT
In this table, you can view the materials that are running low in stock. Materials are added to this list when their quantity falls below the minimum threshold specified earlier in the "Materials" section of the "Storage" tab.
